
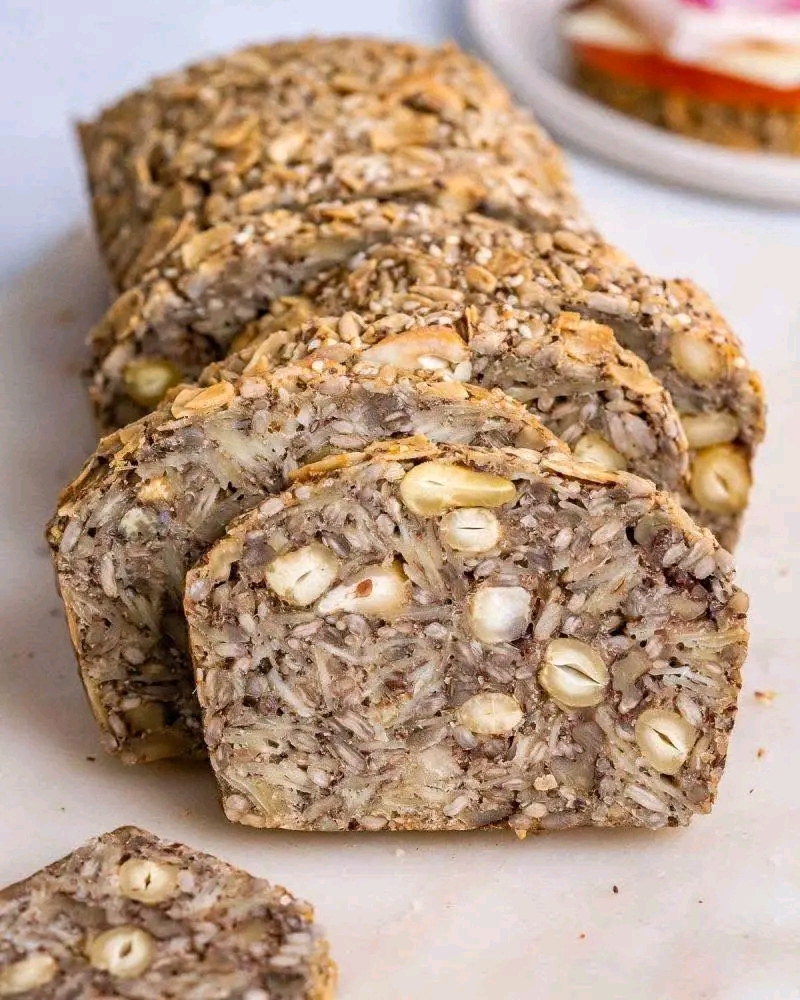
If you have been searching for a homemade bread that is actually filling, packed with texture, and free from refined flour, look no further. This Easy Flourless Seed Bread is about to become your new favorite. It is not fluffy white bread, and it does not pretend to be. Instead, it is a dense, nutty, seed‑packed loaf that toasts beautifully, holds together perfectly, and keeps you full for hours.
The best part? No flour. No yeast. No kneading. No complicated steps.
Just seeds, nuts, oats, a few simple pantry staples, and a little patience while it bakes. The result is a rustic, satisfying bread that works for breakfast, lunch, snacks, or alongside your favorite soup.
In this guide, you will learn exactly how to make this flourless seed bread, why it works so well, how to customize it, and how to store it for maximum freshness. Let us get baking.
Why This Flourless Seed Bread Is Different
Most “healthy” breads fall into one of two categories: dry and crumbly, or so full of gums and starches that they feel artificial. This recipe is neither.
Here is why it stands out:
· No refined flour – Zero white flour, whole wheat flour, or gluten‑free flour blends.
· Naturally hearty – Seeds and nuts provide protein, healthy fats, and fiber.
· Easy to make – Mix, rest, press into a pan, and bake. No rising time.
· Sliceable and sturdy – Holds together without falling apart, perfect for sandwiches or toast.
· Toasts like a dream – Crisp on the outside, tender inside.
· Dietary friendly – Can be made gluten‑free (use certified gluten‑free oats) and dairy‑free.
This is not a zero‑carb bread. It contains oats, seeds, nuts, and psyllium — all of which have carbohydrates. But it is low in refined carbs, high in fiber, and much lower in net carbs than traditional bread. It is also naturally vegan if you skip the honey.
Think of it as a satisfying, nutrient‑dense loaf that works for anyone looking to reduce refined flour without giving up the joy of homemade bread.
Ingredients for Easy Flourless Seed Bread
This recipe makes one standard 9×5‑inch loaf (about 12–14 slices).
Dry Ingredients
· 1 cup sunflower seeds (raw, unsalted)
· ½ cup sesame seeds (raw)
· ½ cup chopped hazelnuts or almonds (raw, unsalted)
· 1½ cups rolled oats (use certified gluten‑free if needed)
· 2 tablespoons chia seeds
· 3 tablespoons psyllium husk powder (not psyllium husk flakes — powder works best)
· 1 teaspoon salt
Wet Ingredients
· 1 tablespoon honey or maple syrup (optional — adds slight sweetness and helps binding)
· 3 tablespoons melted coconut oil or olive oil
· 1¾ cups water
Step‑by‑Step Instructions
Step 1 – Preheat and Prepare
Preheat your oven to 350°F (175°C). Line a 9×5‑inch loaf pan with parchment paper, leaving some overhang on the sides for easy removal. You can also lightly grease the pan, but parchment is better for this sticky dough.
Step 2 – Mix the Dry Ingredients
In a large mixing bowl, combine the sunflower seeds, sesame seeds, chopped nuts, rolled oats, chia seeds, psyllium husk powder, and salt. Whisk or stir with a spoon until everything is evenly distributed.
Psyllium husk powder tends to clump, so break up any lumps with your fingers or the back of a spoon.
Step 3 – Add the Wet Ingredients
Pour in the melted coconut oil (or olive oil), water, and honey or maple syrup (if using). Stir vigorously with a spatula or wooden spoon until all the dry ingredients are moistened. The mixture will look very wet and loose at first — that is normal.
Keep stirring for about a minute until everything is well combined. The psyllium will start to absorb the water immediately.
Step 4 – Let the Mixture Thicken
This is a crucial step. Let the mixture sit at room temperature for 20 to 30 minutes. During this time, the psyllium husk, chia seeds, and oats will absorb the liquid and turn the loose batter into a thick, dough‑like paste. It should be scoopable and hold its shape.
Do not skip this rest period. If you bake it right away, the bread will be wet and gummy inside.
Step 5 – Press into the Loaf Pan
After resting, transfer the thickened dough into the prepared loaf pan. Use a spatula or your hands (dampen them slightly to prevent sticking) to press the mixture down firmly and evenly. The top should be smooth and flat. Press firmly — this helps the bread hold together when sliced.
Step 6 – Bake
Place the loaf pan in the preheated oven. Bake at 350°F (175°C) for 50 to 60 minutes.
The bread is done when the top is deep golden brown, the edges pull away slightly from the pan, and a toothpick inserted into the center comes out clean (or with just a few moist crumbs). The loaf will feel firm to the touch.
Step 7 – Cool Completely
This is the hardest part, but do not skip it. Let the bread cool in the pan for 15 minutes, then lift it out using the parchment paper overhang and transfer to a wire rack. Allow it to cool completely — at least 1 to 2 hours — before slicing.
If you cut into it while warm, the interior will be gummy and the slices may fall apart. Patience pays off.
Step 8 – Slice and Enjoy
Once completely cool, use a serrated knife to slice the bread. For cleaner, more even slices, you can chill the loaf in the refrigerator for 30 minutes before cutting. Toast slices before serving for the best texture.
Why This Bread Is So Satisfying
The combination of seeds, nuts, oats, and psyllium creates a loaf that is:
· High in fiber – Keeps you full and supports digestion.
· Rich in healthy fats – From sunflower seeds, nuts, and coconut oil.
· Protein‑packed – Seeds and nuts add plant‑based protein.
· Slow‑digesting – No blood sugar spikes like white bread.
This is the kind of bread you can eat a single slice of and feel satisfied. It is perfect for breakfast with avocado, nut butter, or a fried egg. It also makes an excellent base for open‑faced sandwiches or as a side for soup and salad.
Pro Tips for Perfect Flourless Seed Bread Every Time
Use Psyllium Husk Powder, Not Whole Husks
Whole psyllium husks work but produce a coarser, denser loaf. Psyllium husk powder creates a smoother, more bread‑like texture. If you only have whole husks, grind them briefly in a spice grinder or use 4 tablespoons instead of 3.
Do Not Skip the Resting Time
The mixture needs time to hydrate. If you bake too soon, the center will be wet and doughy. Set a timer for 20 minutes at minimum.
Press Firmly into the Pan
Loosely packed dough will crumble when sliced. Use the back of a spoon or your dampened fingers to press down with authority.
Cool Completely Before Slicing
This bread continues to set as it cools. Slicing warm is the #1 reason for crumbly loaves.
Toast Before Eating
While you can eat it untoasted, toasting transforms this bread. It becomes crisp on the outside, warm and tender inside, and the nutty flavors bloom
Store Properly
See the storage section below for details. This bread does best in the fridge or freezer.
Want the full truth and the practical next steps?
Page 2 continues with the real explanation, the key details many readers skip, and the simple takeaways that make this guide more useful.