
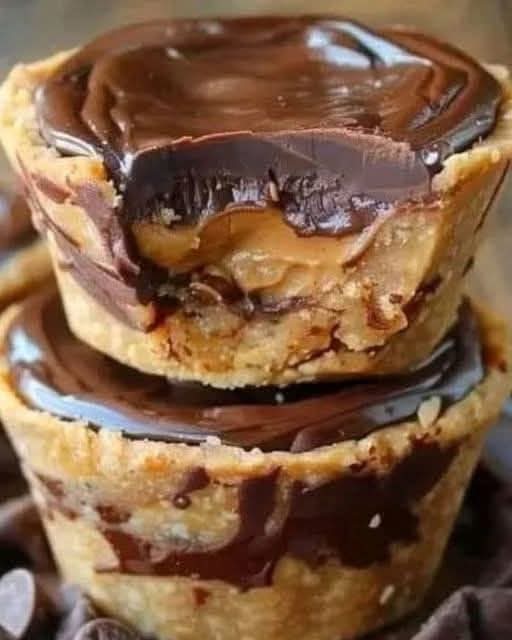
There are peanut butter cups that come wrapped in orange and brown foil, and then there are homemade no‑bake chocolate peanut butter cups – the kind you make in your own kitchen with just a handful of simple ingredients, no oven required, and a final product that tastes fresher, creamier, and more chocolatey than anything from a store shelf. If you have ever loved a Reese’s peanut butter cup, you will be absolutely obsessed with this homemade version.
These no‑bake chocolate peanut butter cups are dangerously easy to make. With a smooth, creamy, slightly salty peanut butter filling and a rich, snappy chocolate shell, they are the perfect bite‑sized treat for holidays, parties, edible gifts, or just because you have a craving. In this guide, you will learn the complete recipe, pro tips for perfect cups (no special molds required), delicious variations (add a crunch, use dark chocolate, or make them keto), storage advice, and why these little cups will disappear faster than you can make them.
Why You Need This No‑Bake Chocolate Peanut Butter Cup Recipe
Store‑bought peanut butter cups are convenient, but they often contain preservatives, palm oil, and too much sugar. Homemade cups let you control the quality of ingredients, adjust the sweetness, and create a far superior flavor. The peanut butter filling is creamy, not dry; the chocolate is rich and melt‑in‑your‑mouth. Plus, you can make them in any size – from mini cups to giant “gourmet” cups.
Here is why you will love them:
· No baking required – Perfect for hot days or when your oven is occupied.
· Only 5 main ingredients – Peanut butter, powdered sugar, butter, chocolate chips, and a little salt.
· Ready in 20 minutes active time – Plus chilling.
· No special mold needed – Use a muffin tin or mini muffin tin.
· Make‑ahead friendly – Store in the fridge or freezer for weeks.
· Customizable – Add sea salt, use dark chocolate, or swap peanut butter for almond butter.
· Crowd‑pleaser – Everyone loves peanut butter cups.
Once you see how easy they are, you will never buy the store‑bought version again.
The Complete No‑Bake Chocolate Peanut Butter Cups Recipe
This recipe makes about 12 standard‑size peanut butter cups (using a regular muffin tin) or 24 mini cups (using a mini muffin tin). It can be easily doubled.
Ingredients
For the Peanut Butter Filling:
· 1 cup (240g) creamy peanut butter (use standard like Jif or Skippy, not natural for best texture)
· ¼ cup (56g) unsalted butter, softened to room temperature
· ¾ cup (90g) powdered sugar, sifted
· ½ teaspoon vanilla extract
· ¼ teaspoon salt (if using unsalted peanut butter)
For the Chocolate Shell:
· 2 cups (340g) semi‑sweet chocolate chips (or milk chocolate, or dark)
· 1 tablespoon coconut oil or vegetable shortening (thins the chocolate for dipping)
Optional Toppings:
· Flaky sea salt
· Crushed peanuts
· White chocolate drizzle
Equipment
· Standard 12‑cup muffin tin or mini muffin tin
· Paper liners (foil or parchment liners work best)
· Small cookie scoop or spoon
· Microwave or double boiler
Step‑by‑Step Instructions
Step 1 – Prepare the Muffin Tin
Line a muffin tin with paper liners. If you are making mini cups, use a mini muffin tin. For easy removal, foil liners or parchment liners work better than standard paper.
Step 2 – Make the Peanut Butter Filling
In a medium bowl, combine the peanut butter, softened butter, powdered sugar, vanilla extract, and salt. Beat with an electric mixer or stir vigorously with a spoon until smooth and well combined. The mixture should be thick and dough‑like, similar to soft cookie dough. If it is too soft, refrigerate for 10 minutes before shaping.
Step 3 – Form the Peanut Butter Discs
Using a small cookie scoop or a spoon, portion the peanut butter mixture into small balls (about 1 teaspoon for mini cups, 2 teaspoons for standard cups). Place the balls on a parchment‑lined plate. Flatten each ball slightly into a disc shape – slightly smaller than the diameter of your muffin cups. You want them to fit inside the chocolate shell.
Step 4 – Chill the Peanut Butter Discs
Place the plate in the refrigerator for at least 15 minutes, or in the freezer for 10 minutes. Chilled peanut butter is easier to handle and will not melt when you add the warm chocolate.
Step 5 – Melt the Chocolate
Place the chocolate chips and coconut oil in a microwave‑safe bowl. Microwave in 20‑second bursts, stirring between each, until smooth and glossy. Do not overheat. Alternatively, use a double boiler.
Step 6 – Coat the Bottom of the Liners
Spoon about 1 teaspoon of melted chocolate into the bottom of each paper liner (for mini cups; use 1½‑2 teaspoons for standard cups). Use the back of the spoon or tap the pan gently to spread the chocolate evenly up the sides of the liner. This creates the bottom and partial sides of the chocolate shell.
Step 7 – Chill to Set
Place the muffin tin in the refrigerator for 10‑15 minutes until the chocolate is firm.
Step 8 – Add the Peanut Butter Disc
Remove the muffin tin from the refrigerator. Place one chilled peanut butter disc on top of the set chocolate in each liner. Gently press down to ensure it is level.
Step 9 – Cover with Chocolate
Spoon more melted chocolate over each peanut butter disc, covering it completely. Use enough chocolate to reach the edges of the liner and seal the sides. Tap the pan gently on the counter to release air bubbles.
Step 10 – Add Toppings (Optional)
Before the chocolate sets, sprinkle with flaky sea salt or crushed peanuts.
Step 11 – Chill and Set
Refrigerate the peanut butter cups for at least 30 minutes, or until the chocolate is completely firm.
Step 12 – Serve
Peel off the paper liners and enjoy. Store leftovers in the refrigerator.
Pro Tips for Perfect No‑Bake Chocolate Peanut Butter Cups
Use Standard Peanut Butter
Natural peanut butter (oil‑separated) can make the filling oily and too soft. Standard creamy peanut butter (like Jif, Skippy, or Peter Pan) gives the right consistency.
Soften the Butter
Ensure your butter is softened to room temperature so it blends smoothly. Do not melt it.
Chill, Chill, Chill
Chilling the peanut butter discs before placing them on the chocolate is essential. If they are warm, they will melt into the chocolate and the layers will blend.
Thin the Chocolate
Adding coconut oil or shortening to the chocolate chips makes the melted chocolate thinner and easier to work with. It also creates a shinier, snappier shell.
Work Quickly
If the chocolate begins to set while you are working, reheat it in the microwave for 10‑15 seconds.
Tap Out Air Bubbles
After filling the cups, tap the pan gently on the counter to bring air bubbles to the surface, then smooth with a toothpick.
For Clean, Professional Look
Use foil or parchment liners – they release more easily than standard paper liners.
Make Extra Large Cups
For giant peanut butter cups, use a 4‑inch round silicone mold or a jumbo muffin tin. Increase all ingredient amounts accordingly.
Want the full truth and the practical next steps?
Page 2 continues with the real explanation, the key details many readers skip, and the simple takeaways that make this guide more useful.