
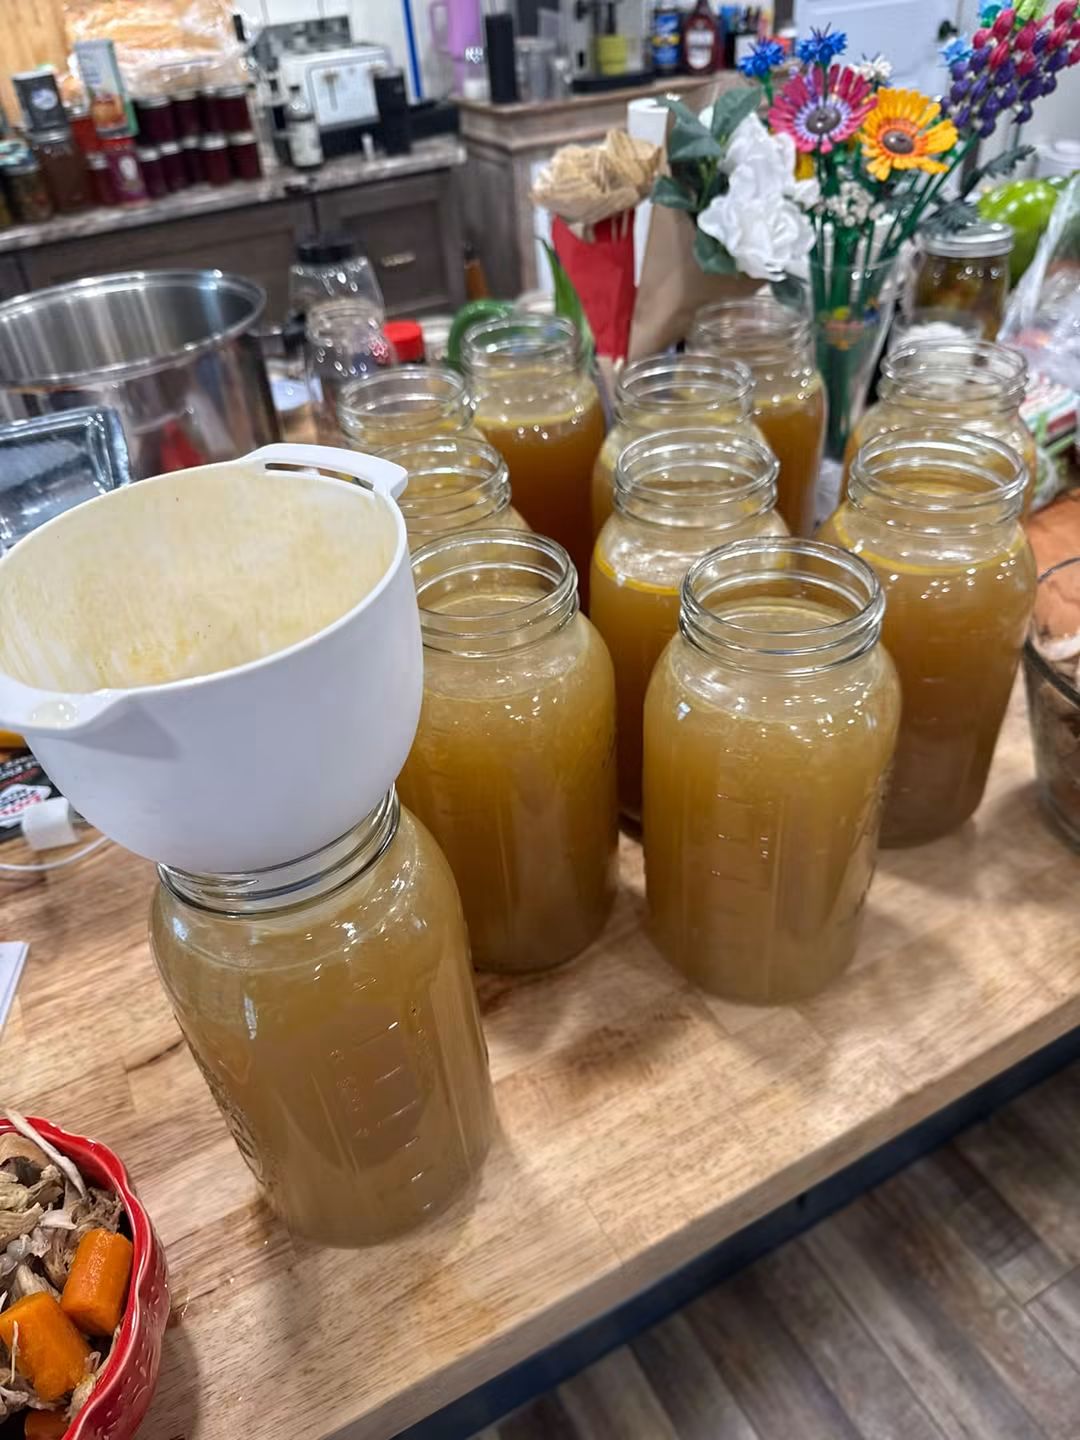
If you’ve ever looked at a bowl of vegetable peels and thought, “There’s got to be a better use for these,” you are in the right place. Just look at that photo—beautiful, golden jars of rich, flavorful broth being carefully funneled into mason jars, right next to the exact bowl of scraps that made it! This is the ultimate zero-waste kitchen hack. Instead of tossing your vegetable trimmings, you can transform them into the most delicious, deeply savory broth you’ve ever tasted. It’s practically free, incredibly healthy, and the ultimate pantry staple for soups, stews, and risottos.
Why You’ll Love This Recipe
· Practically Free: You are using ingredients you would have otherwise thrown away.
· Incredibly Flavorful: Scrap broth is often richer and more complex than store-bought broth because it’s made with a variety of vegetables and herbs.
· Zero Waste: It’s a fantastic way to reduce your food waste and make the most of your grocery budget.
· No Preservatives: You control the sodium and ingredients. No mystery additives or excess salt.
· Endlessly Versatile: Use it as a base for soups, cook your rice in it, use it to deglaze pans, or sip it on its own.
· Shelf-Stable: Properly pressure canned (as shown in the photo!), these jars will last in your pantry for over a year.
The Best Vegetables for Scrap Broth
· Excellent: Onion skins (adds that beautiful golden color!), carrot peels/ends, celery leaves/stalks, garlic skins, mushroom stems, parsley stems, bell pepper cores.
· Use Sparingly: Cruciferous vegetables like broccoli, cauliflower, cabbage, and Brussels sprouts. They can turn the broth bitter and sulfurous.
· Avoid: Beets (they turn everything red), potatoes (they cloud the broth), and anything moldy or slimy.
Equipment You’ll Need
· A large pot or stockpot (6–8 quarts)
· A fine-mesh strainer or cheesecloth
· A large bowl or another pot to strain into
· Clean mason jars (pint or quart)
· Canning funnel (as shown in the photo!)
· Pressure Canner (required for shelf-stable storage of vegetable broth)
· Lids and rings
Step-by-Step Instructions
- Save Your Scraps: Keep a large zip-top bag in your freezer. Every time you cook, toss your clean vegetable scraps into the bag. Once the bag is full (about 8-10 cups of scraps), you’re ready to make broth.
- Simmer the Broth: Add your frozen scraps to a large stockpot. Cover with cold water (about 8-10 cups, or until scraps are fully submerged by an inch or two). Bring to a boil, then reduce heat and simmer uncovered for 45 minutes to 2 hours. The longer it simmers, the richer the flavor.
- Optional Flavor Boosters: Add a few whole peppercorns, a bay leaf, or a few cloves of crushed garlic to the pot while it simmers.
- Strain: Carefully strain the broth through a fine-mesh strainer into a large bowl or pot. Discard the solids (or compost them!).
- Skim the Fat: If you want a clearer broth, let it cool slightly and skim any fat or foam off the top.
- Prepare the Jars: Wash your mason jars in hot, soapy water. Keep them hot in a pot of simmering water. Place your lids in a small saucepan of hot (not boiling) water to soften the rubber seals.
- Fill the Jars: Using your canning funnel (just like the photo!), ladle the hot broth into the hot jars, leaving 1 inch of headspace.
- Remove Air Bubbles: Run a plastic bubble popper or wooden skewer along the inside of the jars to release trapped air.
- Wipe and Seal: Wipe the rims of the jars with a clean, damp cloth. Center the lids and screw on the rings until fingertip-tight.
- Pressure Can: Place the jars in your pressure canner according to the manufacturer’s instructions.
- Process: For pints and quarts of vegetable broth, process for 20 minutes at 10 lbs pressure (adjusting for altitude). Note: If you add meat or poultry to your broth, you must process pints for 60 minutes and quarts for 75 minutes.
- Cool and Store: Turn off the heat and let the canner depressurize naturally. Remove the jars and let them cool undisturbed for 12-24 hours. Check the seals, remove the rings, and store in a cool, dark pantry.
⚠️ Important Canning Safety Note
Vegetable broth is a low-acid food. It MUST be pressure canned to be shelf-stable. Water-bath canning is NOT safe for vegetable broth, as it will not reach the temperatures required to kill botulism spores. If you don’t have a pressure canner, you can freeze this broth in freezer-safe containers for up to 6 months.
How to Use Your Homemade Broth
· Soups and Stews: The absolute best base for any recipe.
· Rice and Grains: Cook your rice, quinoa, or couscous in broth instead of water for an instant flavor upgrade.
· Mashed Potatoes: Use warm broth instead of milk or water when mashing potatoes.
· Pan Sauces: Deglaze your skillet after cooking meat to make a quick, delicious pan sauce.
· Sipping: Warm up a mug of broth with a pinch of salt, pepper, and fresh herbs for a soothing, healthy drink.
Frequently Asked Questions
How long does homemade canned broth last?
Properly pressure canned and stored in a cool, dark place, it will last for 12 to 18 months, though it is best within the first year.
Can I water bath can this broth?
No. For safety reasons, vegetable broth must be pressure canned. Freezing is a safe alternative if you don’t have a pressure canner.
Why is my broth cloudy?
Cloudiness is usually caused by starch (from potatoes or corn) or by boiling the broth too vigorously. It’s completely safe to eat, just less visually clear.
Do I have to add salt?
No! It’s best to leave the salt out when canning, and season the broth when you actually use it in a recipe. This gives you more control over the sodium in your meals.
Can I mix chicken bones with vegetable scraps?
Yes! This makes an incredible chicken-vegetable stock. However, because of the meat, you must increase your pressure canning time to 60 minutes for pints and 75 minutes for quarts.
Recipe Card: Homemade Kitchen Scrap Broth
· Prep Time: 10 minutes (plus time to collect scraps)
· Cook Time: 1–2 hours (simmering)
· Processing Time: 20 minutes (for pints of vegetable broth)
· Servings: Varies (approx. 4–6 pints per batch)
· Category: Pantry, Canning, Zero Waste
· Cuisine: American, Homesteading
Final Thoughts
Making and canning your own vegetable broth from kitchen scraps is one of the most rewarding, money-saving habits you can adopt in the kitchen. Just look at those beautiful jars in the photo—they represent hours of flavor, zero waste, and a pantry stocked with liquid gold. Once you start making your own broth, you’ll never want to buy the watery, bland store-bought stuff again.
Have you tried making scrap broth? What are your favorite vegetables to save? Share your tips in the comments below!