
How to Store, Freeze, and Reheat
Room Temperature
Store cooled bread in a bread box or paper bag for up to 3 days. Do not store in plastic – it makes the crust soft.
Refrigerator
Refrigeration stales bread faster. Avoid if possible.
Freezer
Wrap cooled bread tightly in plastic wrap, then foil. Freeze for up to 3 months. Thaw at room temperature. Reheat in a 350°F oven for 5–10 minutes to refresh the crust.
Reheating Slices
Toast slices for a crisp exterior and soft interior. Or wrap the whole loaf in foil and warm at 300°F for 10–15 minutes.
Frequently Asked Questions (Bread in a Bag)
Can I use a different type of flour?
Yes. You can substitute up to 50% whole wheat, spelt, or bread flour. All‑purposeark works best for beginners. Bread flour will give a chewier texture.
Why is my dough not rising?
Possible reasons:
· Water was too hot (killed yeast) or too cold (yeast not activated).
· Yeast was old or expired. Check the expiration date.
· Room temperature is too cool. Place the bag in a warm spot (near a preheating oven or in a sunny window).
Can I make this bread without a bag?
Absolutely. Mix in a large bowl, then knead on a floured surface. The bag is for convenience and cleanup.
How do I know when the bread is done?
The internal temperature should reach 190–200°F (88–93°C). If you do not have a thermometer, tap the bottom of the loaf – it should sound hollow.
Why is my bread dense?
Possible causes:
· Not kneaded enough (gluten not developed).
· Dough was too dry (add more water next time).
· Second rise was too short (let it puff up more).
· Oven temperature too low.
Can I add seeds or nuts?
Yes. Add up to ½ cup of sunflower seeds, sesame seeds, or chopped walnuts after the first rise. Knead them in gently.
How do I make this bread dairy‑free?
It already is dairy‑free. Olive oil replaces butter. Use water instead of milk.
Can I bake this in a Dutch oven?
Yes. Preheat the Dutch oven at 450°F (230°C). Carefully place the shaped dough inside (on parchment paper). Cover and bake for 30 minutes, then uncover and bake 10–15 minutes more.
Why This Recipe Is Perfect for Busy Families
Homemade bread should not be a production. It should be simple, satisfying, and fit into real life. This bread‑in‑a‑bag method is exactly that. You can make it with your kids, after work, or even while camping.
The cleanup is almost nonexistent – just toss the bag. The ingredients are cheap and always on hand. And the result is a warm, fragrant loaf that makes any meal feel special.
I started making this bread when my children were small. They loved shaking the bag and watching the dough come together. Now they are grown, and they still ask for “bag bread” when they come home.
There is something magical about pulling a golden loaf out of the oven. It fills the kitchen with a smell that says, “You are home.”
A Simple Bread‑Making Timeline
Here is how to fit this into a busy day.
· 5 minutes: Gather ingredients and mix in the bag.
· 5 minutes: Knead in the bag.
· 45 minutes: First rise (do other things).
· 5 minutes: Shape the dough.
· 30 minutes: Second rise (preheat oven).
· 30 minutes: Bake.
· 10 minutes: Cool slightly.
Total active time: about 15 minutes. From start to finish: about 2 hours. Most of that time is waiting, not working.
The Joy of Homemade Bread
There is a reason people have been baking bread for thousands of years. It is nourishing, economical, and deeply satisfying. When you make bread yourself, you control the ingredients – no preservatives, no additives, no mystery chemicals.
And when you slice into that first warm piece, spread a little butter, and take a bite, you realize that simple food is often the best food.
This bread‑in‑a‑bag recipe removes every barrier. No mess. No stress. Just delicious, homemade bread that you made with your own two hands – even if they never touched the dough.
Final Thoughts
Homemade Bread in a Bag is proof that you do not need a stand mixer, a marble countertop, or years of experience to bake amazing bread. With just a few pantry staples and a resealable plastic bag, you can create a soft, golden, crusty loaf that will make your home smell like a bakery.
It is perfect for beginners, busy parents, camping trips, and anyone who wants fresh bread without the cleanup. Try it once, and you will never buy store‑bought bread the same way again.
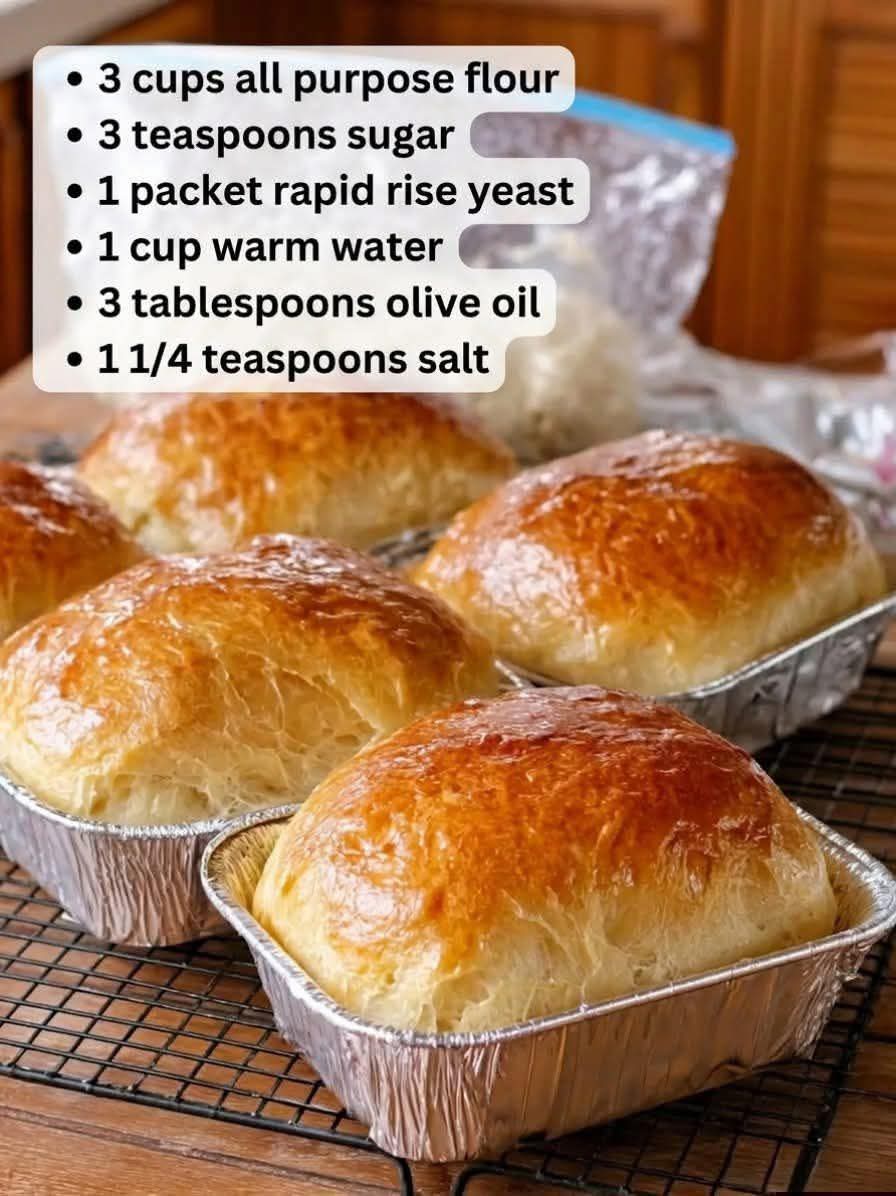
So grab a bag. Measure out the flour. Add the yeast, sugar, salt, warm water, and olive oil. Shake, knead, rise, shape, and bake. Then slice, butter, and enjoy.
Welcome to the joy of homemade bread – no mess required.
Have you made bread in a bag? Share your experience in the comments below. And if you found this guide helpful, save it for later or send it to a friend who needs an easy, no‑mess bread recipe.
This recipe is adapted from classic bread‑in‑a‑bag methods. Baking times may vary by oven. Always check for doneness at the minimum time.