
My neighbor begged for this recipe after smelling it all afternoon. It turns a budget roast into a melt‑in‑your‑mouth dinner. Just 4 ingredients.
That is the kind of recipe that becomes a legend. You know the one — the dish that fills your kitchen with an irresistible aroma, makes your family hover around the slow cooker, and has neighbors texting you for the secret. This Slow Cooker Balsamic Shredded Beef is exactly that.
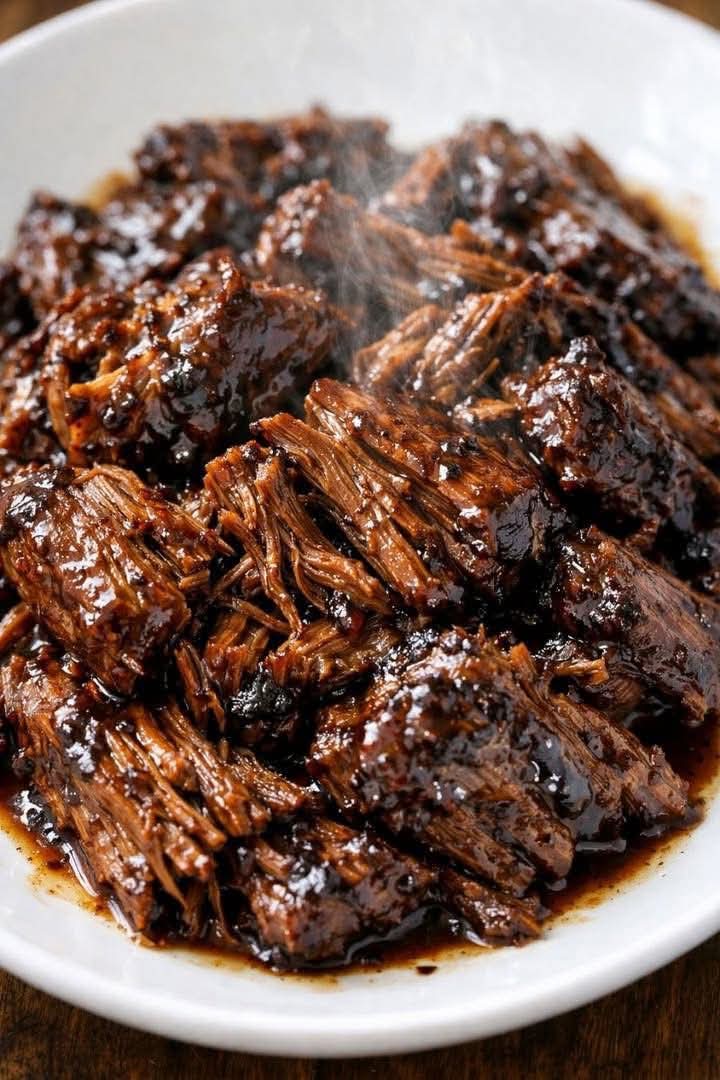
With only four simple ingredients — a beef roast, balsamic vinegar, beef broth, and a packet of onion soup mix — you can create a meal that tastes like it simmered all day in an Italian grandmother’s kitchen. The beef becomes so tender it falls apart with a fork, and the sauce is a perfect balance of sweet, tangy, and savory.
Best of all, it is budget‑friendly, hands‑off, and endlessly versatile. Serve it over mashed potatoes, on crusty rolls for sandwiches, or alongside roasted vegetables. However you serve it, do not expect leftovers.
In this guide, you will learn the complete recipe, why these four ingredients work so well together, pro tips for perfect shredded beef, delicious variations, storage instructions, and how to turn this into multiple meals.
Why This 4‑Ingredient Recipe Works So Well
You might be skeptical. Four ingredients? No complicated searing? No long list of spices? How can something so simple taste so good?
The magic happens in the slow cooker. The low, gentle heat breaks down the tough connective tissue in an inexpensive beef roast (like chuck or round), turning it into tender, juicy shreds. The balsamic vinegar adds sweetness and tang, while also helping to tenderize the meat. Beef broth provides depth and keeps everything moist. And the dry onion soup mix — that little packet — is a powerhouse of flavor, adding onion, garlic, herbs, and umami.
Together, they create a rich, savory sauce that the meat soaks up as it cooks. No searing required. No standing over the stove. Just dump, set, and forget.
Here is why you will love it:
· Only 4 ingredients – Pantry staples you likely already have.
· Budget‑friendly – Uses an inexpensive chuck or bottom round roast.
· Set it and forget it – Your slow cooker does all the work.
· Fall‑apart tender – The meat shreds effortlessly.
· Versatile – Serve over potatoes, rice, noodles, or on sandwiches.
· Freezer‑friendly – Make a double batch and save for later.
This is the kind of recipe that makes you look like a hero with almost no effort.
The 4 Simple Ingredients (Yes, That’s Really It)
For the Beef:
· 2 to 3 pounds (900g to 1.4kg) beef chuck roast (or bottom round, rump roast, or brisket) – Look for good marbling.
· ½ cup (120 ml) balsamic vinegar – Not balsamic glaze; use real vinegar.
· 1 cup (240 ml) beef broth – Low‑sodium is best to control salt.
· 1 packet (1 oz / 28g) dry onion soup mix – Like Lipton or store brand.
Optional (Still 4 Ingredients for the Core):
· 1 tablespoon olive oil (for browning – adds flavor but not required)
· Fresh parsley for garnish
That is it. No garlic cloves, no tomato paste, no Worcestershire sauce. The onion soup mix and balsamic vinegar do all the heavy lifting.
Step‑by‑Step Instructions (Dump, Set, Forget)
Step 1 – Prepare the Roast (Optional Browning)
For deeper flavor, you can brown the roast before adding it to the slow cooker. Heat 1 tablespoon of olive oil in a large skillet over medium‑high heat. Sear the roast on all sides until browned (about 2–3 minutes per side). This step adds a rich, caramelized flavor but is not strictly necessary. If you are short on time, skip it.
Step 2 – Place the Roast in the Slow Cooker
Put the beef roast into the bottom of your slow cooker. If you did not brown it first, that is fine — just place it in.
Step 3 – Mix the Sauce
In a small bowl or measuring cup, whisk together the balsamic vinegar, beef broth, and dry onion soup mix. Pour the mixture over the roast.
Step 4 – Cover and Cook
Place the lid on the slow cooker. Cook on:
· LOW for 8–10 hours (recommended for the most tender results)
· HIGH for 5–6 hours (if you are short on time)
Do not lift the lid during cooking — the heat escapes and adds to the cooking time.
Step 5 – Shred the Beef
Once the beef is fork‑tender and easily pulls apart, remove it from the slow cooker with tongs. Place it on a cutting board or in a large bowl. Use two forks to shred the beef into bite‑sized pieces.
Step 6 – Return to the Sauce
Return the shredded beef to the slow cooker and stir to coat with the cooking liquid. Let it soak for 10–15 minutes on the “warm” setting or low heat. This allows the meat to absorb even more flavor.
Step 7 – Serve
Serve the balsamic shredded beef hot, spooning extra sauce over the top. Garnish with fresh parsley if desired.
Pro Tips for the Best Balsamic Shredded Beef
Choose the Right Cut
The best cuts for slow cooking are those with connective tissue and marbling:
· Chuck roast – The #1 choice. It becomes incredibly tender and shreds perfectly.
· Bottom round – Leaner but works well; add a little more broth.
· Brisket – Fatty and flavorful, but can be more expensive.
· Rump roast – Also a good option.
Avoid very lean cuts like sirloin or tenderloin; they will become dry.
Do Not Skip the Balsamic Vinegar
Balsamic vinegar is the star. It provides sweetness, tang, and helps tenderize the meat. Use a good quality balsamic (not the cheap, watery kind). If you only have balsamic glaze, thin it with a little water or red wine vinegar.
Adjust the Flavor
· For a sweeter sauce: Add 1 tablespoon of brown sugar or honey.
· For more tang: Add 1 tablespoon of red wine vinegar.
· For extra depth: Add 2 cloves of minced garlic or a sprig of rosemary.
Thicken the Sauce (If Desired)
The cooking liquid will be thin but flavorful. If you prefer a thicker gravy:
· Remove the beef and shred it.
· In a small bowl, mix 2 tablespoons of cornstarch with ¼ cup of cold water.
· Whisk the slurry into the slow cooker liquid.
· Cook on HIGH for 15–20 minutes, uncovered, until thickened.
Do Not Overcook
While slow cookers are forgiving, cooking too long on HIGH can dry out the meat even in liquid. For the best texture, stick to LOW for 8–10 hours. Check at 8 hours; if it is not fork‑tender, continue cooking.
Want the full truth and the practical next steps?
Page 2 continues with the real explanation, the key details many readers skip, and the simple takeaways that make this guide more useful.