
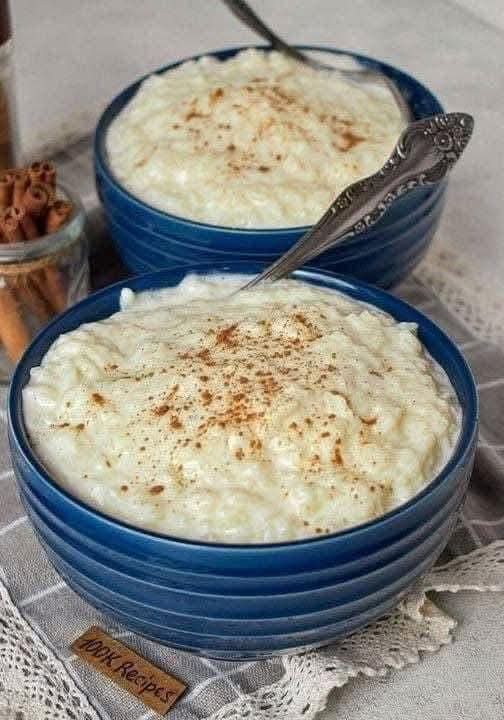
There are desserts that are complicated, and then there is Old Fashioned Rice Pudding – the kind of creamy, comforting, nostalgic dessert that has been warming hearts and homes for generations. Imagine a bowl of thick, velvety rice pudding, studded with tender grains of rice, infused with vanilla and a hint of cinnamon, and finished with a sprinkle of nutmeg. It is not too sweet, not too heavy – just pure, honest, homemade goodness. This is the dessert your grandmother made on cold winter afternoons, the one that appeared at family dinners and potlucks, the one that never had leftovers. If you are searching for a classic rice pudding recipe that is easy, creamy, and absolutely delicious, this is the one.
This old fashioned rice pudding is made on the stovetop with simple pantry ingredients – white rice, whole milk, heavy cream, sugar, eggs, and vanilla. A touch of cinnamon and a pat of butter add richness. The result is a thick, custard‑like pudding that is equally delicious warm or chilled. Whether you need a comforting dessert for a cold night, a make‑ahead treat for a crowd, or simply a taste of nostalgia, this rice pudding delivers. This homemade stovetop rice pudding will become a family favorite.
In this complete guide, you will learn how to make the perfect old fashioned rice pudding, including pro tips for a creamy (not mushy) texture, delicious variations (add raisins, lemon zest, or a meringue topping), storage and freezing instructions, and why this timeless dessert has stood the test of time. Let’s get cooking.
Why Old Fashioned Rice Pudding Is a Timeless Classic
Rice pudding has been enjoyed for centuries across many cultures – from English rice pudding to Indian kheer to arroz con leche. This old fashioned version is the American classic: creamy, custardy, and gently spiced. It is made with simple ingredients, cooks on the stovetop, and tastes like a warm hug. The combination of whole milk and heavy cream creates a rich, velvety texture, while the eggs thicken the pudding to perfection. A dash of cinnamon and vanilla adds warmth. This is a vintage dessert recipe that never goes out of style.
Here is why you will love it:
Only 10 minutes of active prep – Then simmer and stir.
Incredibly creamy and satisfying – The ultimate comfort food.
Simple pantry ingredients – Rice, milk, cream, sugar, eggs, vanilla.
Great for using up leftover rice – A frugal, delicious dessert.
Perfect for holidays, potlucks, or everyday dessert – Always a hit.
Kid‑friendly and adult‑loved – A guaranteed crowd‑pleaser.
Can be served warm or cold – Versatile and make‑ahead friendly.
Once you try this easy homemade rice pudding, you will never buy the canned stuff again.
The Complete Old Fashioned Rice Pudding Recipe
This recipe serves 6‑8 people. It can easily be doubled.
Ingredients:
1 cup white rice (long‑grain or medium‑grain – not instant rice)
2 cups whole milk
½ cup heavy cream
½ cup granulated sugar
2 large eggs
1 teaspoon vanilla extract
¼ teaspoon salt
½ teaspoon ground cinnamon (plus more for garnish)
2 tablespoons unsalted butter (optional, for richness)
Optional: ¼ cup raisins (soaked in warm water for 10 minutes, then drained)
Optional: 1 teaspoon lemon zest
Equipment:
- Medium saucepan or heavy‑bottomed pot
- Whisk
- Wooden spoon or spatula
- Mixing bowl
- Measuring cups and spoons
Step‑by‑Step Instructions
Step 1 – Cook the Rice
In a medium saucepan, combine the rice, 2 cups of water, and a pinch of salt. Bring to a boil, then reduce heat to low, cover, and simmer for 15‑18 minutes, until the rice is tender and the water is absorbed. Do not overcook – the rice should be al dente, not mushy. Fluff with a fork. (If using leftover rice, skip this step.)
Step 2 – Combine Milk, Cream, and Sugar
In the same saucepan (or a larger one), combine the cooked rice, whole milk, heavy cream, sugar, and salt. Stir well. Bring to a gentle simmer over medium heat, stirring occasionally to prevent sticking.
Step 3 – Temper the Eggs
In a separate bowl, whisk the eggs until smooth. Slowly ladle about ½ cup of the hot milk mixture into the eggs, whisking constantly. This tempers the eggs and prevents scrambling. Pour the egg mixture back into the saucepan, whisking continuously.
Step 4 – Cook the Pudding
Reduce the heat to low. Cook, stirring constantly with a wooden spoon or spatula, for 10‑15 minutes, until the pudding thickens and coats the back of a spoon. Do not let it boil, or the eggs may curdle. The pudding should be thick but still pourable – it will continue to thicken as it cools.
Step 5 – Add Flavorings
Remove the saucepan from heat. Stir in the vanilla extract, cinnamon, and butter (if using). If adding raisins or lemon zest, fold them in now.
Step 6 – Cool and Serve
Let the pudding cool for 10‑15 minutes, then transfer to a serving bowl or individual ramekins. Sprinkle with additional cinnamon or nutmeg. Serve warm, or cover and refrigerate for at least 2 hours to serve cold. The pudding will thicken significantly as it cools.
Want the full truth and the practical next steps?
Page 2 continues with the real explanation, the key details many readers skip, and the simple takeaways that make this guide more useful.