
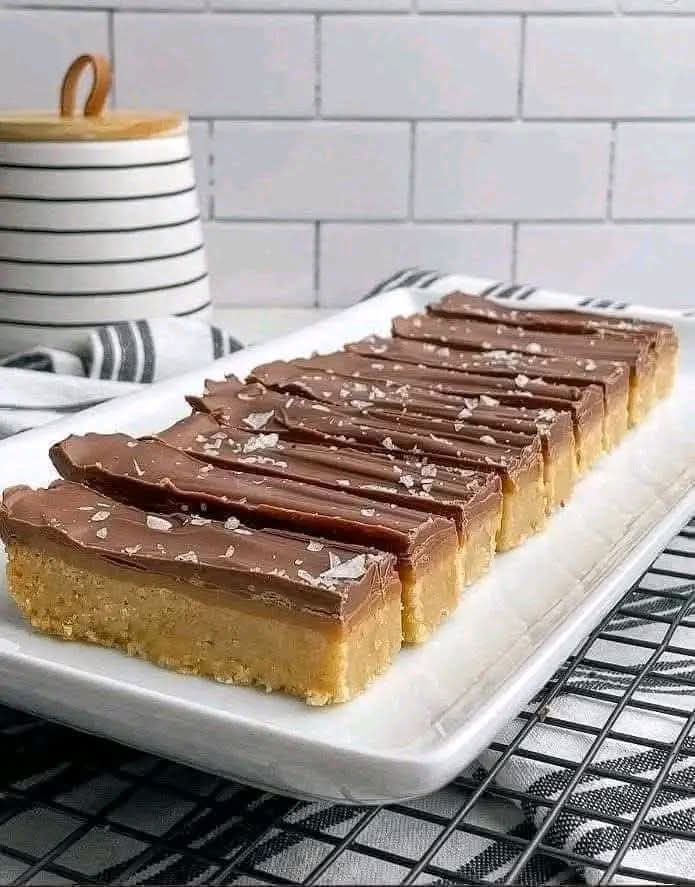
There are dessert bars that are good, and then there is Millionaire’s Shortbread – the kind of rich, buttery, caramel‑filled, chocolate‑topped indulgence that tastes like a million bucks. Imagine a crisp, sandy shortbread crust, topped with a thick, velvety layer of homemade caramel that is chewy, buttery, and sweet, all crowned with a glossy blanket of dark or milk chocolate. Every bite is a perfect symphony of textures: the crumbly base, the sticky caramel, and the snappy chocolate. This is not a dessert for the faint of heart – it is a showstopper, a bake sale superstar, and the kind of treat that disappears within minutes. If you are searching for a millionaire’s shortbread recipe that is authentic, foolproof, and absolutely irresistible, this is the one.
This classic British and Scottish treat has been beloved for generations. It is also known as “Caramel Shortbread” or “Caramel Squares.” The name “Millionaire’s” comes from its rich, luxurious ingredients – butter, sugar, cream, and chocolate – which were once considered expensive indulgences. Today, it is a favorite for holidays, bake sales, afternoon tea, and any time you need a truly decadent dessert. This homemade caramel shortbread will become a family heirloom.
In this complete guide, you will learn how to make the perfect millionaire’s shortbread, including pro tips for a non‑sticky caramel, delicious variations (add sea salt, use white chocolate, or make it gluten‑free), storage and freezing instructions, and why this layered bar has earned its luxurious name. Let’s preheat that oven.
Why Millionaire’s Shortbread Is a Legendary Dessert
This dessert is incredibly rich and satisfying, made with simple pantry ingredients, perfect for special occasions, and endlessly customizable. The combination of the three layers – buttery shortbread, chewy caramel, and smooth chocolate – creates a dessert that is greater than the sum of its parts. Unlike many layered bars, millionaire’s shortbread has a defined crunch from the shortbread and a sticky, not runny, caramel. This is a luxury caramel slice that will impress anyone.
Here is why you will love it:
Only 30 minutes of active prep – Then chill and slice.
Incredibly decadent – Tastes like a high‑end bakery treat.
Made with simple ingredients – Butter, flour, sugar, condensed milk, chocolate.
Perfect for holidays, bake sales, and gifts – Always a hit.
Customizable – Add sea salt, use dark chocolate, or make it gluten‑free.
Great for meal prep and freezing – Stays fresh for weeks.
Kid‑friendly and adult‑loved – A guaranteed crowd‑pleaser.
Once you try this easy millionaire’s shortbread, you will never buy store‑bought caramel slices again.
The Complete Millionaire’s Shortbread Recipe
This recipe makes one 9×9 inch pan (about 16 squares). It can easily be doubled for a 9×13 pan.
Ingredients – For the Shortbread Crust:
1 ½ cups (190g) all‑purpose flour
½ cup (100g) granulated sugar
½ cup (113g, 1 stick) unsalted butter, cold and cut into small cubes
¼ teaspoon salt
Ingredients – For the Caramel Layer:
1 can (14 oz / 397g) sweetened condensed milk
½ cup (113g, 1 stick) unsalted butter
½ cup (100g) light brown sugar, packed
2 tablespoons golden syrup or corn syrup (optional, for chewiness)
1 teaspoon vanilla extract
¼ teaspoon salt
Ingredients – For the Chocolate Topping:
1 ½ cups (255g) semi‑sweet or dark chocolate chips
1 tablespoon coconut oil or vegetable oil (optional, for shine)
Optional: flaky sea salt for sprinkling
Equipment:
- 9×9 inch square baking pan
- Parchment paper
- Food processor or pastry blender (for crust)
- Saucepan
- Rubber spatula
- Microwave‑safe bowl or double boiler
Step‑by‑Step Instructions
Step 1 – Preheat and Prepare the Pan
Preheat your oven to 350°F (175°C). Line a 9×9 inch baking pan with parchment paper, leaving overhangs on two sides for easy removal. Grease lightly with butter.
Step 2 – Make the Shortbread Crust
In a food processor (or a large bowl using a pastry blender), combine the flour, sugar, and salt. Add the cold butter cubes. Pulse (or cut in) until the mixture resembles fine crumbs and starts to clump together. Do not overmix. Press the dough firmly into the bottom of the prepared pan, using your fingers or the back of a measuring cup to create an even, compact layer. Prick all over with a fork.
Bake at 350°F for 18‑22 minutes, until lightly golden brown. Let cool completely in the pan on a wire rack.
Step 3 – Make the Caramel Layer
In a medium heavy‑bottomed saucepan over medium heat, combine the sweetened condensed milk, butter, brown sugar, golden syrup (if using), vanilla, and salt. Stir constantly with a wooden spoon or silicone spatula until the butter is melted and the mixture is smooth. Bring to a gentle boil, then reduce heat to medium‑low. Continue stirring constantly for 5‑7 minutes, until the caramel thickens and turns a deep golden color. The mixture should pull away from the sides of the pan.
Pro tip: Do not stop stirring – the caramel can burn easily. Use a candy thermometer if desired; the caramel is ready at 225‑230°F (soft‑ball stage).
Step 4 – Pour Caramel over Shortbread
Pour the hot caramel over the cooled shortbread crust. Spread evenly with a spatula. Let the caramel set at room temperature for about 30 minutes, then refrigerate for 1 hour until firm.
Step 5 – Add the Chocolate Topping
In a microwave‑safe bowl, combine the chocolate chips and coconut oil (if using). Microwave in 20‑second bursts, stirring after each, until smooth. Alternatively, use a double boiler. Pour the melted chocolate over the set caramel layer. Spread evenly with a spatula. If using flaky sea salt, sprinkle it on top immediately.
Step 6 – Chill and Slice
Refrigerate the pan for at least 2 hours, or until the chocolate is completely set. Use the parchment overhangs to lift the whole block out of the pan. Place on a cutting board and use a sharp knife to cut into squares. For clean cuts, run the knife under hot water and wipe dry between slices. Let the bars sit at room temperature for 10 minutes before serving for the best texture.
Want the full truth and the practical next steps?
Page 2 continues with the real explanation, the key details many readers skip, and the simple takeaways that make this guide more useful.