
There are appetizers that are good, and then there are Crispy Pork Belly Bites – the kind of snack that makes people hover around the serving plate, waiting for the next batch to come out of the oven. My neighbor brought these to every backyard party, and they never lasted five minutes. Not once. By the time she set the plate down, hands were already reaching. By the time I got there, the plate was empty. The secret? Just three simple ingredients and a foolproof method that turns ordinary pork belly into crispy, salty, savory, melt‑in‑your‑mouth nuggets of pure joy. If you are searching for a crispy pork belly bites recipe that will make you the hero of every gathering, this is the one.
Whether you need a game day snack, a party appetizer, a keto‑friendly treat, or simply a way to use up pork belly, these bites deliver. They are naturally low‑carb, gluten‑free, and require almost no hands‑on time. The result is pork belly that is crackling‑crisp on the outside, tender and juicy on the inside, and seasoned to perfection with just salt and pepper. This 3 ingredient pork belly appetizer will become your signature dish.
In this complete guide, you will learn the master recipe for crispy pork belly bites, including pro tips for achieving that shatteringly crisp skin, delicious variations (add a glaze, spices, or a dipping sauce), storage and reheating instructions, and why this simple three‑ingredient wonder is the ultimate party food. Let’s preheat that oven.
Why These 3‑Ingredient Pork Belly Bites Are the Ultimate Party Food
The beauty of this recipe is its simplicity. You need exactly three ingredients: pork belly, coarse salt, and black pepper. That is it. No brines, no marinades, no complicated spice blends. The pork belly’s own fat does all the work, rendering down and crisping the skin into golden, crackly perfection. The salt and pepper provide just enough seasoning to let the rich, savory pork flavor shine. These bites are naturally keto, paleo, and low‑carb – but even guests who do not follow those diets will devour them. This is a low carb pork belly snack that everyone loves.
Here is why you will love them:
Only 3 ingredients – Pork belly, salt, pepper.
Incredibly crispy skin – Crackling perfection.
Juicy, tender meat inside – Melts in your mouth.
Ready in under an hour – Mostly hands‑off oven time.
Perfect for parties, game day, or meal prep
Naturally keto, paleo, and gluten‑free
Customizable with dips and seasonings
Once you try these oven baked pork belly bites, you will never serve store‑bought party snacks again.
The Complete Crispy Pork Belly Bites Recipe
This recipe serves 6‑8 as an appetizer. It can easily be doubled or tripled.
The 3 Ingredients:
2 lbs (900g) pork belly – skin‑on, preferably with an even layer of fat
2 tablespoons coarse sea salt (or kosher salt)
1 tablespoon freshly ground black pepper
Equipment:
Sharp knife
Baking sheet or roasting pan
Wire rack (fits inside the baking sheet)
Aluminum foil
Paper towels
Step‑by‑Step Instructions
Step 1 – Prepare the Pork Belly
Pat the pork belly completely dry with paper towels. This is crucial for crispy skin. If the skin is wet, it will steam instead of crisp. Place the pork belly on a cutting board, skin side up. Use a sharp knife to score the skin in a crosshatch pattern, cutting through the skin and about ¼ inch into the fat, but not into the meat. Scores should be about ½ inch apart. This allows the fat to render out and the skin to crisp evenly. Flip the pork belly over and score the meat side lightly (optional).
Step 2 – Season Generously
Rub the coarse salt and black pepper all over the pork belly, making sure to get salt into the score marks on the skin. The salt helps draw out moisture, which is essential for crispy crackling. Do not be shy – use the full amount. Let the seasoned pork belly sit at room temperature for 20‑30 minutes, or refrigerate uncovered for up to 24 hours (this dries the skin further for maximum crispiness).
Step 3 – Preheat and Set Up the Pan
Preheat your oven to 400°F (200°C). Line a baking sheet with aluminum foil for easy cleanup. Place a wire rack on top of the foil. The rack elevates the pork belly, allowing air to circulate underneath and fat to drip away, preventing sogginess.
Step 4 – Roast the Pork Belly
Place the seasoned pork belly on the wire rack, skin side up. Roast for 40‑50 minutes, until the skin is deep golden brown, puffed, and crackling. The internal temperature should reach at least 165°F (74°C), but for tender, rendered fat, you can go to 190‑200°F. If the skin is not crispy enough after 45 minutes, switch the oven to broil for 1‑2 minutes – watch carefully to prevent burning. The pork belly will sizzle and pop as the fat renders.
Step 5 – Rest and Cut into Bites
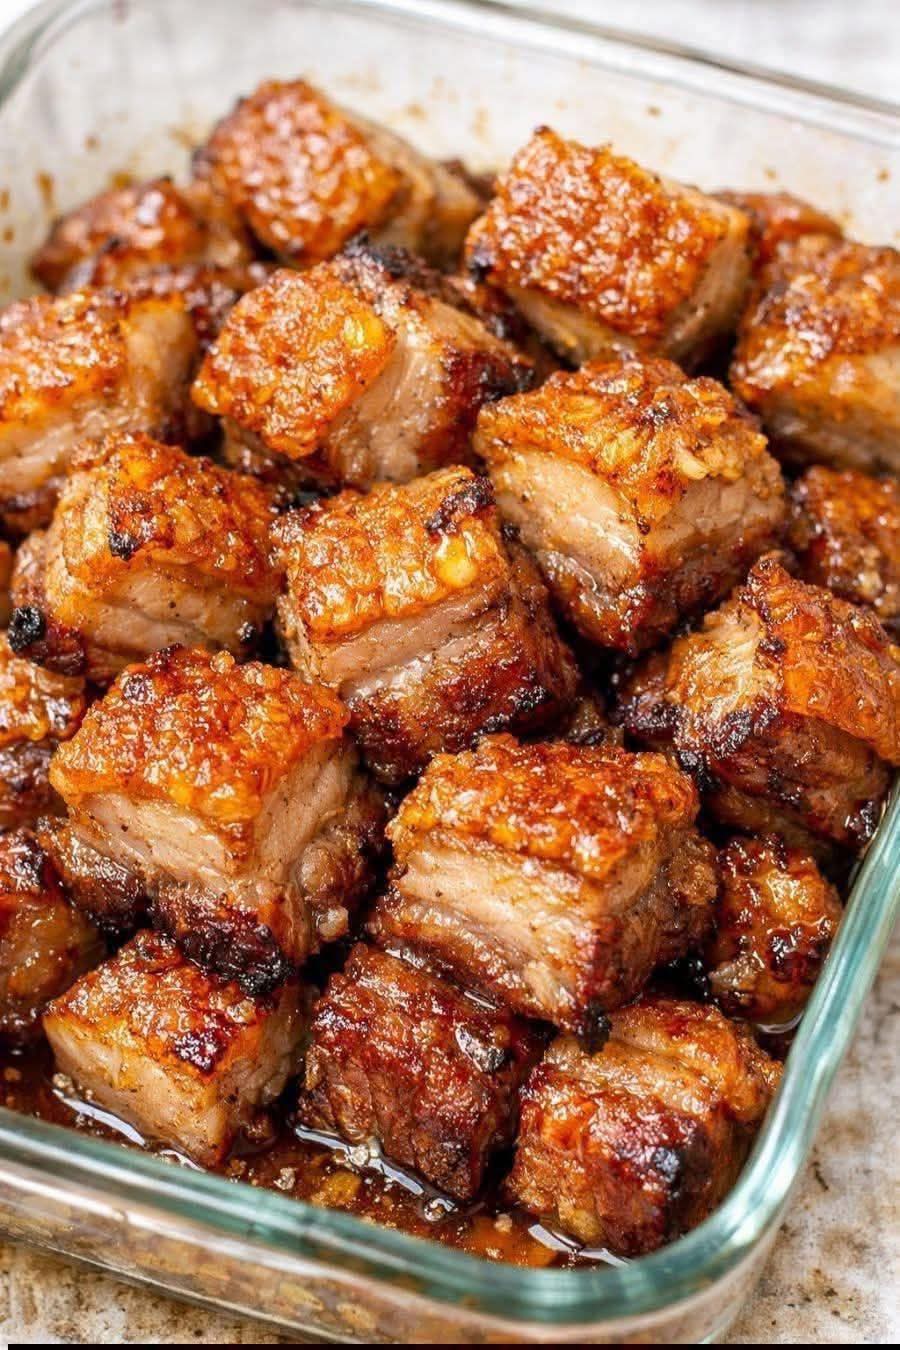
Remove the pork belly from the oven and let it rest on the rack for 10‑15 minutes. This allows the juices to redistribute. Transfer to a cutting board. Use a sharp knife or kitchen shears to cut the pork belly into bite‑sized cubes – about 1‑inch squares. The skin will crackle and shatter as you cut, which is exactly what you want. Arrange the crispy pork belly bites on a serving platter.
Step 6 – Serve Immediately
Serve the bites hot, plain or with your favorite dipping sauce. They are best within 10‑15 minutes of coming out of the oven, while the skin is still shatteringly crisp. Watch them disappear – they never last five minutes.
Pro Tips for the Crispiest Pork Belly Bites
Follow these expert tips for perfect crispy pork belly cubes every time:
Start with a dry surface – Pat the pork belly with paper towels until absolutely dry. Any moisture will steam the skin instead of crisping it.
Score the skin, not the meat – Cut through the skin and into the fat layer, but stop before hitting the meat. This helps fat render and creates more surface area for crispiness.
Use coarse salt – Fine salt can be too harsh; coarse salt (kosher or sea salt) seasons evenly and helps draw out moisture.
Let it rest uncovered in the fridge – If you have time, leave the salted pork belly uncovered in the refrigerator for 4‑24 hours. The cold air dries the skin, resulting in extra‑crackly results.
Use a wire rack – Do not skip this. The rack allows hot air to circulate and fat to drip away, preventing sogginess.
Do not crowd the pan – Leave space around the pork belly for air to flow. If making a larger batch, use two baking sheets.
Rest before cutting – Letting the pork belly rest ensures the juices stay in the meat, not on your cutting board.
Delicious Variations (Still Only 3 Core Ingredients)
Once you master the classic salt‑and‑pepper pork belly bites, try these simple twists. These pork belly appetizer ideas use the same base method with minimal additions.
1. Garlic Pork Belly Bites
Before roasting, rub the pork belly with 4 crushed garlic cloves (remove before cooking). The garlic infuses the meat with savory flavor. Or sprinkle with garlic powder along with the salt and pepper.
2. Smoked Paprika Pork Belly Bites
Add 1 tablespoon of smoked paprika to the salt and pepper mixture. The smoky, slightly sweet flavor pairs beautifully with the rich pork.
3. Five‑Spice Pork Belly Bites (Asian Twist)
Replace the black pepper with 2 teaspoons of Chinese five‑spice powder. The star anise, fennel, and clove notes are incredible with crispy pork belly.
4. Spicy Cayenne Pork Belly Bites
Add 1 teaspoon of cayenne pepper to the seasoning. For extra heat, serve with a side of sriracha mayo.
5. Honey Glazed Pork Belly Bites
During the last 5 minutes of roasting, brush the bites with 2 tablespoons of honey mixed with 1 tablespoon of water. Return to the oven to caramelize. The sweet‑savory combination is addictive.
6. Soy Ginger Pork Belly Bites
Mix 2 tablespoons of soy sauce with 1 teaspoon of grated ginger. Brush onto the pork belly halfway through roasting. This adds umami without adding more than a few extra ingredients.
7. Lemon Pepper Pork Belly Bites
Add 1 tablespoon of lemon zest to the black pepper. The bright citrus cuts through the richness. Serve with lemon wedges.
After roasting, toss the bites in everything bagel seasoning (poppy seeds, sesame seeds, dried garlic, dried onion, salt). This is a fun, unexpected twist.
Want the full truth and the practical next steps?
Page 2 continues with the real explanation, the key details many readers skip, and the simple takeaways that make this guide more useful.