
Cheese straws are a beloved classic – a crisp, savory, buttery snack that has been a staple at Southern parties, holiday gatherings, and afternoon teas for generations. With a texture somewhere between a cheese cracker and a savory shortbread, these golden straws are packed with sharp cheddar flavor and a whisper of cayenne for just the right amount of warmth. The beauty of cheese straws lies in their simplicity: a handful of pantry ingredients, a few minutes of prep, and a quick bake in the oven. Whether you are serving them at a cocktail party, packing them in a lunchbox, or simply enjoying them with a cup of tea, these homemade cheese straws are sure to impress.
⏲️ Prep: 15-20 mins🔥 Bake: 12-15 mins🍽️ Yields: 3-4 dozen🧀 Sharp cheddar🔥 Crisp & buttery⭐ Southern classic
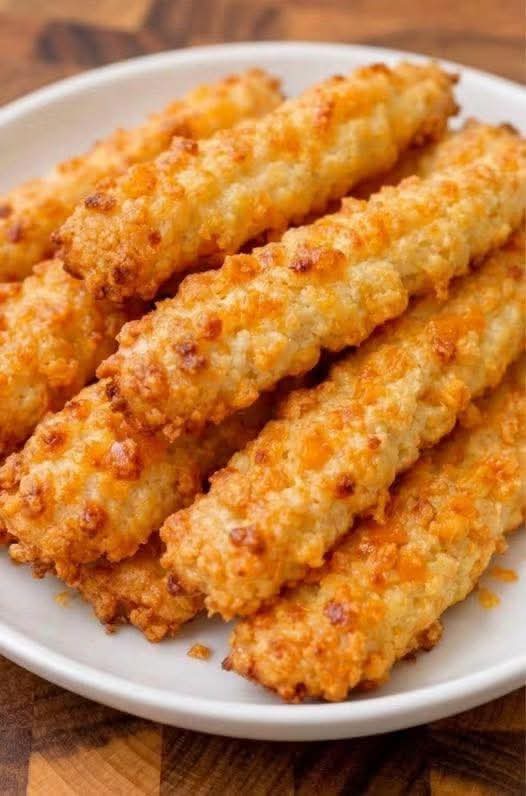
✨ What Are Cheese Straws?
Cheese straws are a traditional snack that bridges the gap between a cheese cracker and a savory pastry. They are typically made from a simple dough of flour, butter, cheese, and seasonings, which is then shaped into thin strips – or “straws” – and baked until golden and crisp. The result is a snack that is both satisfyingly crunchy and deeply flavorful.
While they are often associated with the American South, where they are a fixture at weddings, cocktail parties, and holiday gatherings, cheese straws have roots in British biscuit traditions and even Italian and Spanish crisp snacks. In the South, cheese straws were also developed as a clever way to preserve cheese during the hot, humid months – the dough could be made and stored, then baked as needed [citation:8][citation:9].
💡 Southern Tradition: “Along with pecan tassies and pepper jelly with cream cheese, crispy, buttery cheese straws are an absolute must at Southern holiday parties.” – Serious Eats [citation:5]
📝 The Ingredients (Simple and Wholesome)
All-purpose flour (2 cups / 255g) – forms the base of the dough. For a lighter, more tender texture, some recipes use self-rising flour, which includes baking powder and salt [citation:9].
Sharp or extra-sharp cheddar cheese (8 ounces / 227g) – freshly grated. This is the star of the show. A sharp cheddar provides bold, tangy flavor that stands up to the buttery dough. Do not use pre-shredded cheese, as it contains anti-caking agents that prevent smooth incorporation into the dough [citation:5][citation:8].
Unsalted butter (½ cup / 113g) – cold and cubed. The butter creates the flaky, tender texture that makes cheese straws so irresistible.
Seasonings: salt, cayenne pepper (for a gentle warmth), and optional garlic powder or dry mustard for added depth [citation:5][citation:6].
Cold water (¼ cup / 60ml) – helps bring the dough together without making it too wet.
👩🍳 Step‑by‑Step Instructions
First, preheat your oven to 400°F (205°C). Line two baking sheets with parchment paper.
Make the dough. In a food processor, pulse together the flour, salt, cayenne, garlic powder (if using), and baking powder (if using). Add the cheese and cold butter, and pulse until the butter forms pea-sized pieces. With the processor running, drizzle in the water and process until the mixture starts to clump together. Turn the dough out onto a clean surface and knead gently until it comes together in a smooth ball [citation:5].
Shape the straws. Divide the dough in half. On a lightly floured surface, roll each portion into a rectangle about ⅛ inch thick. Use a pizza cutter or a sharp knife to cut the dough into ¾‑inch wide strips. For a classic twisted look, gently twist each strip 3‑4 times before placing it on the prepared baking sheet [citation:5].
Chill the dough. For the best shape and texture, freeze the shaped straws on the baking sheets for about 30 minutes before baking. This step helps the straws maintain their crisp, clean lines [citation:5].
Bake. Bake the straws for 12‑15 minutes, rotating the pans halfway through, until they are crisp and golden brown around the edges. Let them cool completely on the baking sheets before serving [citation:5].
💡 Pro Tips for the Best Cheese Straws
Use a food processor. A food processor keeps the butter in small, cold pieces, creating a short, tender, ultra-crisp texture that is impossible to achieve with puff pastry or hand-mixed dough [citation:5].
Shred your own cheese. Finely shredding the cheddar ensures even distribution without disrupting the butter structure. Pre-shredded cheese contains anti-caking agents that can make the dough grainy [citation:5][citation:8].
Chill the dough. Freezing the shaped straws before baking helps them hold their shape and ensures a crisper texture [citation:5].
Don’t overbake. The straws should be light golden brown – they will continue to crisp as they cool. Overbaking can make them bitter [citation:5].
Make ahead. Cheese straws store beautifully. They can be kept in an airtight container at room temperature for up to a week, or frozen for up to three months [citation:5][citation:8].
🥗 Nutritional Snapshot (per serving, 1/12 of recipe)
🔥 Calories: 256
💪 Protein: 10g
🥑 Fat: 18g
🍚 Carbs: 14g
🌾 Fiber: 1g
🧂 Sodium: 309mg
Values are estimates based on a standard cheese straw recipe [citation:5].
🌟 7 Delicious Variations to Try
Spicy Cheddar Cheese Straws: Add an extra pinch of cayenne pepper or a teaspoon of chipotle powder for a smoky, fiery kick [citation:5].
Parmesan and Herb Straws: Replace half the cheddar with grated Parmesan and add a teaspoon of dried oregano or thyme [citation:6].
Smoked Gouda Straws: Swap the cheddar for smoked Gouda for a rich, smoky flavor profile.
Everything Bagel Cheese Straws: Sprinkle the shaped straws with everything bagel seasoning before baking for a savory, crunchy finish.
Jalapeño Cheddar Straws: Fold finely chopped pickled jalapeños into the dough for a spicy, tangy punch.
Pecan Cheese Straws: For a Southern twist, press a toasted pecan half into each straw before baking.
Gluten-Free Cheese Straws: Use a 1:1 gluten-free flour blend in place of all-purpose flour.
❄️ How to Store, Make Ahead & Freeze
Cheese straws are an excellent make‑ahead snack. Store baked straws in an airtight container at room temperature for up to 1 week [citation:5]. For longer storage, freeze them in an airtight container for up to 3 months [citation:8]. The dough can also be prepared in advance: shape the straws, freeze them on a baking sheet until solid, then transfer to a freezer bag. When ready to bake, place the frozen straws directly on a baking sheet and bake for an additional 1‑2 minutes [citation:5][citation:8].
📦 Gift giving tip: Stack the cooled cheese straws upright in a decorative tin or clear glass jar. They make a beautiful, thoughtful homemade gift for any occasion.
💬 Frequently Asked Questions (Cheese Straws)
Can I make cheese straws without a cookie press? Yes. You can roll the dough out and cut it into strips with a pizza cutter or sharp knife, then twist them for a classic look [citation:5][citation:9].
What is the best cheese for cheese straws? Sharp or extra-sharp cheddar is the classic choice. For a more intense flavor, use an aged white cheddar [citation:6].
Can I use pre-shredded cheese? It is not recommended. Pre-shredded cheese contains anti-caking agents that can affect the texture of the dough [citation:5][citation:8].
Should I chill the dough? Yes. Chilling the dough helps the straws hold their shape and bake up crispier [citation:5].
Can I freeze cheese straws? Yes. Baked cheese straws freeze well for up to 3 months. Unbaked straws can also be frozen and baked straight from frozen [citation:5][citation:8].
Want the full truth and the practical next steps?
Page 2 continues with the real explanation, the key details many readers skip, and the simple takeaways that make this guide more useful.