
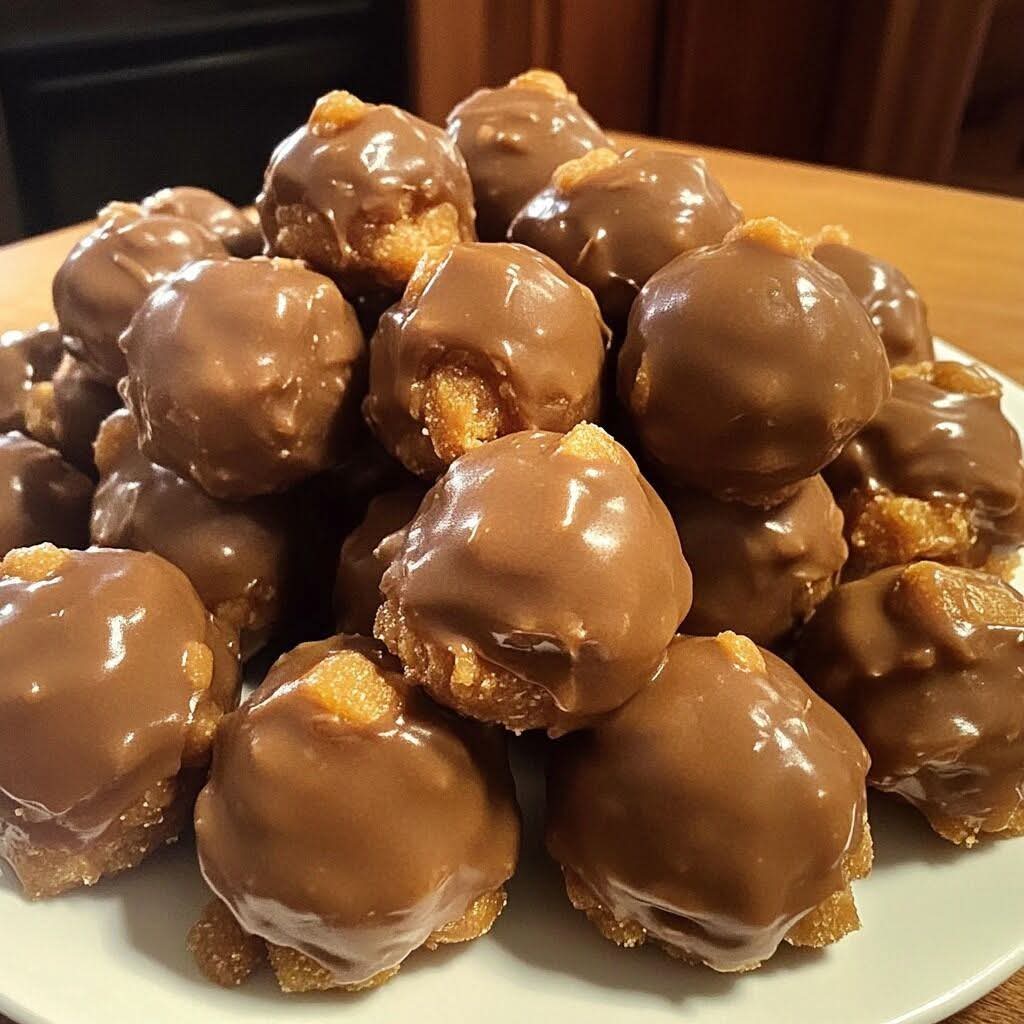
If you are a fan of the iconic Butterfinger candy bar – with its crisp, peanut buttery, chocolate‑coated crunch – you are going to fall head over heels for these Butterfinger Balls. They capture everything you love about the original in a bite‑sized, no‑bake, homemade treat. Imagine a creamy, peanut buttery center studded with crunchy crushed Butterfinger pieces, all enrobed in a smooth chocolate shell. Each bite delivers that signature crispy, chocolatey, peanut buttery flavor that makes Butterfingers so addictive.
The best part? These Butterfinger balls are incredibly easy to make, require no baking, and come together in under 20 minutes of active time. They are perfect for holiday cookie trays, edible gifts, birthday parties, or just a sweet craving. In this guide, you will learn the complete recipe, pro tips for the perfect texture, delicious variations (add a drizzle of caramel or white chocolate), storage advice, and why these little bites will disappear faster than you can say “Butterfinger.”
Why You Will Love These Butterfinger Balls
Butterfinger candy bars have a unique crunchy, flaky texture that is hard to replicate. This recipe gets incredibly close by combining crushed Butterfinger pieces with a creamy peanut butter and cream cheese base. The result is a soft, slightly chewy center with bursts of crunchy candy in every bite. Dipped in chocolate, they taste like a homemade version of the classic candy bar – only better.
Here is why you will make them again and again:
· No baking required – Perfect for hot days or when you don’t want to turn on the oven.
· Only 5 main ingredients – Cream cheese, peanut butter, powdered sugar, Butterfinger bars, and chocolate.
· Ready in 20 minutes active time – Plus chilling.
· No special equipment – Just a bowl, a spoon, and your hands.
· Make‑ahead friendly – Store in the fridge or freezer for weeks.
· Customizable – Use different candy bars, add toppings, or make them gluten‑free.
· Crowd‑pleaser – Kids and adults alike love them.
Once you try these, you will be making them for every holiday, bake sale, and potluck.
The Complete Butterfinger Balls Recipe
This recipe makes about 30‑40 balls, depending on size.
Ingredients
For the Butterfinger Filling:
· 8 oz (226g) cream cheese, softened to room temperature
· ¼ cup (65g) creamy peanut butter (not natural – use standard like Jif or Skippy)
· 2 cups (240g) powdered sugar, sifted
· 6 full‑size Butterfinger candy bars (about 6 oz / 170g total), crushed into small pieces
For the Chocolate Coating:
· 2 cups (340g) semi‑sweet or milk chocolate chips
· 1 tablespoon coconut oil or vegetable shortening (for thinning)
Optional Toppings:
· Crushed Butterfinger pieces
· Flaky sea salt
· White chocolate drizzle
Equipment
· Mixing bowl
· Electric hand mixer or stand mixer
· Baking sheet lined with parchment paper
· Small cookie scoop or spoon
· Microwave or double boiler
Step‑by‑Step Instructions
Step 1 – Crush the Butterfinger Bars
Place the Butterfinger bars in a sealed plastic bag and crush them with a rolling pin or meat mallet. You want small pieces (about the size of chocolate chips), not fine powder. Some larger chunks are fine – they add great texture. Set aside.
Step 2 – Prepare the Filling Base
In a large mixing bowl, beat the softened cream cheese and peanut butter together until smooth and creamy, about 2 minutes. Scrape down the sides.
Step 3 – Add Powdered Sugar
Gradually add the powdered sugar, beating on low speed until fully incorporated. The mixture will be thick and dough‑like.
Step 4 – Add Crushed Butterfinger
Fold in the crushed Butterfinger pieces until evenly distributed. The mixture should be stiff enough to roll into balls. If it is too soft, refrigerate for 15 minutes before shaping.
Step 5 – Form the Balls
Scoop about 1 tablespoon of the mixture (a small cookie scoop is perfect) and roll it between your palms into a smooth ball. Place the balls on a parchment‑lined baking sheet. Repeat with the remaining mixture. You should get about 30‑40 balls.
Step 6 – Chill
Refrigerate the balls for at least 30 minutes, or freeze for 15 minutes. Chilling is essential – if the balls are warm, they will fall apart when you dip them in chocolate.
Step 7 – Melt the Chocolate
In a microwave‑safe bowl, combine the chocolate chips and coconut oil. Microwave in 20‑second bursts, stirring between each, until smooth and glossy. Alternatively, use a double boiler. Do not overheat.
Step 8 – Dip the Balls
Using a fork, toothpick, or dipping tool, dip each chilled Butterfinger ball into the melted chocolate, turning to coat evenly. Let excess chocolate drip off, then place back on the parchment paper. If you want a thicker coating, dip twice (let the first layer set for a few minutes before second dip).
Step 9 – Decorate (Optional)
While the chocolate is still wet, sprinkle with additional crushed Butterfinger pieces, flaky sea salt, or drizzle with melted white chocolate.
Step 10 – Set and Serve
Refrigerate the dipped balls for 15‑20 minutes until the chocolate is firm. Store in an airtight container in the refrigerator. Serve chilled or at room temperature.
Pro Tips for the Best Butterfinger Balls
Use Full‑Fat Cream Cheese
Low‑fat cream cheese contains more water and can make the filling too soft. Full‑fat gives the best texture.
Soften Cream Cheese Thoroughly
Cold cream cheese will not blend smoothly. Leave it on the counter for 1‑2 hours before starting. If you forget, microwave it in 10‑second bursts.
Crush Butterfinger Bars, Not Pulverize
You want small pieces, not dust. Some texture is good. A rolling pin works well, or you can pulse in a food processor – just be careful not to overprocess.
Chill Before Dipping
If the balls are warm, they will fall apart or melt into the chocolate. Always chill until very firm.
Use Coconut Oil for a Smooth Coating
Adding a little coconut oil or shortening to the chocolate chips thins the chocolate, making it easier to dip and giving it a beautiful shine.
Double Dip for a Thicker Shell
For an extra crunchy shell, let the first coat set in the refrigerator for 10 minutes, then dip again.
Save Some Crushed Candy for Topping
Sprinkling crushed Butterfinger on top of the wet chocolate adds visual appeal and extra crunch.
Want the full truth and the practical next steps?
Page 2 continues with the real explanation, the key details many readers skip, and the simple takeaways that make this guide more useful.