
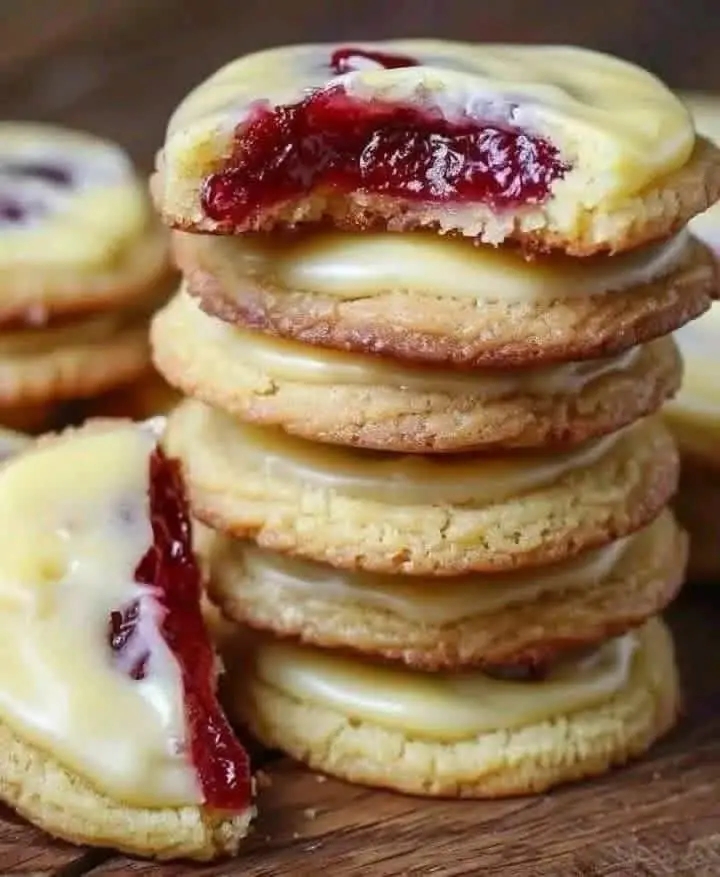
There are thumbprint cookies that are good, and then there are these Raspberry Thumbprint Cookies with Lemon Glaze – the kind of buttery, tender, jam‑filled, citrus‑drizzled treats that disappear from cookie trays in minutes. Imagine a soft, melt‑in‑your‑mouth shortbread cookie, indented with a thumbprint and filled with sweet‑tart raspberry jam, then finished with a bright, zesty lemon glaze. Every bite is a perfect balance of buttery richness, fruity sweetness, and tangy citrus. These cookies are classic for a reason – they look beautiful on a holiday platter, taste incredible with a cup of tea or coffee, and are surprisingly easy to make. If you are searching for a raspberry thumbprint cookies recipe that is foolproof, delicious, and perfect for any occasion, this is the one.
These thumbprint cookies (also called “jam drops” or “butterballs”) have been a beloved cookie jar staple for generations. The dough is a simple shortbread – butter, sugar, flour, and egg yolks – that comes together quickly and requires no chilling. The raspberry jam provides a burst of fruity flavor, and the lemon glaze adds a bright, refreshing finish. Whether you need a cookie for Christmas, Valentine’s Day, Easter, or simply a weekend baking project, these raspberry thumbprint cookies deliver. This homemade thumbprint cookie recipe will become a family favorite.
In this complete guide, you will learn how to make the perfect raspberry thumbprint cookies with lemon glaze, including pro tips for preventing cracks, delicious variations (use other jams, add nuts, or make them gluten‑free), storage and freezing instructions, and why this classic cookie never goes out of style. Let’s preheat that oven.
Why These Raspberry Thumbprint Cookies Are a Classic Favorite
These cookies are incredibly buttery and tender (shortbread texture), filled with sweet‑tart raspberry jam, topped with a bright lemon glaze, easy to make (no electric mixer required), and perfect for holidays, tea parties, and cookie exchanges. The combination of the rich, crumbly cookie and the fruity, tangy jam is irresistible. The lemon glaze adds an extra layer of flavor and makes them look bakery‑beautiful. This is a vintage jam thumbprint cookie that has stood the test of time.
Here is why you will love it:
Only 20 minutes of active prep – Then bake and glaze.
Incredibly buttery and tender – Melt‑in‑your‑mouth texture.
Beautiful and festive – Perfect for holiday cookie trays.
Customizable – Use strawberry, apricot, or blueberry jam.
Great for gifting – Stack in a tin with parchment paper.
Kid‑friendly and adult‑loved – A guaranteed hit.
Freezer‑friendly – Make ahead and bake later.
Once you try these lemon raspberry thumbprints, you will never buy store‑bought cookies again.
The Complete Raspberry Thumbprint Cookies with Lemon Glaze Recipe
This recipe makes about 24‑30 cookies. It can easily be doubled.
Ingredients – For the Cookies:
1 cup (226g, 2 sticks) unsalted butter, softened to room temperature
⅔ cup (135g) granulated sugar
2 large egg yolks (reserve the whites for another use or discard)
2 teaspoons vanilla extract
2 cups (250g) all‑purpose flour
¼ teaspoon salt
½ cup (about 160g) raspberry jam (seedless or with seeds – your preference)
Ingredients – For the Lemon Glaze:
1 cup (120g) powdered sugar
2‑3 tablespoons fresh lemon juice (about 1 lemon)
1 teaspoon lemon zest (optional, for extra flavor)
Equipment:
- Large mixing bowl
- Electric mixer (hand or stand) or wooden spoon
- Baking sheet lined with parchment paper
- Small cookie scoop or spoon
- Measuring spoons
- Cooling rack
Step‑by‑Step Instructions
Step 1 – Preheat and Prepare
Preheat your oven to 350°F (175°C). Line a baking sheet with parchment paper or a silicone baking mat.
Step 2 – Cream Butter and Sugar
In a large bowl, beat the softened butter and granulated sugar together until light and fluffy, about 2‑3 minutes. Add the egg yolks and vanilla extract, and beat until well combined. Scrape down the sides as needed.
Step 3 – Add Dry Ingredients
In a separate bowl, whisk together the flour and salt. Gradually add the dry ingredients to the butter mixture, mixing on low speed just until combined. Do not overmix. The dough will be soft and slightly sticky.
Step 4 – Shape the Cookies
Scoop rounded tablespoons of dough (about 1 inch balls) and roll them into smooth balls between your palms. Place them on the prepared baking sheet, spacing about 2 inches apart.
Step 5 – Make the Thumbprint
Using your thumb or the back of a small spoon, gently press an indentation into the center of each dough ball. Do not press all the way through – leave a nice well for the jam. If the edges crack, gently press them back together.
Step 6 – Fill with Jam
Spoon about ½ teaspoon of raspberry jam into each indentation. Do not overfill – the jam will bubble slightly as it bakes.
Step 7 – Bake
Bake at 350°F for 12‑15 minutes, until the edges are lightly golden brown. The centers will still be soft. Let the cookies cool on the baking sheet for 5 minutes, then transfer to a wire rack to cool completely.
Step 8 – Make the Lemon Glaze
In a small bowl, whisk together the powdered sugar, lemon juice, and lemon zest (if using) until smooth. The glaze should be thick but pourable – add more powdered sugar or lemon juice to adjust consistency.
Step 9 – Glaze the Cookies
Once the cookies are completely cool, drizzle the lemon glaze over the tops using a spoon or a piping bag. Let the glaze set for 15‑20 minutes before serving or storing.
Pro Tips for the Best Raspberry Thumbprint Cookies
Follow these expert tips for perfect thumbprint cookies every time:
Use room temperature butter – Cold butter will not cream properly, leading to dense cookies. Leave it out for 30‑60 minutes before starting.
Do not overmix the dough – Overmixing develops gluten, making the cookies tough. Mix just until the flour disappears.
Chill the dough if too soft – If the dough is sticky, refrigerate for 15‑20 minutes before rolling.
Make the indentations gently – Press firmly but gently. If the edges crack, smooth them with your fingers.
Do not overfill with jam – Too much jam can bubble over and burn. A ½ teaspoon is plenty.
Let the cookies cool completely before glazing – Warm cookies will make the glaze runny and thin.
Use seedless jam for a smoother look – Seedless raspberry jam gives a more polished appearance. Traditional jam with seeds is rustic and delicious too.
Delicious Variations (Same Thumbprint Base)
Once you master the classic raspberry thumbprint cookies, try these fun twists. These thumbprint cookie variations will keep your baking exciting.
1. Strawberry Thumbprint Cookies
Replace the raspberry jam with strawberry jam. Use the same lemon glaze – the strawberry‑lemon combination is wonderful.
2. Apricot Thumbprint Cookies
Use apricot jam. Add a pinch of cardamom to the dough. The apricot and cardamom pair beautifully.
3. Blueberry Thumbprint Cookies
Use blueberry jam or preserves. Add a little lemon zest to the dough as well as the glaze.
Roll the dough balls in finely chopped pecans, walnuts, or almonds before making the thumbprint. The nuts add crunch and flavor.
5. Chocolate Thumbprint Cookies
Replace ¼ cup of flour with ¼ cup of unsweetened cocoa powder. Fill with raspberry jam and drizzle with a vanilla glaze instead of lemon. This is a chocolate raspberry thumbprint cookie.
Use a 1:1 gluten‑free flour blend (like King Arthur). Add ¼ teaspoon of xanthan gum if your blend does not already contain it. The texture will be slightly more delicate.
7. Vegan Thumbprint Cookies
Use vegan butter and a flax egg (1 tbsp ground flax + 3 tbsp water, let sit for 5 minutes). Use a plant‑based jam and a simple powdered sugar glaze with plant‑based milk.
Replace the lemon juice with fresh orange juice and add orange zest. The orange glaze pairs beautifully with raspberry jam.
Want the full truth and the practical next steps?
Page 2 continues with the real explanation, the key details many readers skip, and the simple takeaways that make this guide more useful.