
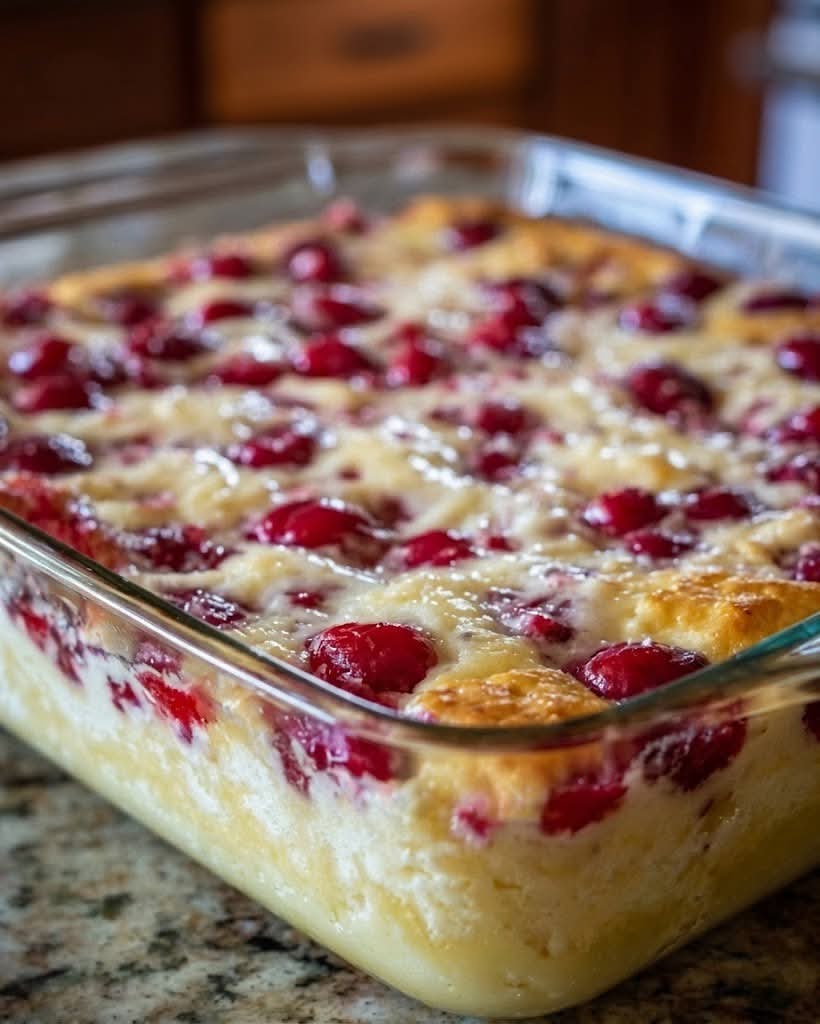
There are French desserts that are intimidating, and then there is Cherry Clafoutis – the kind of rustic, elegant, custard‑like masterpiece that looks like it came from a Parisian bakery but is almost embarrassingly easy to make. Imagine a golden, puffed, tender pancake‑like batter, studded with sweet, juicy cherries, baked until the edges are crisp and the center is soft and creamy. A dusting of powdered sugar is all it needs. This is the dessert that celebrates fresh cherries in the most glorious way. If you are searching for a classic cherry clafoutis recipe that is simple, impressive, and absolutely delicious, this is the one.
Clafoutis (pronounced “kla‑foo‑TEE”) hails from the Limousin region of France. Traditionally made with unpitted black cherries (the pits add a subtle almond flavor), this dessert has become a beloved summer staple around the world. It is not a cake, not a custard, not a pancake – it is somewhere in between, and it is pure magic. This French cherry dessert will become your go‑to for cherry season.
In this complete guide, you will learn how to make the perfect cherry clafoutis, including pro tips for a silky, lump‑free batter, delicious variations (use other fruits, add almond extract, or make it dairy‑free), storage and reheating instructions, and why this simple dessert has stood the test of time. Let’s preheat that oven.
Why Cherry Clafoutis Is a French Summer Classic
Clafoutis is beloved because it is simple, forgiving, and showcases fresh fruit beautifully. The batter is a quick, blender‑friendly mixture of eggs, milk, cream, flour, and sugar – no complicated techniques. The cherries soften and become jammy as they bake, while the batter puffs into a golden, custardy cloud. It is traditionally served slightly warm, dusted with powdered sugar, often with a dollop of crème fraîche or a scoop of vanilla ice cream. This is a rustic French fruit dessert that works for brunch, dessert, or even breakfast.
Here is why you will love it:
Only 15 minutes of active prep – Then the oven does the work.
One bowl or blender – Minimal cleanup.
Incredibly versatile – Use any seasonal fruit (peaches, plums, berries).
Elegant yet rustic – Impressive without fuss.
Naturally gluten‑free option – Use a gluten‑free flour blend.
Perfect for cherry season – A celebration of summer.
Kid‑friendly and adult‑loved – A guaranteed hit.
Once you try this easy French clafoutis, you will make it every cherry season.
The Complete Cherry Clafoutis Recipe
This recipe serves 6‑8 people. It fits a 10‑inch cast iron skillet, a 9‑inch pie dish, or a 9×9 square baking dish. It can easily be doubled.
Ingredients:
1 lb (450g) fresh sweet cherries, pitted (or leave pits in for traditional flavor)
3 large eggs, room temperature
½ cup (100g) granulated sugar
1 cup (240ml) whole milk
½ cup (120ml) heavy cream (or use all milk for a lighter version)
½ cup (65g) all‑purpose flour (or ½ cup gluten‑free flour blend)
2 teaspoons vanilla extract
¼ teaspoon salt
1 tablespoon unsalted butter (for greasing the dish)
Powdered sugar for dusting
Optional: ¼ teaspoon almond extract (traditional flavor)
Equipment:
- 10‑inch cast iron skillet or 9‑inch pie dish
- Blender or large mixing bowl and whisk
- Cherry pitter or small knife
- Cooling rack
Step‑by‑Step Instructions
Step 1 – Preheat and Prepare the Dish
Preheat your oven to 350°F (175°C). Generously butter a 10‑inch cast iron skillet, a 9‑inch pie dish, or a 9×9 square baking dish. Place the dish on a baking sheet to catch any drips.
Step 2 – Prepare the Cherries
Wash and dry the cherries. If you prefer to remove the pits, use a cherry pitter or carefully cut around the pit with a small knife. Traditional clafoutis uses unpitted cherries – the pits add a subtle almond‑like flavor and prevent the cherries from releasing too much juice. However, pitted cherries are easier to eat. Choose your preference. Arrange the cherries in a single layer in the prepared baking dish.
Step 3 – Make the Batter
In a blender or a large bowl, combine the eggs, granulated sugar, milk, heavy cream, flour, vanilla extract, salt, and almond extract (if using). Blend or whisk until smooth and frothy. The batter should be thin, like heavy cream. If mixing by hand, whisk vigorously to ensure no lumps remain.
Step 4 – Pour the Batter Over the Cherries
Pour the batter evenly over the cherries. The cherries may float – that is fine. Use a spatula to gently nudge the batter to cover any exposed fruit.
Step 5 – Bake
Bake at 350°F for 35‑45 minutes, until the clafoutis is puffed, golden brown, and set in the center. A knife inserted into the center should come out clean (a few moist crumbs are fine, but not wet batter). The edges will be darker and slightly crisp. Do not overbake, or it will become dry.
Step 6 – Cool and Serve
Let the clafoutis cool in the pan for 10‑15 minutes. It will deflate slightly – that is normal. Dust generously with powdered sugar. Serve warm, at room temperature, or even chilled. It is delicious on its own or with a dollop of whipped cream, crème fraîche, or vanilla ice cream.
Pro Tips for the Best Cherry Clafoutis
Follow these expert tips for perfect French clafoutis every time:
Use ripe, sweet cherries – The flavor of the dessert depends on the fruit. Dark sweet cherries (Bing, Rainier) are ideal.
Do not overmix the batter – Overmixing can develop gluten, making the clafoutis tough. Blend just until smooth.
Let the batter rest (optional) – Letting the batter sit for 15‑30 minutes allows the flour to hydrate, resulting in a smoother texture.
Do not open the oven door during the first 25 minutes – Cold air can cause the clafoutis to deflate.
Use a cast iron skillet for the crispiest edges – Cast iron retains heat beautifully and creates a golden crust.
Pitting cherries? Catch the juice – If you pit the cherries, work over a bowl to catch any juice. You can add the juice to the batter for extra flavor.
Make it dairy‑free – Use unsweetened almond milk or oat milk, and coconut cream instead of heavy cream. Use vegan butter.
Want the full truth and the practical next steps?
Page 2 continues with the real explanation, the key details many readers skip, and the simple takeaways that make this guide more useful.