
There are healthy breakfasts that taste like cardboard, and then there are these High Protein Strawberry Cheesecake Yogurt Jars – the kind of creamy, fruity, satisfying meal prep that makes you excited to open the fridge in the morning. Imagine layers of velvety cheesecake‑style yogurt, sweet macerated strawberries, and a buttery, crunchy crumb topping – all packed into a portable jar. It tastes exactly like strawberry cheesecake, but it is made with Greek yogurt, cream cheese, and protein powder, with no baking required. Each jar is loaded with protein, naturally sweetened with honey or maple syrup, and perfect for breakfast, a post‑workout snack, or a healthy dessert. If you are searching for a high protein strawberry cheesecake yogurt jar recipe that is easy, delicious, and perfect for meal prep, this is the one.
Whether you are meal prepping for the week, need a quick grab‑and‑go breakfast, or want a healthy dessert that satisfies your sweet tooth, these yogurt jars deliver. They come together in minutes, look beautiful in mason jars, and stay fresh in the fridge for days. This no bake cheesecake yogurt bowl will become a staple in your kitchen.
In this complete guide, you will learn how to make the perfect high protein strawberry cheesecake yogurt jars, including pro tips for the creamiest texture, delicious variations (use blueberries, add chocolate chips, or make it vegan), storage and meal prep instructions, and why this recipe is a total game‑changer for healthy eating. Let’s get layering.
Why These Strawberry Cheesecake Yogurt Jars Are a Meal Prep Hero
These jars are incredibly creamy and satisfying, packed with 20‑25g of protein per serving, no‑bake and ready in 15 minutes, naturally sweetened with honey or maple syrup, made with simple, wholesome ingredients, and perfect for breakfast, snacks, or dessert. The combination of Greek yogurt and cream cheese creates a thick, tangy, cheesecake‑like filling that is rich and decadent without being heavy. The fresh strawberries add sweetness, brightness, and a pop of color. The crumb layer – made from graham crackers, granola, or digestive biscuits – provides a satisfying crunch. Layered in small jars, they are portable, portion‑controlled, and absolutely gorgeous. This is a high protein meal prep breakfast that you will actually look forward to eating.
Here is why you will love it:
Only 15 minutes of active prep – Then chill and enjoy.
No oven, no baking – Perfect for hot days.
Packed with protein – Greek yogurt, cream cheese, and optional protein powder.
Tastes like dessert – Satisfies cheesecake cravings without the sugar crash.
Customizable – Use different fruits, add chocolate chips, or make it vegan.
Great for meal prep – Stays fresh for 3 days in the fridge.
Kid‑friendly and adult‑loved – A guaranteed hit.
Once you try these healthy strawberry cheesecake jars, you will never buy sugary yogurt parfaits again.
The Complete High Protein Strawberry Cheesecake Yogurt Jars Recipe
This recipe makes 4 small jars (about 8 oz each). It can easily be doubled.
Ingredients – For the Cheesecake Yogurt Layer:
2 cups (480g) plain Greek yogurt – full‑fat or 2% for creaminess
4 oz (113g) cream cheese, softened to room temperature
2‑3 tablespoons honey or maple syrup – adjust to taste
1 teaspoon vanilla extract
1 scoop (30g) vanilla protein powder – optional but highly recommended for extra protein
1‑2 tablespoons milk – only if needed to loosen the mixture
Ingredients – For the Strawberry Layer:
2 cups fresh strawberries, chopped (about 300g)
1 tablespoon honey or maple syrup (optional, if strawberries are tart)
1 teaspoon lemon juice (optional, for brightness)
Ingredients – For the Crumb Layer:
¾ cup (75g) crushed graham crackers, granola, or digestive biscuits
1 tablespoon melted butter or coconut oil (optional, for richer crumbs)
Pinch of cinnamon (optional)
Equipment:
- 4 small mason jars or glass containers (8 oz each)
- Mixing bowls
- Electric mixer or whisk
- Spatula
- Measuring cups and spoons
Step‑by‑Step Instructions
Step 1 – Make the Cheesecake Yogurt Filling
In a medium bowl, beat the softened cream cheese with a hand mixer or a whisk until smooth and creamy. Add the Greek yogurt, honey (or maple syrup), vanilla extract, and protein powder (if using). Mix until well combined and creamy. The mixture should be thick and spreadable. If it is too thick to layer easily, add a splash of milk (1 tablespoon at a time) until it reaches a creamy, spoonable consistency. Taste and adjust sweetness if needed.
Step 2 – Prepare the Strawberries
Wash and dry the strawberries. Remove the stems and chop them into small, bite‑sized pieces. In a small bowl, combine the chopped strawberries with honey (if using) and lemon juice. Let them sit for 5‑10 minutes. This maceration process draws out the natural juices, creating a light syrup that adds flavor and moisture to the jars.
Step 3 – Make the Crumb Layer
Crush the graham crackers, granola, or digestive biscuits into fine crumbs. You can use a food processor, a rolling pin, or a zip‑top bag. In a small bowl, mix the crumbs with melted butter (if using) and a pinch of cinnamon. The butter adds richness and helps the crumbs hold together. If you prefer a lighter, crunchy topping, skip the butter and use dry crumbs.
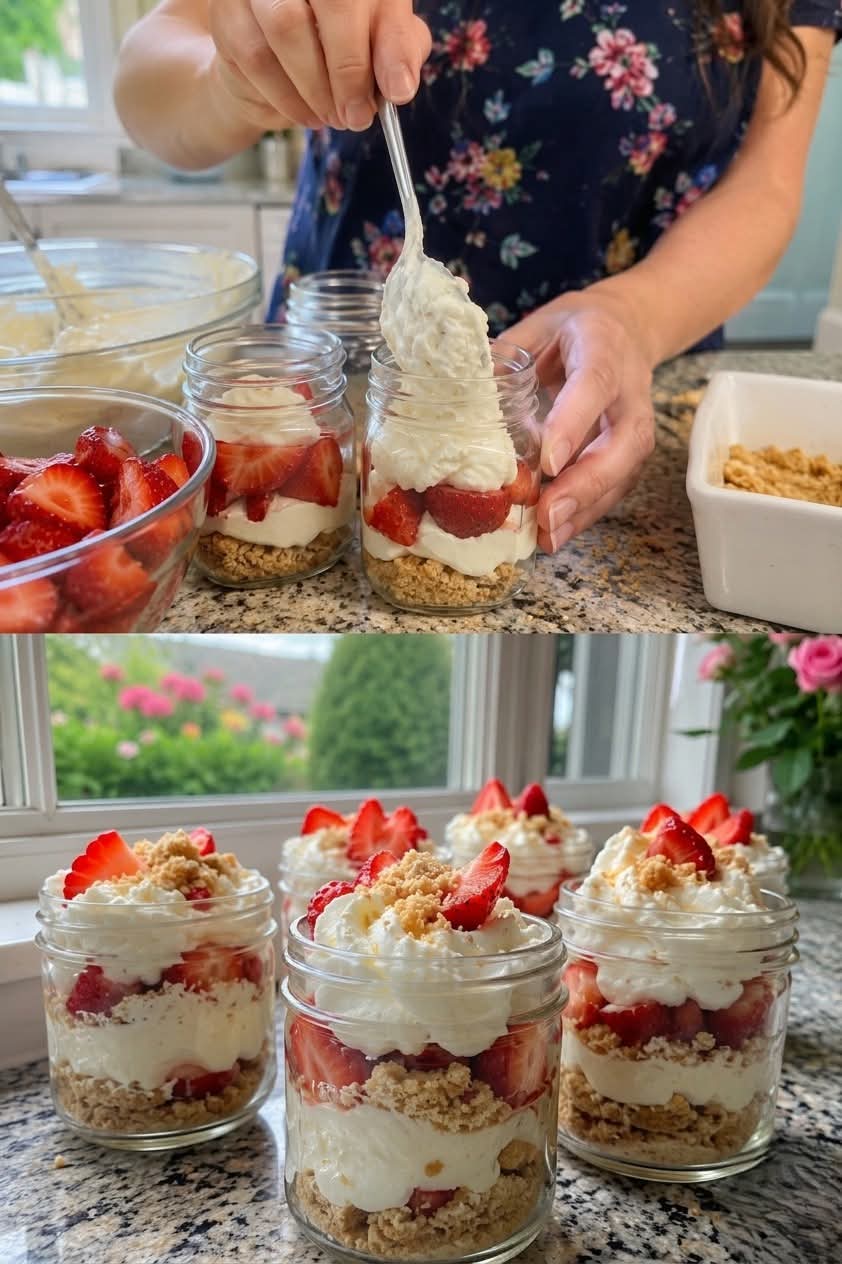
Step 4 – Layer the Jars
Place the 4 jars on a work surface. Start with a layer of crumbs at the bottom of each jar (about 1‑2 tablespoons). Spoon a generous layer of the cheesecake yogurt mixture over the crumbs (about ¼ cup). Add a layer of the macerated strawberries (about 2 tablespoons). Repeat the layers if your jars are tall enough – yogurt, then strawberries, then more yogurt. You can do two layers of each for a beautiful striped effect.
Step 5 – Top Them Off
Finish with a final spoonful of yogurt mixture, a few fresh strawberry slices (reserve some from the 2 cups), and a sprinkle of crumbs on top. This gives a pretty presentation and adds crunch with every bite.
Step 6 – Chill
Cover the jars with lids or plastic wrap. Refrigerate for at least 30 minutes, or overnight for the best texture. Chilling allows the flavors to meld and the layers to set. The jars will stay fresh for up to 3 days.
Want the full truth and the practical next steps?
Page 2 continues with the real explanation, the key details many readers skip, and the simple takeaways that make this guide more useful.