
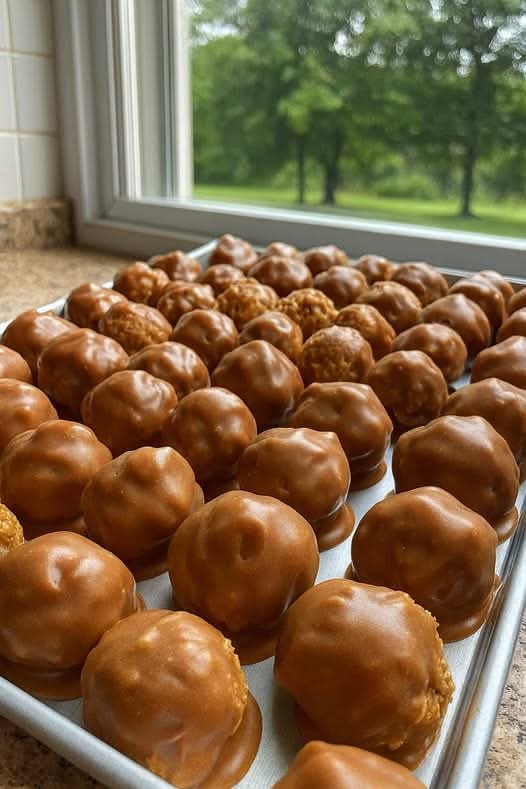
There are candies that come from a store, and then there are candies that come from Grandma’s kitchen – the kind that fill a tin on the counter and disappear one by one, every time someone walks by. Grandma’s Peanut Butter Balls are exactly that. Imagine a creamy, melt‑in‑your‑mouth peanut butter center, sweet but not cloying, with just a whisper of vanilla. Then imagine that center enveloped in a thin, snappy shell of semi‑sweet chocolate. Each bite is a perfect balance of salty peanut butter and rich cocoa. These no‑bake treats require no oven, no candy thermometer, and just a handful of pantry ingredients. If you are searching for old‑fashioned peanut butter balls that taste like childhood, this recipe is for you.
Whether you need a homemade gift for Christmas, a sweet snack for bake sales, or simply a way to use up that jar of peanut butter, these peanut butter balls are easy, forgiving, and absolutely addictive. This no‑bake chocolate peanut butter treat will become a family tradition.
In this complete guide, you will learn Grandma’s original recipe (no weird ingredients – just peanut butter, butter, powdered sugar, and chocolate), pro tips for the perfect creamy texture, delicious variations (add rice krispies, use white chocolate, make them spicy), storage advice, and why this classic candy has stood the test of time. Let’s get rolling.
Why Grandma’s Peanut Butter Balls Are a Timeless Classic
Peanut butter balls – also known as buckeyes (especially when you leave a bit of peanut butter showing) – have been a staple of American home candy making since the mid‑20th century. They likely originated as a simple, no‑fuss way to use pantry staples during the holidays. Grandma’s version is the purest: creamy peanut butter, softened butter, confectioners’ sugar, and a dip in melted chocolate. The result is a candy that is simultaneously rich, sweet, salty, and satisfying. This easy holiday candy recipe requires no special equipment or skills.
Here is why you will love it:
Only 6 simple ingredients – Peanut butter, butter, powdered sugar, vanilla, chocolate, salt.
No baking required – Perfect for hot days or when the oven is full.
Ready in under an hour (plus chilling time).
Incredibly creamy and smooth – No grittiness, just pure peanut butter bliss.
Customizable – Add rice krispies for crunch, use dark chocolate, or roll in sprinkles.
Perfect for gifting – Pack in tins, cellophane bags, or cookie boxes.
Make‑ahead and freezer‑friendly – Stays fresh for months.
Once you try these grandma’s peanut butter bites, you will understand why they’ve been passed down for generations.
The Complete Grandma Peanut Butter Balls Recipe
This recipe makes about 40‑50 small balls (about 1 inch each) or 25‑30 larger balls. It can easily be doubled.
Ingredients:
1 cup (240g) creamy peanut butter – use standard brands like Jif or Skippy (natural peanut butter that separates can be too runny; if using natural, stir well and add an extra ¼ cup powdered sugar)
½ cup (113g, 1 stick) unsalted butter, softened to room temperature
2 ½ cups (300g) powdered sugar (confectioners’ sugar) – sifted if lumpy
1 teaspoon vanilla extract
¼ teaspoon salt – only if using unsalted peanut butter
12 oz (340g) semi‑sweet chocolate chips or melting wafers – for dipping
1 tablespoon coconut oil or vegetable shortening – optional, for thinning the chocolate
Equipment:
Large mixing bowl
Hand mixer or sturdy spatula
Baking sheet lined with parchment paper or wax paper
Small cookie scoop or teaspoon
Fork or toothpicks (for dipping)
Double boiler or microwave‑safe bowl
Step‑by‑Step Instructions
Step 1 – Cream the Butter and Peanut Butter
In a large mixing bowl, combine the softened butter and peanut butter. Using a hand mixer (or a strong spatula), beat until smooth and fully blended, about 1‑2 minutes. The mixture should be light and creamy. If your peanut butter is very stiff, let it sit at room temperature for 15 minutes.
Step 2 – Add Vanilla and Salt
Mix in the vanilla extract and salt (if using). Stir to combine.
Step 3 – Gradually Add Powdered Sugar
Add the powdered sugar one cup at a time, mixing on low speed after each addition. The mixture will become crumbly at first, then come together into a thick, dough‑like consistency. You may need to use your hands at the end to fully incorporate the sugar – it should feel like soft play dough, not sticky. If it is too sticky, add an extra ¼ cup of powdered sugar. If it is too dry and crumbly, add a teaspoon of milk or softened butter.
Step 4 – Chill the Peanut Butter Dough
Cover the bowl with plastic wrap and refrigerate for at least 30 minutes, or up to 2 hours. Chilling makes the dough firm enough to roll into balls without sticking to your hands. This step is essential for homemade buckeye candy that holds its shape.
Step 5 – Roll into Balls
Line a baking sheet with parchment paper. Scoop teaspoon‑sized portions of the chilled dough (about 15g each) and roll them between your palms into smooth, round balls. Place the balls on the prepared baking sheet, spacing them about ½ inch apart. For true buckeyes, roll the balls and then slightly flatten one side. For fully coated chocolate peanut butter balls, keep them round. Refrigerate the rolled balls for another 15‑20 minutes – cold balls dip much more cleanly.
Step 6 – Melt the Chocolate
Place the chocolate chips (and coconut oil or shortening, if using) in a microwave‑safe bowl. Microwave in 30‑second intervals, stirring after each, until the chocolate is smooth and fully melted. Do not overheat – chocolate can seize. Alternatively, use a double boiler on the stovetop. The coconut oil helps the chocolate become thinner and shinier, making dipping easier.
Step 7 – Dip the Peanut Butter Balls
Remove the chilled balls from the refrigerator. Using a fork, a dipping tool, or a toothpick, lower one ball at a time into the melted chocolate. Turn to coat completely (or leave the top exposed for buckeye style). Lift the ball out, allowing excess chocolate to drip back into the bowl. Gently scrape the bottom of the fork against the bowl’s rim to remove drips. Place the dipped ball back on the parchment‑lined baking sheet. Repeat with the remaining balls. If the chocolate becomes too thick, reheat it for 10‑15 seconds in the microwave.
Pro tip for buckeyes: Insert a toothpick into each ball before dipping. Hold the toothpick, dip the ball, leaving a small circle of peanut butter exposed at the top. Place on the sheet, then remove the toothpick and smooth the hole with a fingertip.
Step 8 – Let the Chocolate Set
Allow the dipped balls to sit at room temperature for 30‑60 minutes until the chocolate is completely firm. Or, for faster setting, place the baking sheet in the refrigerator for 10‑15 minutes. Do not freeze – condensation can cause streaks.
Step 9 – Serve and Store
Once the chocolate is set, transfer the peanut butter balls to an airtight container. Store at room temperature or in the refrigerator. Serve cold or at room temperature – both are delicious.
Pro Tips for the Best Grandma Peanut Butter Balls
Follow these expert tips for creamy homemade peanut butter truffles every time:
Use standard creamy peanut butter – Skippy, Jif, or Peter Pan work best. Natural peanut butter (the kind with oil on top) can be too runny and cause the balls to be soft. If you only have natural, drain off the excess oil and add an extra ¼ cup of powdered sugar.
Soften the butter, don’t melt it – Melted butter makes the dough greasy and hard to roll. Softened butter (room temperature, still solid but easily pressed) creates a smooth, cohesive dough.
Sift your powdered sugar – Lumps in the sugar lead to lumps in the candy. A quick sift or whisk before adding prevents this.
Chill the dough and the balls – Patience is key. Cold dough rolls easily; cold balls dip cleanly without falling apart in the warm chocolate.
Thin the chocolate – Adding a tablespoon of coconut oil or shortening makes the chocolate thinner, smoother, and gives a professional, snappy finish.
Work in small batches – If the chocolate cools and thickens, reheat it gently. Don’t let the peanut butter balls sit out too long while dipping – return them to the fridge if they soften.
Decorate while wet – If you want sprinkles, crushed nuts, or sea salt, add them immediately after dipping before the chocolate sets.
Want the full truth and the practical next steps?
Page 2 continues with the real explanation, the key details many readers skip, and the simple takeaways that make this guide more useful.