
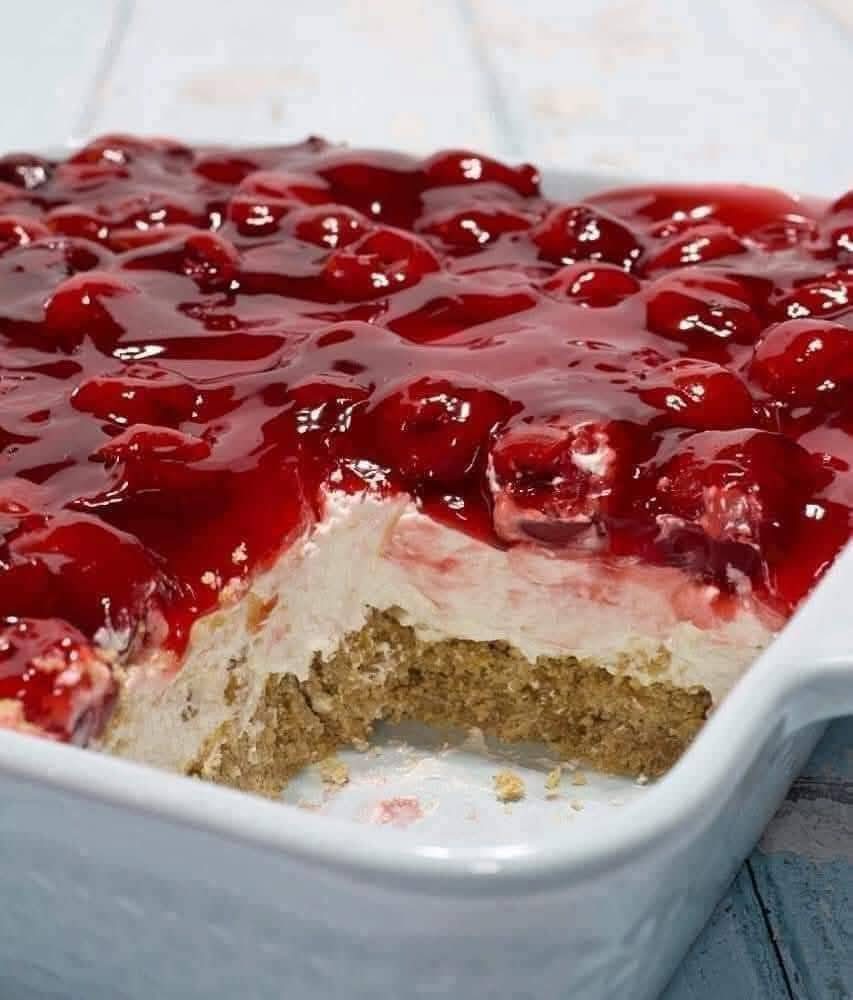
Discover the timeless classic Cherry Delight! A buttery graham cracker crust, creamy cheesecake filling, and sweet cherry topping—all no‑bake. Perfect for holidays, potlucks, or any sweet craving.
Let me introduce you to a dessert that has graced family gatherings, church potlucks, and holiday tables for generations—Classic Cherry Delight.
If you grew up in the 70s, 80s, or 90s, you’ve likely encountered this iconic no‑bake dessert. It’s the kind of recipe that gets passed down in stained index cards, made for every birthday and summer barbecue. Layers of buttery graham cracker crust, a silky cream cheese filling, and a sweet, tart cherry topping come together in a dish that’s both nostalgic and endlessly satisfying.
What I love about Cherry Delight is its simplicity. There’s no oven required, no complicated techniques, and the ingredients are pantry staples. Yet when you pull it from the refrigerator, it looks like a million bucks—a beautiful layered dessert that everyone wants a piece of.
In this guide, I’ll share the classic recipe, along with pro tips, delicious variations, and answers to all your questions. Whether you’re making it for a holiday, a summer picnic, or just because, this Cherry Delight will earn you rave reviews.
Why You’ll Love This Classic Cherry Delight
No‑Bake Simplicity
Perfect for hot days when you don’t want to turn on the oven. It comes together in about 20 minutes of active prep.
Layers of Texture
Buttery, crumbly crust, creamy, tangy filling, and sweet, juicy cherries—every bite is a delight.
Make‑Ahead Friendly
This dessert needs to chill, so you can prepare it a day or two ahead—ideal for entertaining.
Crowd‑Pleasing
The combination of cream cheese and cherry pie filling is universally loved. It’s always the first dessert to disappear.
Endlessly Customizable
Swap the fruit, change the crust, or add a drizzle of chocolate—the possibilities are endless.
Ingredients
Ingredient Amount Notes
Graham cracker crumbs 2 cups About 16 full sheets
Granulated sugar ¼ cup For crust
Unsalted butter ½ cup (1 stick) Melted
Cream cheese 8 oz (1 block) Full‑fat, softened
Powdered sugar 1 cup Sifted
Vanilla extract 1 teaspoon
Whipped topping (Cool Whip) 8 oz (1 container) Thawed
Cherry pie filling 1 can (21 oz) Or about 2 cups
Optional Toppings
· Extra whipped cream
· Fresh cherries
· Chocolate shavings
· Chopped nuts
Step‑by‑Step Instructions
Step 1: Make the Crust
In a medium bowl, combine the graham cracker crumbs and granulated sugar. Pour in the melted butter and stir until all crumbs are moistened. Press firmly into the bottom of a 9×9‑inch square pan, a 9‑inch springform pan, or an 8×8‑inch dish. Use the back of a spoon or the bottom of a measuring cup to press evenly. Refrigerate while you prepare the filling.
Step 2: Prepare the Cream Cheese Layer
In a large bowl, beat the softened cream cheese with an electric mixer until smooth and creamy, about 2 minutes. Add the powdered sugar and vanilla extract, and beat until well combined and fluffy.
Step 3: Fold in Whipped Topping
Gently fold the thawed whipped topping into the cream cheese mixture with a spatula. Fold until no white streaks remain and the mixture is uniform. Be careful not to overmix—you want to keep the airiness.
Step 4: Assemble
Spread the cream cheese mixture evenly over the chilled crust. Smooth the top with a spatula.
Step 5: Add Cherry Topping
Spoon the cherry pie filling over the cream cheese layer, spreading gently to cover the surface.
Step 6: Chill
Cover the dish with plastic wrap or foil and refrigerate for at least 4 hours, or overnight. The dessert needs time to set; it will be too soft to slice if not chilled long enough.
Step 7: Serve
Before serving, you can add optional garnishes: a dollop of whipped cream, fresh cherries, or a sprinkle of chocolate shavings. Slice and enjoy.
Pro Tips for the Perfect Cherry Delight
- Soften Cream Cheese Properly
Let the cream cheese sit at room temperature for 30–60 minutes before mixing. Cold cream cheese will leave lumps.
- Use Full‑Fat Cream Cheese
Low‑fat cream cheese can make the filling runny. Full‑fat gives the best texture and flavor.
- Press the Crust Firmly
A compact crust holds together better when slicing. Use a flat‑bottomed glass or measuring cup to press it firmly.
- Fold, Don’t Stir
When adding whipped topping, fold gently to keep the filling light and airy.
- Chill Thoroughly
Under‑chilled dessert will be difficult to slice. Aim for at least 4 hours; overnight is even better.
- Use a Sharp Knife for Clean Slices
Wipe the knife between cuts for neat pieces. If using a springform pan, remove the sides before slicing.
Delicious Variations
- Strawberry Delight
Replace cherry pie filling with strawberry pie filling or fresh sliced strawberries tossed with a little sugar.
- Blueberry Delight
Use blueberry pie filling or a homemade blueberry compote.
- Chocolate Cherry Delight
Add 2 tablespoons of unsweetened cocoa powder to the cream cheese mixture. Top with cherry pie filling.
- Lemon Delight
Add 1 tablespoon lemon zest and 2 tablespoons lemon juice to the cream cheese mixture. Top with raspberry or blueberry filling.
- Oreo Crust
Replace graham crackers with crushed Oreos (remove the filling if you prefer). Use about 2 cups of crumbs and the same amount of butter.
- Peanut Butter Delight
Add ½ cup creamy peanut butter to the cream cheese mixture. Top with chocolate or cherry filling.
- Gluten‑Free Version
Use gluten‑free graham crackers or gluten‑free vanilla wafers for the crust.
- Individual Servings
Layer the crust, filling, and topping in small cups or mason jars for portable, no‑slice desserts.
Serving Suggestions
· As a dessert: Serve chilled with a dollop of whipped cream.
· For parties: Present in a clear glass dish to show off the beautiful layers.
· With coffee: The sweet, tangy flavors pair wonderfully with a cup of black coffee or espresso.
· For a crowd: Make in a 9×13‑inch pan for more servings.
Storage and Make‑Ahead Tips
Refrigerator Storage
Cover and refrigerate for up to 3–4 days. The crust will soften slightly, but the dessert will still be delicious.
Freezer Instructions
You can freeze the cheesecake (without topping) for up to 2 months. Wrap tightly in plastic wrap and foil. Thaw overnight in the refrigerator before adding topping and serving.
Make‑Ahead Timeline
· Up to 2 days ahead: Assemble the dessert completely and refrigerate. Add garnishes just before serving.
· Up to 1 month ahead: Freeze the plain cheesecake, then thaw and top when ready.
Frequently Asked Questions (FAQs)
Q: Can I use homemade whipped cream instead of Cool Whip?
A: Yes. Whip 1 cup of heavy cream with 2 tablespoons of powdered sugar until stiff peaks form. Fold into the cream cheese mixture. The texture will be slightly less stable but still delicious.
Q: Why is my filling runny?
A: Runny filling can result from under‑chilling, using low‑fat cream cheese, or not draining any liquid from the whipped topping. Ensure the cream cheese is fully softened and the dessert chills for at least 4 hours.
Q: Can I use a different crust?
A: Absolutely. Crushed shortbread cookies, vanilla wafers, or even pretzels make great alternatives.
Q: How do I get clean slices?
A: Use a sharp knife and wipe it clean between cuts. For a springform pan, remove the sides before slicing. Chilling thoroughly is essential.
Q: Can I use fresh fruit instead of pie filling?
A: Yes. Cook fresh cherries or other fruit with sugar and a little cornstarch to make a thickened topping. Cool completely before spreading.
Q: Is this dessert gluten‑free?
A: With gluten‑free graham crackers or cookies, yes.
Q: How many servings does this make?
A: A 9×9‑inch pan yields 9–12 servings. A springform pan yields 8–10 wedges.
Nutritional Information
Per serving (based on 12 servings)
Nutrient Amount
Calories ~280–320
Total Fat 14–18g
Saturated Fat 8–10g
Cholesterol 30–40mg
Sodium 180–220mg
Total Carbohydrates 34–38g
Dietary Fiber 1–2g
Sugars 24–28g
Protein 3–4g
Values are estimates and will vary with specific ingredients.
Conclusion
Classic Cherry Delight is a dessert that stands the test of time. With its buttery crust, creamy filling, and sweet cherry topping, it’s a simple yet elegant treat that works for any occasion. No oven, no fuss—just layers of deliciousness that come together in minutes.
What I love most about this recipe is its versatility. Make it in any dish, swap the fruit, change the crust, and serve it for everything from summer picnics to holiday dinners. It’s a staple in my kitchen, and I hope it becomes one in yours too.
Now it’s your turn! What’s your favorite no‑bake dessert? Share your creations in the comments below.
And if you’re looking for more easy dessert recipes, check out our guides for No‑Bake Lemon Cheesecake, Easy Chocolate Mousse, and Fruit Pizza.
Happy no‑baking! 🍒✨
Did you make this Classic Cherry Delight? We’d love to see your beautiful layers! Leave a comment below and share your photos. Don’t forget to pin this recipe for your next gathering.
More Recipes You Might Like
-
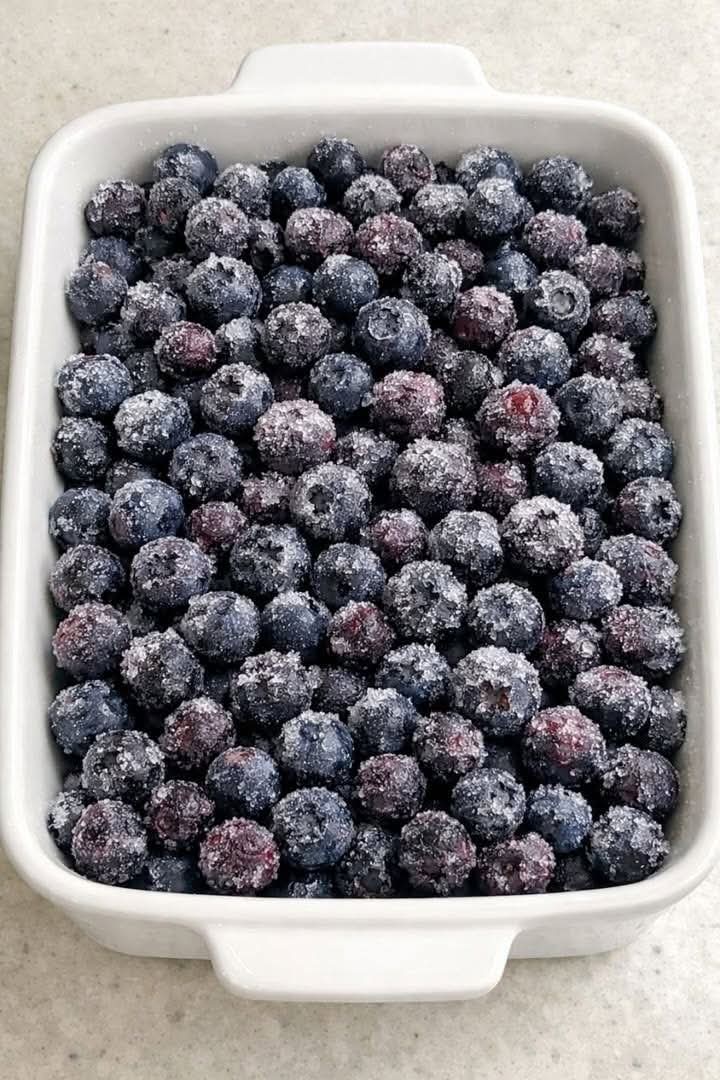
3 Ingredient Blueberry Dump Casserole: The Unbelievably Easy Dessert That Disappears Fast
You don’t need a dozen ingredients, a stand mixer, or complicated steps to create a dessert that will have your husband (and everyone else) going back for thirds. Just dump frozen raw blueberries straight into a casserole dish with three simple ingredients, bake, and watch magic happen. This Blueberry Dump Casserole is a cross between…
-
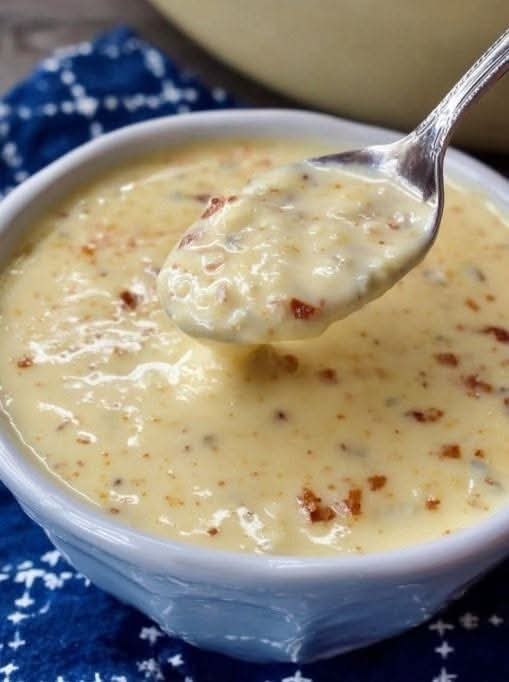
Canadian Cheese Soup: The Velvety, Bacon‑Infused Comfort Classic
When the temperature drops and you crave something deeply satisfying, nothing hits like a bowl of Canadian Cheese Soup. This is not a thin, boxed cheese soup — it’s a rich, lager‑laced, sharp‑cheddar chowder with smoky bacon and a velvety smooth texture that warms you from the inside out. Made famous by the Le Cellier…
-
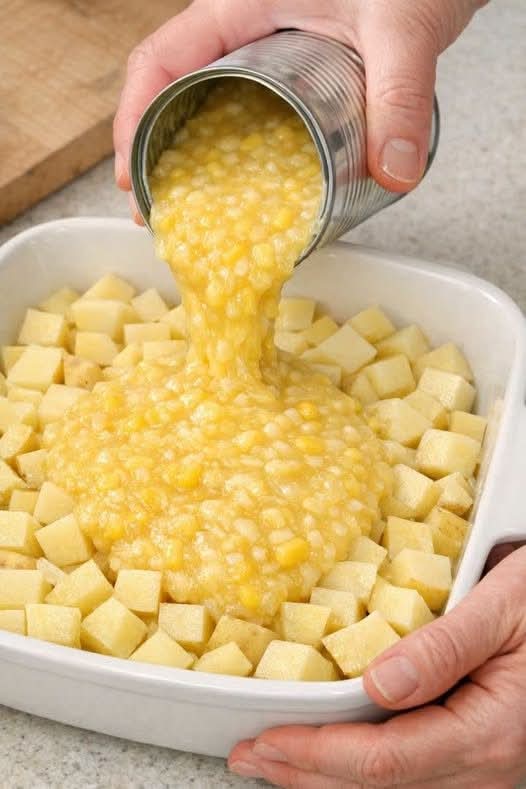
Creamy Corn Potato Casserole: The Side Dish That Disappears Every Time
Some side dishes are forgettable. This one is not. Creamy Corn Potato Casserole is the kind of recipe that earns a permanent spot in your holiday and weeknight rotation. With just a handful of humble ingredients – diced Yukon Gold potatoes, cream‑style corn, and plenty of sharp cheddar – you get a bubbling, golden, spoonable…