
Is your mop dark, smelly, and stained? Don’t toss it. Learn how to clean a dirty mop with hot water, vinegar, and baking soda. Restore it to like‑new condition in under an hour.
Let’s be honest: we’ve all been there. You look at your mop after cleaning the floors, and the once‑bright fibers are now dark, matted, and maybe even a little smelly. You rinse it, squeeze it, but the water still runs gray. You think, “There’s no way this thing can ever be clean again.”
It feels easier to just throw it out and buy a new one. After all, mops aren’t that expensive. But before you toss it into the trash, consider this: there’s a simple cleaning trick that can bring your mop back to life – using ingredients you probably already have in your kitchen.
A dirty, smelly mop isn’t just unpleasant; it’s also less effective at cleaning your floors. It can spread bacteria and leave behind a musty odor instead of a fresh, clean scent. But with a little hot water, white vinegar, baking soda, and dish soap, you can restore your mop to nearly new condition – saving money and reducing waste.
In this guide, I’ll walk you through exactly why mops get so dirty, the simple step‑by‑step cleaning method that works for most mop types, and how to keep your mop cleaner for longer. No harsh chemicals, no expensive replacements – just a little time and common household staples.
Let’s give that tired mop a second life.
Why Mops Get So Dirty (And Smelly)
Mops don’t just clean your floors – they collect everything that’s on them. Over time, that buildup turns your mop into a breeding ground for grime and bacteria.
What Builds Up on Your Mop
Type of Buildup How It Happens
Dirt and dust Everyday foot traffic, pet hair, and airborne particles
Grease and residue Kitchen spills, body oils tracked from bare feet, cleaning product residue
Bacteria Moisture + organic matter = bacterial growth
Minerals Hard water deposits from repeated rinsing
Mildew and mold Leaving the mop damp in a dark, poorly ventilated space
Signs Your Mop Needs a Deep Clean
· Dark, gray, or brown stains that won’t rinse out
· A musty, sour, or unpleasant smell even after rinsing
· Dirty water every time you wring it out – it never runs clear
· Stiff or matted fibers instead of soft, fluffy strands
· Leaving streaks or dirt behind when you clean your floors
If any of these sound familiar, your mop isn’t just dirty – it’s overdue for a deep clean.
Why You Shouldn’t Just Throw It Away
It’s tempting to toss a dirty mop and buy a new one. But consider:
Reason Explanation
Cost savings A good mop head or sponge can cost $5–15. Why spend that if you can restore it for pennies?
Environmental impact Mop heads are often made of synthetic materials that don’t biodegrade quickly. Less waste is better.
Convenience You don’t have to run to the store. The cleaning solution is already in your pantry.
Satisfaction There’s a real sense of accomplishment in restoring something instead of discarding it.
Before you replace it, try this simple method. In most cases, you’ll be surprised at how well it works.
The Simple Cleaning Solution – What You’ll Need
You don’t need fancy, expensive cleaning products. These common household ingredients are highly effective at breaking down grime, cutting grease, and neutralizing odors.
Ingredient Role
Hot water Loosens dirt, grease, and stuck‑on residue; activates other ingredients
White vinegar Natural acid that dissolves mineral deposits, kills bacteria, and neutralizes odors
Baking soda (optional) Mild abrasive that lifts stubborn stains; deodorizes
Dish soap Cuts through grease and helps release dirt from fibers
What if you don’t have all these ingredients? Vinegar and hot water alone will still make a big difference. Baking soda adds extra power for heavily soiled mops.
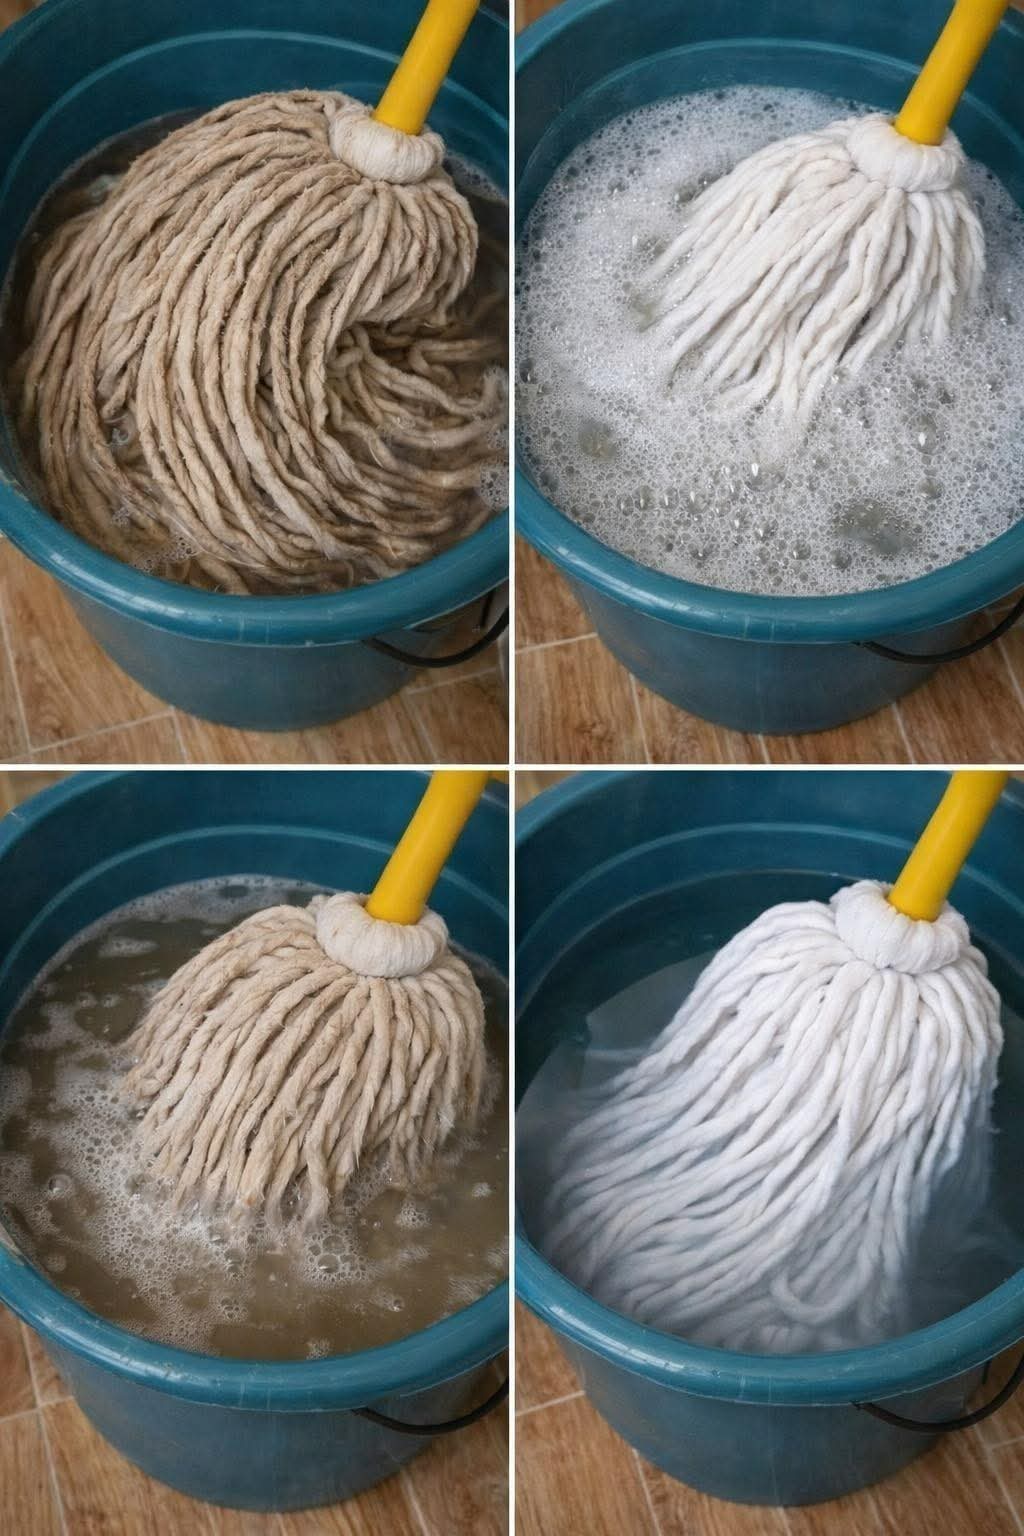
Step‑by‑Step Method to Clean Your Dirty Mop
Follow these simple steps. The whole process takes about an hour, but most of that is passive soaking time.
Step 1: Remove the Mop Head (If Possible)
If your mop has a removable head (sponge, microfiber, or string), take it off. This makes soaking and rinsing much easier. If the head is not removable, you can still clean it by placing the entire mop in a bucket or sink – just make sure the handle doesn’t block full submersion.
Step 2: Prepare the Cleaning Solution
Find a bucket, large bowl, or sink deep enough to fully submerge the mop head.
· Fill with hot water – as hot as your tap can get, but not boiling (boiling water can damage some synthetic fibers).
· Add 1 cup of white vinegar.
· Add a few drops of dish soap – about 1 teaspoon.
· Optional: Add 1–2 tablespoons of baking soda. It will fizz slightly when combined with vinegar – that’s normal.
Stir the solution gently to mix.
Step 3: Soak the Mop
Place the mop head into the solution, making sure it’s completely submerged. If it floats, weigh it down with a heavy, clean object (like a plate or a clean rock).
Let it soak for 30–60 minutes. During this time, the hot water and vinegar will break down grease and grime. You’ll notice the water turning dark and murky – that’s all the dirt and bacteria being pulled out of the fibers.
For extremely dirty mops (years of buildup), you can soak for up to 2 hours. Don’t soak overnight – prolonged soaking can weaken some materials.
Step 4: Agitate and Scrub (If Needed)
After soaking, use your hands (wear rubber gloves) or a soft brush to gently agitate the mop fibers. For sponge mops, squeeze the sponge several times under the solution. For string or microfiber mops, rub the fibers together.
You’ll see even more dirt release into the water.
Step 5: Rinse Thoroughly
Drain the dirty solution and rinse the mop under clean, running water (warm or cool). Continue rinsing and squeezing until the water runs completely clear. This may take a few minutes – be patient.
For sponge mops: Squeeze repeatedly under running water until no soap suds remain.
For string or microfiber: Hold under running water and knead the fibers until clear.
Step 6: Sanitize (Optional but Recommended)
For an extra level of cleanliness, especially if your mop smelled musty:
· Mix 1 part white vinegar with 3 parts water in a bucket.
· Soak the rinsed mop for 10–15 minutes.
· Rinse again with clean water.
Vinegar is a natural disinfectant and deodorizer.
Step 7: Let It Air Dry Completely
This step is crucial. A damp mop will quickly grow mold and bacteria again.
· Hang the mop in a well‑ventilated area – a shower rod, clothesline, or over a sink.
· Do not leave it lying flat or bunched up in a bucket.
· Allow at least 12–24 hours to dry completely. If you can, place it in direct sunlight – UV rays help kill remaining bacteria.
For sponge mops: Prop the sponge open so air can circulate inside the sponge pores.
The Result – What to Expect
After this deep cleaning, your mop should look and feel noticeably different:
Before After
Dark, stained fibers Brighter, cleaner appearance
Musty, sour smell Neutral or faint vinegar scent (fades as it dries)
Water never runs clear Rinse water runs clear
Leaves streaks on floors Cleans effectively again
Stiff, matted texture Soft, fluffy, and absorbent
In many cases, it feels almost like new again – without spending a dime on a replacement.
What to Avoid – Common Mop Cleaning Mistakes
Mistake Why It’s a Problem
Using only cold water Cold water doesn’t dissolve grease or activate cleaning agents effectively.
Leaving the mop wet for long periods Damp mops breed bacteria and mildew. Always dry thoroughly.
Using bleach on colored mops Bleach can discolor or damage synthetic fibers. Stick to vinegar.
Skipping the rinse Residual soap and dirt will make your floors streaky next time you mop.
Storing the mop in a closed bucket No airflow = mold and odor. Hang it up.
Soaking for too long Prolonged soaking (overnight) can weaken fibers and loosen adhesives on sponge mops.
How to Keep Your Mop Cleaner Longer
A little maintenance goes a long way. Follow these habits to extend the time between deep cleans.
Habit Why It Helps
Rinse after every use Removes loose dirt and cleaning solution residue before it dries and hardens.
Squeeze out excess water Less moisture means less bacterial growth.
Hang to dry, never store wet Air circulation prevents mildew.
Deep clean once a week (or every 3–5 uses) Prevents buildup before it becomes severe.
Use two mop heads (rotate) Allows each to dry fully between uses.
Replace mop heads every 2–3 months (for heavy use) Even with good care, fibers eventually wear out.
Does This Method Work for All Mop Types?
Mop Type Works? Special Notes
Microfiber mop (removable pad) ✅ Yes Avoid fabric softener; air dry only (no heat).
String mop (cotton or synthetic) ✅ Yes Cotton may shrink slightly – air dry stretched out.
Sponge mop ✅ Yes Don’t soak longer than 1 hour; squeeze gently.
Spin mop (removable head) ✅ Yes Follow same steps; ensure head is fully dry before reattaching.
Steam mop pads ✅ Yes Check manufacturer instructions; some are machine‑washable.
Disposable mop pads ❌ Not designed for reuse These are meant to be thrown away. Replace instead.
Frequently Asked Questions (FAQs)
Q: Can I use bleach instead of vinegar?
You can, but bleach is harsher, can damage fibers, and may leave a strong chemical smell. Vinegar is gentler, safer, and equally effective for deodorizing and disinfecting. If you use bleach, dilute it (1 part bleach to 9 parts water) and rinse extremely thoroughly.
Q: My mop still smells after cleaning. What went wrong?
Most likely, the mop wasn’t dried completely. Mildew odor returns quickly in damp conditions. Try soaking in a stronger vinegar solution (1:1 vinegar to water), then dry in direct sunlight. If the smell persists after thorough drying, the mop head may be too old – replace it.
Q: Can I wash a mop head in the washing machine?
Yes, many removable mop heads (especially microfiber) are machine washable. Use warm water, a small amount of detergent, and no fabric softener (softener coats fibers and reduces absorbency). Air dry or tumble dry on low. Check the care label first.
Q: How often should I deep clean my mop?
For a household that mops weekly, deep clean the mop head every 2–4 weeks. If you mop less often, clean it after every 3–5 uses. If you notice odor or dark water when rinsing, it’s time.
Q: Can I use this method on a sponge mop that’s falling apart?
If the sponge is crumbling or the adhesive is failing, it’s time to replace it. Deep cleaning won’t fix physical deterioration.
Q: Is baking soda necessary?
No, but it helps. Baking soda is a mild abrasive that can lift stubborn stains and boost deodorizing. For moderately dirty mops, hot water and vinegar alone work well.
Q: Can I clean the mop handle too?
Yes. Wipe down the handle with a cloth dampened with vinegar solution. Pay attention to crevices where the handle meets the head – dirt often collects there. Rinse and dry.
Final Thoughts – Before You Throw It Away
Before you throw away your dirty mop, try this simple method. It’s quick, inexpensive, and surprisingly effective.
With just hot water, white vinegar, a little dish soap, and optional baking soda, you can break down grease, kill bacteria, and remove stubborn odors. In under an hour – most of it passive soaking – you can restore your mop to like‑new condition.
And the best part? You’ll save money, reduce waste, and have a fresh, clean tool ready for your next floor‑cleaning session.
Sometimes, all it takes is the right combination of simple ingredients to turn something old back into something useful again.
Now it’s your turn! Have you tried cleaning a dirty mop with vinegar? What worked for you? Drop a comment below – I’d love to hear your tips.
And if you found this guide helpful, share it with a friend who’s about to throw away their mop. Pin it for later, and subscribe to our newsletter for more simple, money‑saving cleaning hacks.
Stay clean, stay smart, and don’t throw it away – fix it. 🧼✨
More Recipes You Might Like
-
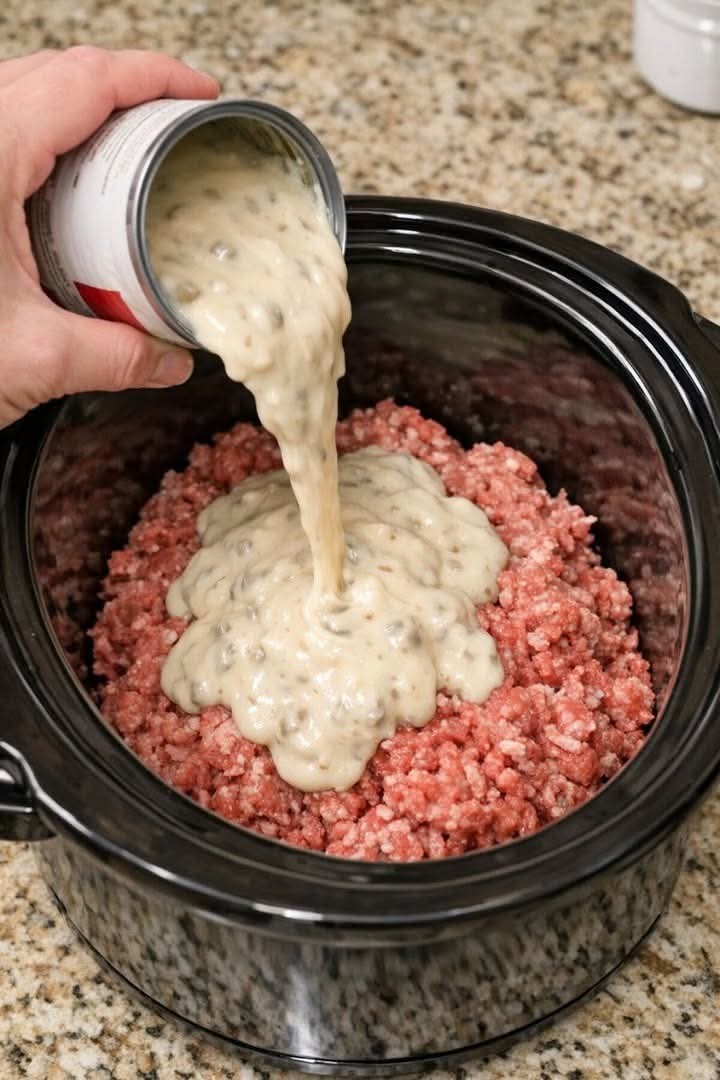
Slow Cooker Ground Beef Casserole – The 5-Ingredient Dinner Everyone Asks For
This slow cooker ground beef casserole uses cream of mushroom soup, onion soup mix, and beef broth for a rich, hearty meal. Just 5 ingredients – set it and forget it. Family‑approved. Let’s be honest: some of the best dinners are the ones you barely have to think about. You toss a few ingredients into…
-

Low Carb 3 Ingredient Salmon Patties – Grandma’s Crispy, Golden Perfection (No Breadcrumbs, No Guilt)
These low carb salmon patties use just 3 ingredients – canned salmon, eggs, and Parmesan. Grandma’s recipe is crispy, golden, and perfect for keto, gluten‑free, and busy weeknights. Ready in 15 minutes. Let’s be honest: some recipes aren’t just about food – they’re about memories. For me, it’s the smell of salmon patties sizzling in…
-
Very Dirty Mop? Don’t Throw It Away — This Simple Trick Can Make It Look Like New
Is your mop dark, smelly, and stained? Don’t toss it. Learn how to clean a dirty mop with hot water, vinegar, and baking soda. Restore it to like‑new condition in under an hour. Let’s be honest: we’ve all been there. You look at your mop after cleaning the floors, and the once‑bright fibers are now…