
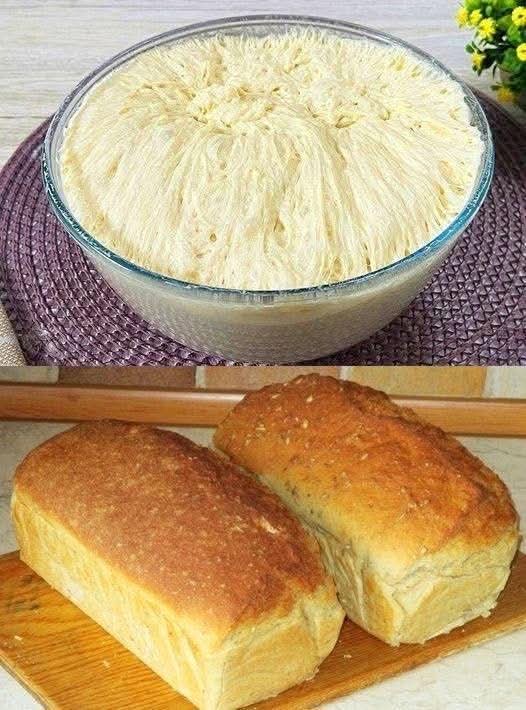
There are certain smells that stop you in your tracks. Freshly baked bread is one of them. That warm, yeasty, golden aroma wafting from the oven has the power to transport you, to comfort you, to make you feel like everything is right in the world.
Now imagine that smell filling your kitchen. Imagine pulling a pan of golden brown dinner rolls from the oven, their tops glistening with melted butter. Imagine tearing one open while it’s still warm, watching the steam rise, and slathering it with even more butter that melts instantly into every crevice.
These are those rolls.
I’ve been baking bread for years, trying countless recipes, tweaking and testing until I found perfection. And this recipe—this simple, straightforward recipe—produces rolls that are genuinely, honestly, undeniably million times better than anything you can buy at the bakery.
The secret? Warm, fresh butter. Lots of it. And a technique that’s easier than you think.
These rolls are soft, pillowy, and tender. They have that perfect balance of slight sweetness and buttery richness. They’re sturdy enough to hold a slice of ham but delicate enough to melt in your mouth. And they’re absolutely, positively best served warm, fresh from the oven, with butter melting into every nook and cranny.
Today, I’m sharing everything you need to know to make these rolls at home. No fancy equipment. No complicated techniques. Just simple ingredients and a little patience for something extraordinary.
Why These Rolls Are Million Times Better Than the Bakery
Freshness. Bakery rolls are often hours or even days old by the time you buy them. These come straight from your oven to your table. There’s simply no comparison.
Butter. Most bakeries use margarine or lower-quality fats. We’re using real butter, and plenty of it. The difference is unmistakable.
No preservatives. Bakery rolls often contain dough conditioners, preservatives, and ingredients you can’t pronounce. These have six simple ingredients you probably already have.
Customizable. You can make them exactly how you like them—bigger, smaller, sweeter, more buttery, topped with seeds or herbs.
The experience. Baking bread is an act of love. The process itself is rewarding, and sharing warm, homemade rolls with people you love? That’s something no bakery can replicate.
Cost. Homemade rolls cost pennies compared to bakery prices. Better quality for a fraction of the cost.
The Complete Ingredient Breakdown
1 cup warm milk
Milk adds richness, tenderness, and helps with browning. Whole milk gives the richest result, but 2% works beautifully too. For dairy-free, unsweetened almond or oat milk can be substituted, though the texture will be slightly different.
Temperature matters: The milk should be warm but not hot—about 110°F (warm to the touch but not burning). Too hot will kill the yeast; too cold won’t activate it properly.
½ cup warm water
Water provides moisture and helps activate the yeast. Same temperature rule applies—warm, not hot.
2¼ teaspoons active dry yeast
That’s one standard packet. Yeast is the magic that makes these rolls rise. Active dry yeast needs to be activated in warm liquid; instant yeast can be mixed directly with dry ingredients but works fine here too.
Testing your yeast: If you’re unsure whether your yeast is active, proof it first. Combine with the warm water and a pinch of sugar, let sit for 5-10 minutes. If it becomes foamy, it’s good. If nothing happens, your yeast is dead—start over.
¼ cup sugar
Sugar feeds the yeast, adds slight sweetness, and helps with browning. It also contributes to the tender texture. You can reduce slightly if you prefer less sweet rolls, but don’t eliminate entirely—the yeast needs some sugar to feed on.
2 tablespoons butter, melted
This is where the flavor begins. Real butter adds richness, tenderness, and that unmistakable flavor. For the absolute best rolls, use good-quality butter. Save the melted butter for the dough, and have extra softened butter ready for slathering on the finished rolls.
1 teaspoon salt
Essential for flavor and for controlling yeast activity. Don’t skip it—unsalted bread tastes flat and sad.
4–4½ cups all-purpose flour
The structure of the rolls. All-purpose flour works beautifully, giving tender results. Bread flour can be used for chewier rolls, but all-purpose is perfect for soft, pillowy dinner rolls.
Why the range: Flour absorption varies based on humidity, altitude, and even the brand of flour. Start with 4 cups and add more as needed until the dough comes together.
Step-by-Step Instructions
Step 1: Activate the Yeast
In a large mixing bowl or the bowl of a stand mixer, combine:
· ½ cup warm water (about 110°F)
· 1 tablespoon of the sugar (from your ¼ cup total)
· 2¼ teaspoons active dry yeast
Stir gently and let sit for 5-10 minutes until foamy. This foam means your yeast is alive and ready to work. If it doesn’t foam, start over with fresh yeast.
Step 2: Add Wet Ingredients
Once the yeast is foamy, add:
· 1 cup warm milk (about 110°F)
· Remaining sugar (about 3 tablespoons)
· 2 tablespoons melted butter
· 1 teaspoon salt
Stir until combined.
Step 3: Add Flour
Add 2 cups of the flour and stir until smooth. Gradually add more flour, ½ cup at a time, until the dough comes together and starts to pull away from the sides of the bowl.
You may not need all 4½ cups. The dough should be soft and slightly sticky but manageable. If it’s too sticky to handle, add a little more flour. If it’s too dry, add a tablespoon of warm water.
Step 4: Knead the Dough
If using a stand mixer: Fit with the dough hook and knead on medium-low speed for 5-7 minutes until the dough is smooth, elastic, and slightly tacky.
If kneading by hand: Turn the dough onto a lightly floured surface. Knead for 8-10 minutes, pushing the dough away with the heel of your hand, folding it back, and repeating. Add flour sparingly—just enough to prevent sticking. The dough should become smooth, elastic, and spring back when poked.
Step 5: First Rise
Place the dough in a lightly greased bowl, turning to coat all sides. Cover with a clean kitchen towel or plastic wrap.
Let rise in a warm, draft-free place until doubled in size, about 1-1½ hours. This timing varies based on room temperature—warmer kitchens rise faster, cooler kitchens take longer.
Pro tip: If your kitchen is cool, turn your oven to the lowest setting for 2-3 minutes, then turn it OFF. Place the covered dough inside with the door slightly ajar. The gentle warmth speeds rising.
Step 6: Shape the Rolls
Punch down the risen dough to release the air. Turn onto a lightly floured surface.
Divide the dough into equal pieces. For standard dinner rolls, aim for 12-15 pieces. For larger rolls, make 8-10. You can weigh them for precision or just eyeball it—homemade charm is part of the appeal.
Shape each piece into a smooth ball by pulling the edges down and pinching underneath. Place the shaped rolls in a greased 9×13-inch baking pan or on a baking sheet lined with parchment. For soft-sided rolls, place them close together so they rise up rather than out. For crustier sides, space them apart.
Step 7: Second Rise
Cover the shaped rolls with a towel and let rise again until doubled, about 30-45 minutes. They should be puffy and touching each other.
Step 8: Preheat and Prepare
About 20 minutes into the second rise, preheat your oven to 375°F (190°C).
If desired, brush the tops with an egg wash (1 egg beaten with 1 tablespoon water) for a shiny, golden crust. Or brush with melted butter for a softer, richer top.
Step 9: Bake
Bake at 375°F for 15-20 minutes, until the tops are golden brown and the rolls sound hollow when tapped. An instant-read thermometer inserted in the center should read 190°F.
Step 10: Butter the Tops
This step is non-negotiable. As soon as the rolls come out of the oven, brush the tops with melted butter. This adds incredible flavor and keeps the tops soft.
Step 11: Cool Slightly and Serve
Let the rolls cool in the pan for 5-10 minutes, then transfer to a wire rack or serve directly from the pan.
Serve warm, with plenty of softened butter on the side. Watch them disappear.
The Science Behind Perfect Dinner Rolls
Yeast fermentation: Yeast consumes sugar and produces carbon dioxide and alcohol. The carbon dioxide creates bubbles that make the dough rise; the alcohol contributes flavor and evaporates during baking.
Gluten development: Kneading develops gluten, the protein network that gives bread structure. Proper gluten development means rolls that are chewy and tender, not dense and crumbly.
Double rising: The first rise develops flavor and structure. The second rise (after shaping) creates the final texture and ensures the rolls are light and airy.
Butter’s role: Fat coats flour particles, limiting gluten formation and creating tender rolls. It also adds flavor and helps with browning.
Baking temperature: High enough heat creates steam that gives the final rise (oven spring) and sets the structure before the crust forms.
Troubleshooting Common Issues
My Rolls Didn’t Rise
Several possible causes:
· Yeast was too old or dead (did it foam?)
· Liquid was too hot and killed the yeast
· Kitchen was too cold
· Too much salt inhibited yeast
Next time, proof your yeast first and ensure liquid is warm, not hot.
My Rolls Are Dense and Heavy
Likely causes:
· Not enough kneading (gluten didn’t develop)
· Too much flour worked in
· First rise wasn’t long enough
Knead thoroughly and use flour sparingly. The dough should be soft and slightly tacky.
My Rolls Are Too Dry
Usually means too much flour was added. Next time, use the lower amount and add gradually. Also, don’t overbake—check at the minimum time.
My Rolls Are Flat and Spread Out
The dough may have been too soft, or the second rise went too long. Shape more tightly next time and don’t overproof.
The Tops Are Too Dark
Your oven may run hot. Check with an oven thermometer and reduce temperature slightly next time. You can also tent loosely with foil during the last few minutes.
The Bottoms Are Burned
Try baking on a higher rack, or use a lighter-colored pan. Dark pans absorb more heat and can burn bottoms.
Delicious Variations
Once you’ve mastered the basic rolls, try these variations.
Garlic Butter Rolls
Add 2 cloves minced garlic to the melted butter for brushing after baking. You can also sprinkle with parsley for color.
Herb Dinner Rolls
Add 1 tablespoon dried rosemary, thyme, or a blend to the dry ingredients. The herbs perfume the entire roll.
Cinnamon Sugar Rolls
Add 1 teaspoon cinnamon to the dry ingredients and brush baked rolls with honey butter. These are perfect for breakfast.
Everything Bagel Rolls
Before the second rise, brush rolls with egg wash and sprinkle with everything bagel seasoning. Bake as directed.
Cheese-Stuffed Rolls
Flatten each dough piece, place a small cube of cheese in the center, seal tightly, and shape into a ball. The cheese melts into pockets of deliciousness.
Whole Wheat Rolls
Replace half the all-purpose flour with whole wheat flour. You may need a little extra liquid, and the rolls will be denser but more nutritious.
Honey Butter Rolls
Replace the sugar with honey, and brush baked rolls with honey butter (softened butter mixed with honey).
Parmesan Herb Rolls
Add ¼ cup grated Parmesan and 1 tablespoon Italian seasoning to the dry ingredients. Brush baked rolls with garlic butter.
How to Serve These Rolls
Classic dinner accompaniment: Alongside roast chicken, pot roast, pasta, soup, or salad. They make any meal special.
Thanksgiving and holidays: Absolutely essential on the holiday table. Make extra—they’ll disappear.
Breakfast: Split, toast, and slather with butter and jam. Or use for breakfast sandwiches.
Sandwiches: Split and fill with ham and cheese, turkey and cranberry, or your favorite sandwich fillings.
With soup or stew: The perfect vehicle for sopping up every last drop.
As slider buns: Make smaller rolls and use for mini sandwiches at parties.
Garlic bread: Split, spread with garlic butter, and toast.
Bread pudding: Day-old rolls make incredible bread pudding or breadcrumbs.
Storage and Make-Ahead Tips
Room temperature: Store in an airtight container or bread bag at room temperature for up to 3 days.
Refrigerator: Not recommended—it speeds staling. Only refrigerate if you must, and reheat thoroughly.
Freezer: These freeze beautifully. Cool completely, wrap tightly in plastic wrap and foil, and freeze for up to 3 months. Thaw at room temperature and reheat in a 300°F oven for 5-10 minutes.
Make-ahead options:
Refrigerator rise: After shaping, cover the pan tightly and refrigerate overnight. The next day, let sit at room temperature for 30-60 minutes while the oven preheats, then bake as directed.
Freeze unbaked: Shape the rolls, place on a baking sheet, and freeze until solid. Transfer to a freezer bag. To bake, place frozen rolls in a greased pan, let thaw and rise until doubled (several hours), then bake.
Bake and reheat: Bake fully, cool completely, freeze. Reheat in a 300°F oven for 10 minutes and they’ll taste almost fresh-baked.
The Story Behind the Recipe
This recipe came to me from my grandmother, who learned it from her mother, who likely learned it from someone before her. It’s the kind of recipe that’s been passed down through generations, tweaked slightly by each baker, but always remaining essentially the same.
I remember as a child walking into my grandmother’s kitchen and being greeted by the smell of these rolls baking. She’d always have a batch rising on the counter, covered with a flour-sack towel. She’d let me punch down the dough, which felt like the most important job in the world.
When she pulled them from the oven and brushed them with butter, the whole kitchen gleamed. And when we sat down to dinner and tore into those warm, soft rolls, everything felt right.
Now I make these rolls for my own family. I’ve added my own tweaks over the years—a little more butter, a slightly different shaping technique—but the heart of the recipe remains the same. It’s comfort, tradition, and love, baked into bread.
And every time I pull a pan from the oven and brush those hot tops with butter, I think of her. I think of all the meals those rolls have graced, all the people who’ve torn into them with happy sighs, all the moments made better by warm, fresh bread.
That’s the power of a recipe like this. It’s not just food—it’s connection. To the past, to the people we love, to the simple pleasure of something made by hand and shared.
Why These Rolls Deserve a Permanent Place in Your Kitchen
These dinner rolls represent everything I love about baking. They’re simple enough for a beginner but satisfying enough for an experienced baker. They use basic ingredients but create something extraordinary. They’re versatile enough for any meal but special enough for holidays.
The process is meditative—kneading dough, watching it rise, shaping each roll by hand. The aroma is intoxicating, filling your entire home with warmth and comfort. And the result? Golden, soft, buttery rolls that genuinely are million times better than anything from a bakery.
I’ve made these rolls for weeknight dinners and Thanksgiving feasts. I’ve made them for company and for no reason at all. Every single time, they’re the first thing to disappear. Every single time, someone asks for the recipe.
That’s the mark of a keeper. A recipe that delivers consistently, that pleases reliably, that becomes a requested favorite.
These rolls are that recipe for me. And now they can be that for you too.
So warm that milk. Proof that yeast. Get your hands into that dough. And get ready to experience the most incredible, buttery, soft dinner rolls you’ve ever made.
Your kitchen is about to smell amazing. Your family and friends are about to be impressed. And you’re about to discover why homemade bread is one of life’s greatest pleasures.
Have you made these dinner rolls? What variations did you try? I’d love to hear about your experience in the comments below!
More Recipes You Might Like
-

Diabetic Strawberry Dessert: Sugar-Free, Low-Calorie, and Only 3 Ingredients!
Discover the ultimate guilt-free treat! This diabetic-friendly strawberry applesauce bread requires just 3 ingredients, has no added sugar, and is incredibly low in calories. Perfect for a healthy dessert or snack! Let me tell you about the dessert that changed how I think about healthy eating. I have a massive sweet tooth. Always have. But…
-
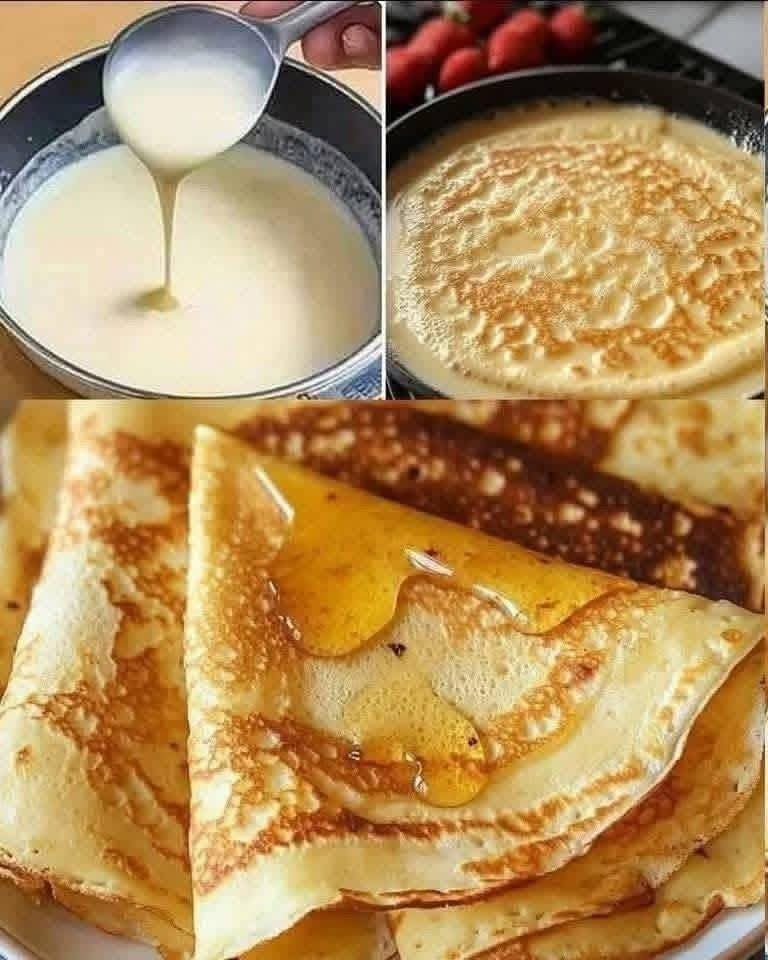
Classic French Crepes with Honey: A Taste of Paris at Home
Discover the secret to authentic Classic French Crepes with Honey! These paper-thin, buttery crepes are incredibly easy to make and absolutely divine drizzled with golden honey. Perfect for breakfast, dessert, or anytime! Close your eyes and imagine yourself sitting at a tiny sidewalk café in Paris. The Eiffel Tower looms in the distance, the scent…
-
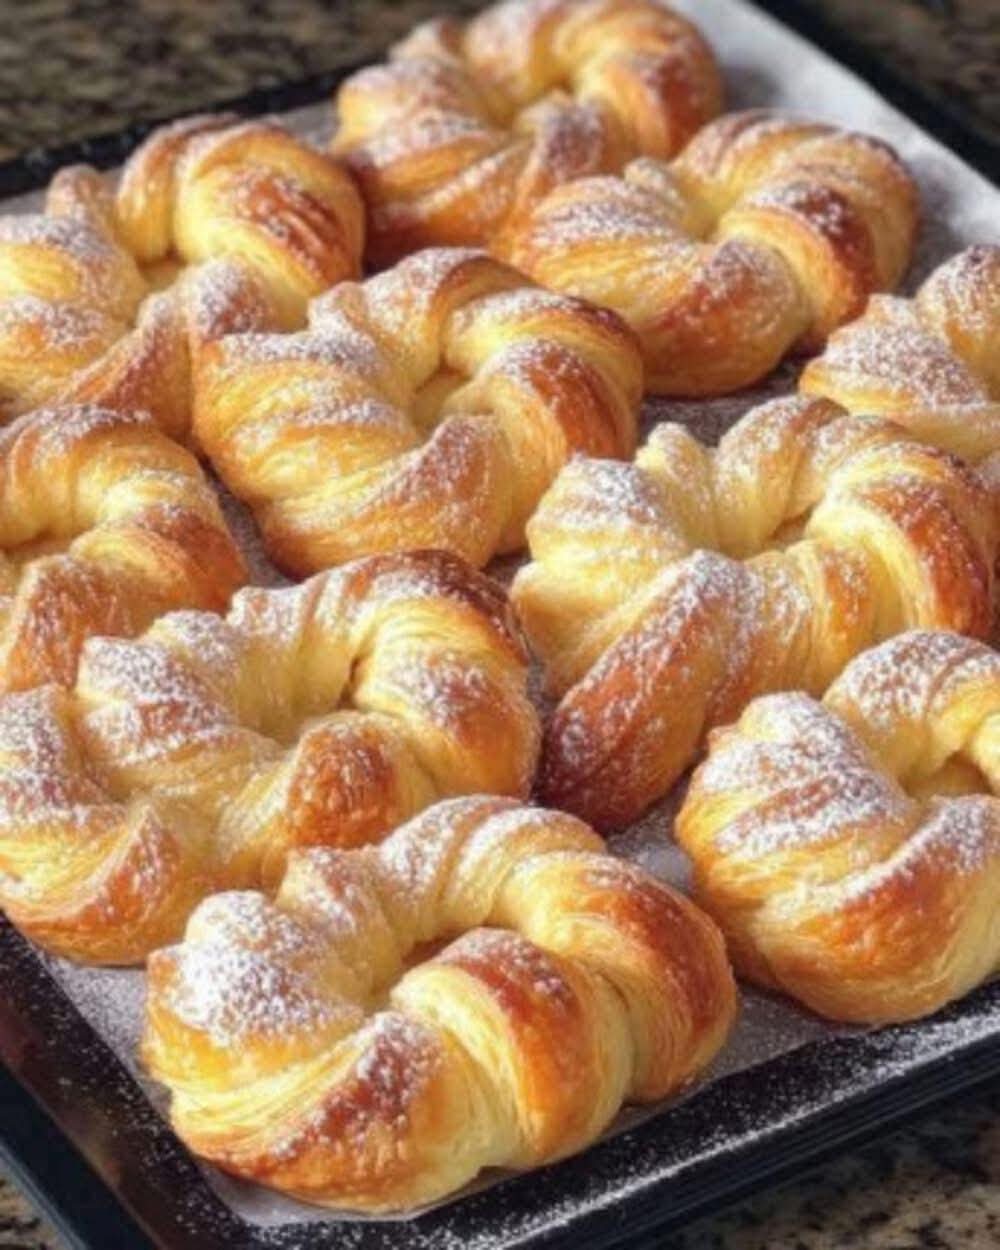
Puff Pastry Cinnamon Sugar Twists: 20-Minute Magic from the Freezer
Discover the magic of Puff Pastry Cinnamon Sugar Twists! With just a few simple ingredients, you can create golden, flaky, buttery pastries that taste like they came from a fancy bakery. Ready in under 20 minutes! Let me tell you about the dessert that makes people think I spent hours in the kitchen when I…