

There are some foods that feel like a celebration. Empanadas are one of them. Those golden, half-moon pastries, crisp on the outside and filled with savory (or sweet) goodness, have been bringing people together for centuries across Spain, Latin America, and beyond. Every culture has its version, and every family has its secret filling.
Now imagine those empanadas made with sourdough. That slight tang, that incredible flakiness, that depth of flavor that only fermented dough can provide. It takes something already wonderful and elevates it to something truly extraordinary.
I first started making sourdough empanadas when I had an abundance of sourdough discard and a craving for something portable and delicious. I’d made traditional empanadas before, but the sourdough version was a revelation. The dough was more flavorful, more complex, and somehow even flakier than the original. My family gathered around the kitchen island, grabbing them as fast as I could fry them.
Since then, these sourdough empanadas have become a staple in my kitchen. I make them for parties, for game day, for busy weeknight dinners, and for no reason at all except that they’re absolutely delicious. The dough comes together in minutes (especially if you have discard on hand), the filling options are endless, and the result is always, always satisfying.
Today, I’m sharing my complete guide to making sourdough empanadas at home, including two filling options and all my tips for getting that perfect, flaky crust.
Why You’ll Love These Sourdough Empanadas
Incredible flavor. The tangy sourdough crust takes empanadas to another level. It’s complex, deeply satisfying, and pairs perfectly with both savory and sweet fillings.
Flaky, tender texture. This dough is a dream—crisp on the outside, tender on the inside, with layers that shatter beautifully.
Versatile. Fill them with beef, chicken, cheese, beans, or even sweet fillings like apple or dulce de leche. Endless possibilities.
Great for using sourdough discard. If you keep a sourdough starter, this is the perfect way to use that discard.
Make-ahead friendly. Assemble them ahead and fry or bake when ready.
Freezer-friendly. Make a big batch and stash some for later emergencies.
Portable and perfect for parties. Handheld, dippable, and always a hit.
Better than any store-bought version. Homemade always wins.
The Complete Ingredient Breakdown
For the Sourdough Empanada Dough:
3 cups all-purpose flour
All-purpose flour gives the perfect structure—tender but sturdy enough to hold the filling without breaking.
1 teaspoon salt
Essential for flavor. Don’t skip it.
1 cup (2 sticks) cold unsalted butter, cut into small pieces
Cold butter is crucial for flakiness. As it melts in the oven or fryer, it creates steam pockets that separate the layers. Keep it in the refrigerator until the last minute.
1 cup sourdough discard (unfed, straight from the fridge)
This is where the magic happens. Sourdough discard adds flavor, tenderness, and that signature tang. It also provides enough liquid to bind the dough without needing water.
¼ cup cold water (if needed)
Depending on the hydration of your discard, you may need a little extra water to bring the dough together. Add it gradually, just until the dough forms.
1 tablespoon white vinegar or apple cider vinegar
This might seem unusual, but vinegar tenderizes the gluten and creates an even flakier texture. It’s a secret weapon in many pastry recipes.
For the Beef Picadillo Filling (Savory Option):
1 tablespoon olive oil
1 pound ground beef
1 small onion, finely chopped
2 cloves garlic, minced
½ cup tomato sauce
¼ cup raisins
¼ cup chopped green olives
1 teaspoon ground cumin
1 teaspoon smoked paprika
½ teaspoon dried oregano
Salt and pepper to taste
Optional: 1 hard-boiled egg, chopped
For the Egg Wash:
1 egg, beaten with 1 tablespoon water
For brushing on baked empanadas to create that golden, glossy crust.
Step-by-Step Instructions: The Sourdough Dough
Step 1: Combine Dry Ingredients
In a large bowl, whisk together the flour and salt.
Step 2: Cut in the Butter
Add the cold butter pieces. Using a pastry blender or your fingertips, cut the butter into the flour until the mixture resembles coarse meal with some pea-sized butter pieces remaining. These chunks are what create flaky layers.
Step 3: Add the Sourdough Discard
Add the sourdough discard and vinegar to the bowl. Stir with a fork until the dough starts to come together. If it seems dry, add cold water 1 tablespoon at a time until a shaggy dough forms.
Step 4: Bring It Together
Turn the dough out onto a lightly floured surface. Gently bring it together with your hands, kneading just a few times until it forms a cohesive ball. Do not overwork—you want to keep those butter pieces intact.
Step 5: Chill
Divide the dough in half, shape into disks, wrap in plastic wrap, and refrigerate for at least 1 hour, or up to 2 days. Chilling relaxes the gluten and firms up the butter, which is essential for flakiness.
Step-by-Step Instructions: The Beef Picadillo Filling
Step 1: Cook the Aromatics
Heat the olive oil in a large skillet over medium heat. Add the chopped onion and cook until softened, about 5 minutes. Add the garlic and cook for 1 minute more until fragrant.
Step 2: Brown the Beef
Add the ground beef to the skillet. Cook, breaking it up with a spoon, until browned and cooked through, about 8-10 minutes. Drain off any excess fat.
Step 3: Add the Flavorings
Stir in the tomato sauce, raisins, chopped olives, cumin, smoked paprika, oregano, salt, and pepper. Reduce heat to low and simmer for 5-10 minutes, until the flavors meld and the mixture thickens slightly.
Step 4: Cool Completely
Remove from heat and let the filling cool completely. If using hard-boiled egg, stir it in now. Cooling is important—warm filling can melt the butter in the dough and make it difficult to work with.
Step-by-Step Instructions: Assembling and Cooking
Step 1: Roll Out the Dough
On a lightly floured surface, roll one disk of dough to about ⅛-inch thickness. Use a round cutter (4-5 inches in diameter) to cut out circles. You can use a bowl, a plate, or a dedicated empanada cutter.
Gather scraps, re-roll, and cut more circles.
Step 2: Fill the Empanadas
Place about 1½ tablespoons of filling in the center of each dough circle. Don’t overfill—you need room to seal.
Step 3: Seal the Edges
Lightly wet the edges of the dough with water. Fold the dough over the filling to create a half-moon shape. Press the edges firmly to seal.
For a decorative touch, crimp the edges with a fork or twist them with your fingers.
Step 4: Chill Again
Place the assembled empanadas on a parchment-lined baking sheet and refrigerate for at least 30 minutes. This firms up the butter and helps prevent leaks during cooking.
Step 5: Choose Your Cooking Method
For frying: Heat about 2 inches of oil in a deep skillet or pot to 350°F. Fry the empanadas in batches, without crowding, for 3-4 minutes per side until golden brown and crispy. Drain on paper towels.
For baking: Preheat your oven to 400°F. Brush the empanadas with egg wash. Bake for 20-25 minutes until golden brown and puffed.
Step 6: Serve
Serve warm, with your favorite dipping sauces.
The Science of Sourdough Empanada Dough
Cold butter creates layers. When cold butter hits the hot oil or oven, it melts rapidly, creating steam that pushes apart the layers of dough. This is what creates that flaky, tender texture.
Sourdough adds flavor and tenderness. The fermentation in sourdough discard breaks down some of the gluten, creating a more tender crust. The acidity also adds complexity that pairs beautifully with savory fillings.
Vinegar is a secret weapon. A little acid tenderizes the gluten, making the dough even more tender and flaky. It also helps prevent the dough from becoming tough.
Chilling is essential. Cold dough is easier to work with, holds its shape better, and creates flakier results. Don’t skip the chilling steps.
Don’t overwork the dough. Overworking develops gluten, which can make the dough tough. Mix just until combined and handle gently.
Troubleshooting Common Issues
My Empanadas Leaked During Cooking
Several possible causes:
· Overfilled (use less filling)
· Edges weren’t sealed properly (press firmly)
· Dough was too warm when cooked (chill before cooking)
The Dough Is Tough
Overworked. Next time, mix just until combined and handle gently.
They’re Not Flaky Enough
Butter wasn’t cold enough, or dough wasn’t chilled properly. Keep everything cold and don’t skip the chilling steps.
The Dough Tore When Filling
It may have been rolled too thin. Next time, aim for ⅛-inch thickness—thin enough to be tender, but thick enough to hold together.
They’re Greasy (Fried Version)
Oil wasn’t hot enough. Make sure it reaches 350°F before adding empanadas. If it’s too cool, they’ll absorb oil.
The Bottoms Burned Before the Tops Were Done (Baked Version)
Bake on a higher rack or use a lighter-colored baking sheet.
Delicious Filling Variations
Once you’ve mastered the beef picadillo, try these variations.
Chicken Tinga Empanadas
Shredded chicken in a smoky tomato-chipotle sauce. The smoky, slightly spicy filling is incredible.
Spinach and Cheese Empanadas
Sautéed spinach mixed with ricotta, mozzarella, and a touch of nutmeg. A classic vegetarian option.
Chorizo and Potato Empanadas
Cooked chorizo mixed with diced potatoes. The potatoes add heartiness, and the chorizo adds spice.
Black Bean and Corn Empanadas
Black beans, corn, onions, and peppers with cumin and chili powder. A delicious vegan option.
Caprese Empanadas
Fresh mozzarella, tomatoes, and basil with a drizzle of balsamic glaze. Taste like summer.
Breakfast Empanadas
Scrambled eggs, bacon or sausage, and cheese. Perfect for brunch.
Apple Cinnamon Empanadas
Sautéed apples with cinnamon, sugar, and a touch of lemon. Serve with caramel sauce for dipping.
Dulce de Leche Empanadas
Fill with dulce de leche and a sprinkle of sea salt. Dessert empanadas!
What to Serve With Sourdough Empanadas
Dipping sauces: Chimichurri, salsa, sour cream, guacamole, hot sauce, or a simple lime crema.
Salad: A simple green salad with a bright vinaigrette.
Rice and beans: Classic Latin American sides.
Pickled vegetables: The acidity cuts through the richness.
Fresh fruit: A side of fresh mango, pineapple, or citrus.
On their own: These are perfect handheld, no sides needed.
Storage and Make-Ahead Tips
Refrigerator (unbaked): Assemble empanadas, place on a parchment-lined baking sheet, cover, and refrigerate for up to 24 hours. Cook as directed.
Refrigerator (baked): Store in an airtight container for up to 3 days. Reheat in a 350°F oven to restore crispness.
Freezer (unbaked): Place assembled empanadas on a parchment-lined baking sheet and freeze until solid. Transfer to a freezer bag. Cook from frozen, adding 2-3 minutes to cooking time.
Freezer (baked): Cool completely, then freeze in a single layer. Reheat in a 350°F oven until hot and crispy.
Make-ahead filling: The beef picadillo can be made up to 3 days ahead and refrigerated.
Why Sourdough Makes Everything Better
Sourdough isn’t just for bread. The same fermentation magic that creates that tangy, complex flavor in a crusty loaf works beautifully in pastry dough too. The acidity tenderizes the gluten, creating a more delicate crumb. The fermentation adds depth and complexity that plain dough just can’t match.
And if you keep a sourdough starter, you know the struggle of finding uses for discard. This recipe is the perfect solution—it uses a full cup of discard and transforms it into something absolutely delicious.
Why This Recipe Deserves a Place in Your Kitchen
These Sourdough Empanadas represent everything I love about cooking. They’re endlessly customizable. They’re perfect for using up what you have. They’re impressive enough for parties but simple enough for weeknights. And they’re genuinely, consistently, undeniably delicious.
I’ve made these empanadas for game day gatherings where they disappeared within minutes. I’ve made them for family dinners where everyone customized their own fillings. I’ve made them for no reason at all except that I had sourdough discard and a craving for something special.
Every single time, they deliver. Every single time, people can’t believe how good the crust is. Every single time, I’m reminded why this recipe is a keeper.
This recipe has become a staple in my kitchen for good reason. It’s reliable, versatile, and always welcome at the table.
And now it can be that for you too.
So make that dough. Chill that butter. Prepare that filling. And get ready to create the most incredible sourdough empanadas of your life.
Your taste buds—and your sourdough starter—will thank you.
Have you made these Sourdough Empanadas? What fillings did you try? I’d love to hear about your experience in the comments below!
More Recipes You Might Like
-
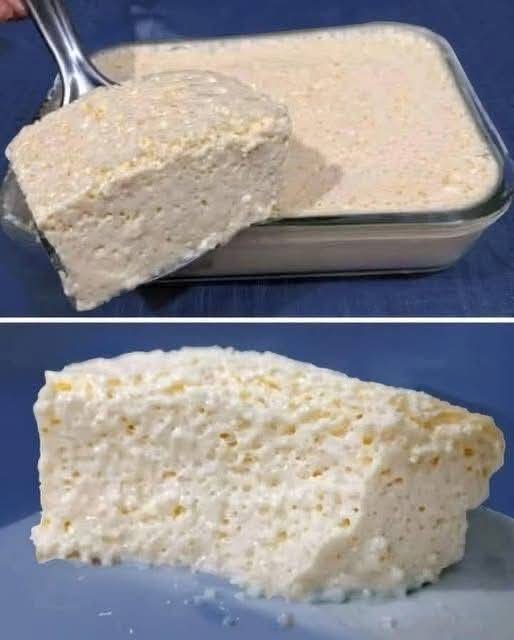
Zero Carb Eggs And Yogurt Flatbread: The 2-Ingredient Miracle
Discover the zero carb, flourless flatbread made with just eggs and yogurt! High protein, gluten-free, and perfect for keto. Easy, quick, and you can eat as much as you like! Let me introduce you to the simplest flatbread you’ll ever make—and one that fits perfectly into a low‑carb, keto, or gluten‑free lifestyle. No flour, no…
-
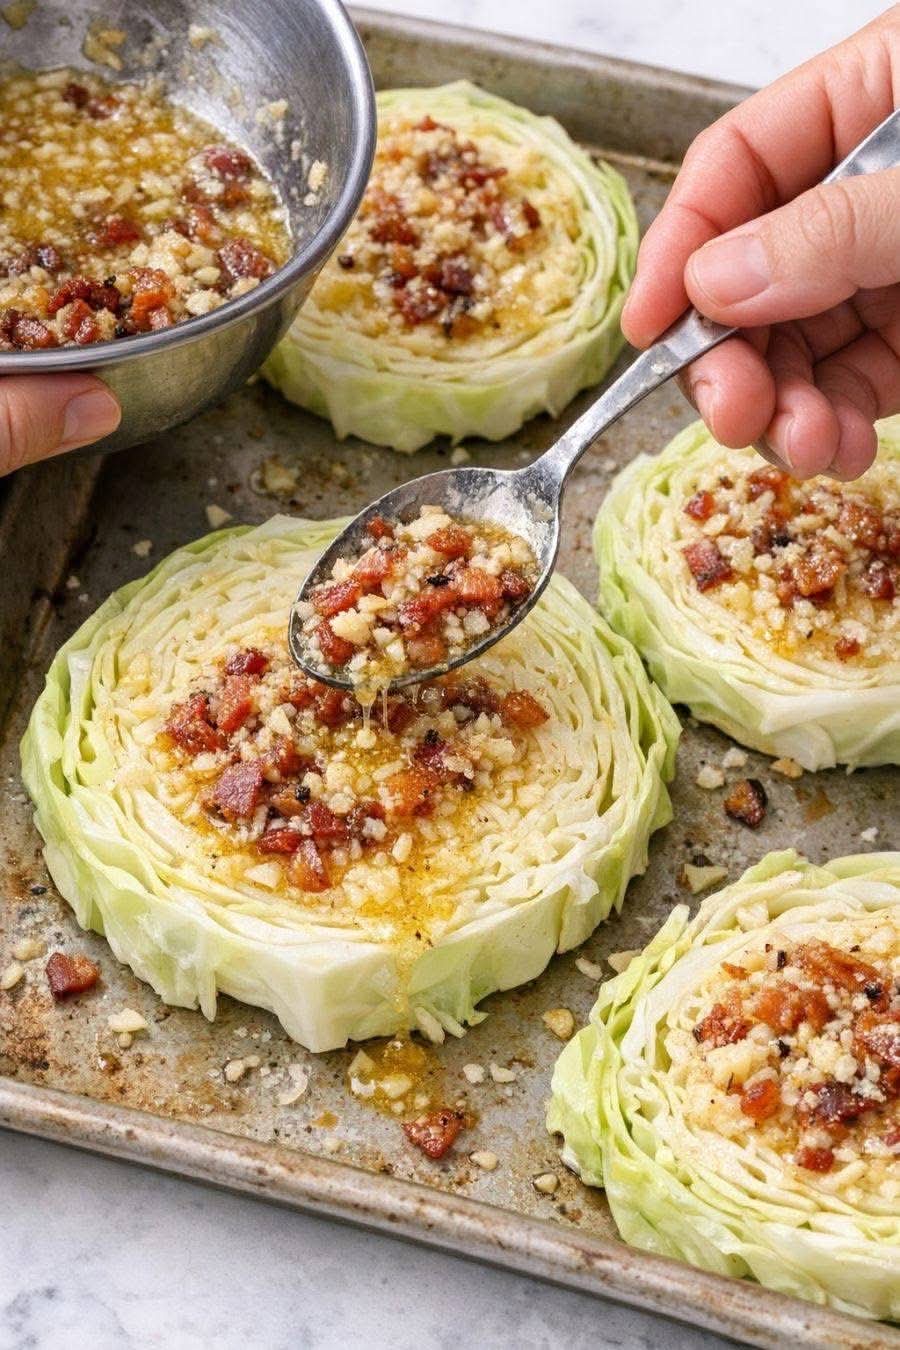
Roasted Bacon Garlic Butter Cabbage Steaks: The Low-Carb Side Dish That Steals the Show
Discover the ultimate roasted cabbage steaks topped with crispy bacon and garlic butter! This low-carb, keto-friendly side dish is packed with flavor, easy to make, and absolutely irresistible. Let me introduce you to the cabbage dish that turned a humble vegetable into the star of our dinner table. I’ve always loved cabbage, but let’s be…
-

Mexican Chicken Pinwheels: My Nana’s Beloved Recipe (Worth Every Bite!)
Discover the legendary Mexican chicken pinwheels my Nana made every year! Creamy, zesty, and impossible to resist, this homemade appetizer is the ultimate crowd-pleaser. Easy to make and impossible to find in stores! Let me introduce you to the recipe that has been a cherished tradition in my family for decades—and now I’m passing it…