
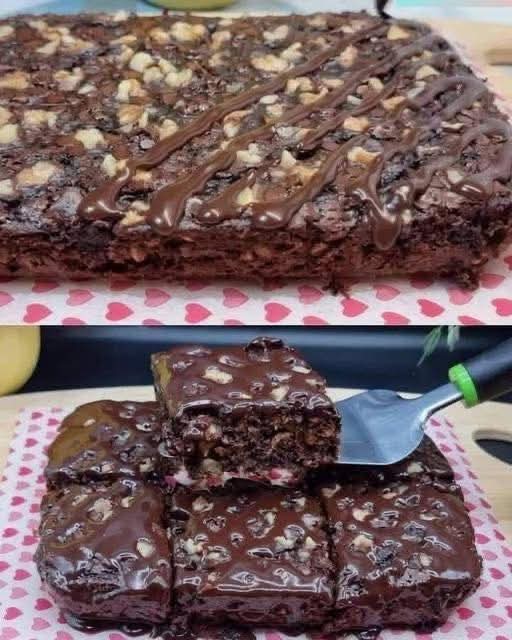
There are some recipes that walk the perfect line between indulgence and nutrition. They satisfy your deepest chocolate cravings while actually providing genuine nourishment. They taste like a treat but function like fuel. They’re the kind of snack you can feel genuinely good about reaching for—again and again.
These Healthy Chocolate Oat Bars are exactly that.
I developed this recipe during a period when I was trying to clean up my snacking habits but refused to give up chocolate. Store-bought granola bars were either delicious and nutritionally worthless or healthy and completely unsatisfying. I wanted something better—something that delivered rich chocolate flavor and satisfying texture while being made from ingredients I could feel good about.
After many experiments, these bars emerged as the winner. They’re fudgy, chewy, and intensely chocolatey. They’re packed with wholesome ingredients like oats, nuts, and natural sweeteners. They come together in minutes with no baking required. And they’ve become the snack I make weekly, the one I pack in lunchboxes, the one I reach for when 3 PM cravings strike.
Today, I’m sharing everything you need to know to make these bars at home, along with endless variations so you’ll never get bored.
Why You’ll Love These Healthy Chocolate Oat Bars
No baking required. These are no-bake bars, which means they come together in minutes and don’t heat up your kitchen. Perfect for year-round making.
Wholesome ingredients. Oats, nuts, natural sweeteners, and real chocolate. Nothing artificial, nothing processed, nothing you can’t pronounce.
Customizable. The basic formula is endlessly adaptable. Swap nuts, change the sweetener, add different mix-ins—the possibilities are endless.
Meal-prep friendly. Make a batch on Sunday and have healthy snacks all week. They store beautifully in the refrigerator or freezer.
Kid-approved. My pickiest eaters love these bars. They’re the perfect lunchbox surprise or after-school treat.
Naturally gluten-free. Made with certified gluten-free oats, these bars are safe for gluten-sensitive folks.
Vegan adaptable. With a few simple swaps, these bars can be completely plant-based.
Portable. Wrap them individually and take them anywhere—work, gym, hiking, travel.
Satisfying. The combination of complex carbs from oats, healthy fats from nuts and coconut, and protein keeps you full and energized.
The Complete Ingredient Breakdown
Base Ingredients:
2 cups rolled oats
Rolled oats (old-fashioned oats) provide the perfect texture. They’re hearty and chewy but soften slightly from the other ingredients. Do not use instant oats—they’ll turn to mush. Steel-cut oats won’t work here—they’re too hard.
For gluten-free: Use certified gluten-free rolled oats.
1 cup nut butter of choice
Nut butter binds the bars and adds healthy fats and protein. Choose based on flavor preference and dietary needs:
· Peanut butter: Classic, affordable, and delicious. Use natural peanut butter (just peanuts and salt) for best results—avoid added sugars and oils.
· Almond butter: Slightly milder flavor, equally delicious. Also use natural.
· Cashew butter: Creamy and mild, lets chocolate flavor shine.
· Sunflower seed butter: For nut-free versions. Note that it may react with baking soda if used (turns green—still safe to eat).
½ cup honey or maple syrup
Natural sweeteners bind the bars and add sweetness. Honey gives a classic flavor; maple syrup adds subtle depth. Both work beautifully.
For vegan: Use maple syrup.
½ cup unsweetened cocoa powder
The chocolate heart of these bars. Use good-quality cocoa for best flavor. Dutch-processed gives a smoother, milder chocolate taste; natural cocoa is more intense and slightly acidic. Both work.
¼ cup coconut oil or butter
Adds richness and helps the bars set firmly. Coconut oil is dairy-free and adds a subtle tropical note. Butter adds delicious flavor but makes bars dairy-containing.
1 teaspoon vanilla extract
Enhances chocolate flavor and adds warmth.
¼ teaspoon salt
Essential for balancing sweetness and enhancing all flavors. If your nut butter is salted, reduce slightly but don’t omit entirely.
Optional Mix-Ins:
½ cup chocolate chips
For extra chocolate intensity. Use dark chocolate chips for less sugar, milk chocolate for sweeter bars.
½ cup chopped nuts
Almonds, walnuts, pecans, or peanuts add crunch and healthy fats. Toast them first for deeper flavor.
¼ cup shredded coconut
Adds texture and tropical flavor. Toast it first for extra depth.
2 tablespoons chia seeds or flax seeds
Boosts nutrition with omega-3s and fiber without changing flavor significantly.
¼ cup dried fruit
Cranberries, cherries, raisins, or chopped apricots add sweetness and chew.
2 tablespoons hemp seeds
Adds protein and nutrients with minimal flavor impact.
Pinch of sea salt for topping
A sprinkle of flaky salt on top elevates the chocolate flavor beautifully.
Step-by-Step Instructions
Step 1: Prepare Your Pan
Line an 8×8-inch baking pan with parchment paper, leaving overhang on two opposite sides. This will make it easy to lift the bars out later. Set aside.
Step 2: Combine Dry Ingredients
In a large bowl, whisk together:
· 2 cups rolled oats
· ½ cup cocoa powder
· ¼ teaspoon salt
If you’re adding any dry mix-ins like chia seeds, hemp seeds, or shredded coconut (untoasted), add them now.
Step 3: Combine Wet Ingredients
In a medium saucepan over low heat, combine:
· 1 cup nut butter
· ½ cup honey or maple syrup
· ¼ cup coconut oil or butter
Stir frequently until everything is melted, smooth, and well combined. Do not let it boil—just heat until fluid and uniform. Remove from heat and stir in vanilla extract.
Step 4: Combine Wet and Dry
Pour the warm wet mixture into the bowl with the dry ingredients. Stir thoroughly until everything is well combined and no dry oats remain. The mixture will be thick and sticky—this is correct.
If you’re adding chocolate chips, nuts, or other mix-ins, fold them in now. If you’re adding chocolate chips, do this while the mixture is still warm so they soften slightly but not so hot that they melt completely.
Step 5: Press Into Pan
Transfer the mixture to your prepared pan. Spread it as evenly as possible, then press down firmly and evenly. This step is crucial—if you don’t press firmly enough, the bars will be crumbly and fall apart.
Use the bottom of a measuring cup or a flat glass to press down with authority. You want the mixture compacted tightly.
Step 6: Chill to Set
Place the pan in the refrigerator for at least 2 hours, or until completely firm. For best results, chill for 4 hours or overnight.
Step 7: Cut and Serve
Once fully chilled and firm, use the parchment overhang to lift the entire block out of the pan. Place on a cutting board and use a sharp knife to cut into bars—12 for smaller snack bars, 9 for larger ones.
Store in the refrigerator and enjoy chilled or at room temperature.
The Science Behind the Perfect No-Bake Bar
Understanding what’s happening helps you troubleshoot and customize.
Oats provide structure. They absorb moisture from the wet ingredients and create the bar’s hearty texture.
Nut butter binds. The fat and protein in nut butter act as glue, holding everything together. Natural nut butter works best—the kind with added oils and sugars doesn’t bind as effectively.
Sweetener adds moisture. Honey and maple syrup provide liquid that helps everything stick together while adding sweetness.
Coconut oil helps set. When chilled, coconut oil solidifies, helping the bars hold their shape. If your kitchen is very warm, bars may soften—store in refrigerator.
Chilling is essential. The bars need time for all the ingredients to meld and for the fats to solidify. Rushing this step results in crumbly bars.
Troubleshooting Common Issues
My Bars Are Too Crumbly
This usually means not enough binder or not pressed firmly enough. Next time, ensure your nut butter is well-stirred (natural nut butter separates) and press much more firmly. You can also add an extra tablespoon of nut butter or sweetener.
My Bars Are Too Soft
They may need more chilling time, or your kitchen may be warm. Store them in the refrigerator. For firmer bars, add ¼ cup more oats or reduce the liquid slightly.
My Bars Won’t Set
If they’re still soft after several hours in the refrigerator, they may have too much liquid. You can try adding more oats, or place them in the freezer for 30 minutes to firm up.
The Mixture Is Too Dry
If your mixture won’t come together, add warm water 1 teaspoon at a time until it reaches the right consistency. Or add an extra tablespoon of nut butter or sweetener.
The Chocolate Chips Melted Into the Mixture
This happens if the wet mixture was too hot when you added them. Let the mixture cool slightly before adding chocolate chips, or stir them in after the mixture has cooled a bit.
My Bars Taste Too Sweet
Reduce honey/maple syrup to ⅓ cup next time, or use unsweetened cocoa powder and dark chocolate chips. You can also add a pinch more salt to balance sweetness.
Delicious Variations
Once you’ve mastered the basic recipe, try these variations.
Peanut Butter Chocolate Chip Bars
Use peanut butter as the nut butter and add ½ cup chocolate chips. The classic combination never disappoints.
Almond Joy Bars
Use almond butter, add ¼ cup shredded coconut and ¼ cup chopped almonds. Top with a drizzle of melted dark chocolate.
Double Chocolate Espresso Bars
Add 1 tablespoon instant espresso powder to the dry ingredients. The coffee deepens the chocolate flavor beautifully.
Cranberry Walnut Chocolate Bars
Use almond or cashew butter. Add ½ cup dried cranberries and ½ cup chopped walnuts.
Mint Chocolate Bars
Add ½ teaspoon peppermint extract along with the vanilla. Add ½ cup chocolate chips and, if desired, a few drops of green food coloring for fun.
Coconut Cashew Bars
Use cashew butter, add ¼ cup toasted shredded coconut, and top with chopped cashews.
Spicy Mexican Chocolate Bars
Add ½ teaspoon cinnamon and a pinch of cayenne to the dry ingredients. The warmth is unexpected and delightful.
Protein-Packed Bars
Add 2 scoops of your favorite chocolate or vanilla protein powder. You may need to add an extra tablespoon or two of liquid to compensate.
Seed Butter Nut-Free Bars
Use sunflower seed butter and omit nuts. Add pumpkin seeds or sunflower seeds for crunch.
Fruit and Nut Bars
Add ½ cup chopped dried apricots, figs, or dates along with ¼ cup chopped pistachios.
How to Store Healthy Chocolate Oat Bars
Refrigerator: Store in an airtight container in the refrigerator for up to 2 weeks. This is the best place for them—they stay firm and fresh.
Freezer: These bars freeze beautifully. Wrap individually in plastic wrap, then place in a freezer bag. Freeze for up to 3 months. Thaw in the refrigerator overnight or at room temperature for 15-20 minutes.
Room temperature: They can be stored at room temperature for 3-4 days, but they’ll be softer. If your kitchen is warm, stick with refrigerator storage.
Lunchboxes: Pack a frozen bar in a lunchbox—it will thaw by lunchtime and be perfectly ready to eat.
On-the-go: Wrapped individually, these are perfect for travel, hiking, or gym bags.
Nutritional Benefits
These bars aren’t just delicious—they’re genuinely good for you.
Oats: Provide complex carbohydrates for sustained energy, plus beta-glucan, a fiber that supports heart health and stabilizes blood sugar.
Nut butter: Adds healthy monounsaturated fats, protein, and various minerals depending on the nut chosen.
Cocoa powder: Packed with antioxidants called flavanols that support heart health, brain function, and reduce inflammation.
Coconut oil: Contains medium-chain triglycerides (MCTs) that may support metabolism and provide quick energy.
Natural sweeteners: Honey and maple syrup provide antioxidants and minerals, unlike refined sugar.
Mix-ins: Nuts add healthy fats and protein; seeds add omega-3s and fiber; dried fruit adds vitamins and additional fiber.
Per bar (approximate, depends on size and ingredients): 150-250 calories, 4-7g protein, 15-25g carbs, 8-15g fat, 3-6g fiber.
When to Eat These Bars
These versatile bars are perfect for so many occasions:
Breakfast on the go: Pair with fruit and you’ve got a balanced morning meal.
Mid-morning snack: Sustain energy until lunch.
Post-workout fuel: The carbs and protein help recovery.
Afternoon pick-me-up: Better than reaching for coffee or sugar.
Lunchbox treat: Kids love them, and you’ll love sending something healthy.
Hiking fuel: Compact, energy-dense, and non-perishable.
Late-night craving: Satisfies chocolate urges without derailing healthy eating.
Travel companion: Much better than airport snacks.
The Story Behind the Recipe
I created these bars during a particularly busy period of my life. I was working long hours, trying to eat well, and constantly finding myself at the mercy of vending machines and convenience store snacks. I knew I needed something better—something I could make ahead, grab easily, and actually feel good about eating.
The first few attempts were… educational. Too crumbly, too sweet, too soft, too hard. But with each batch, I learned. I discovered the importance of pressing firmly. I learned that natural peanut butter behaves differently than the processed kind. I figured out the perfect ratio of wet to dry.
Finally, I landed on this version. The first time I bit into a finished bar, I knew I had it. Rich, chocolatey, satisfyingly chewy, and made entirely from ingredients I felt good about. I ate one, then another, then wrapped the rest for the week ahead.
Since then, these bars have become a staple. I make them weekly, often doubling the batch. I’ve shared the recipe with countless friends, and it’s become a favorite in their kitchens too. They’re the snack I always have on hand, the one I never tire of, the one that proves healthy eating doesn’t have to mean deprivation.
Why These Bars Deserve a Permanent Place in Your Kitchen
These Healthy Chocolate Oat Bars represent everything I want in a snack. They’re quick and easy to make. They use simple, wholesome ingredients. They satisfy deep chocolate cravings while providing genuine nutrition. They’re versatile enough to never get boring. And they make me feel good—not just while eating them, but after, knowing I’ve fueled my body with something worthwhile.
I’ve made these bars for after-school snacks and pre-workout fuel. I’ve packed them for road trips and hiking adventures. I’ve gifted them to friends and brought them to gatherings. Every time, they’re a hit. Every time, someone asks for the recipe.
That’s the mark of a keeper. A recipe that delivers consistently, that pleases reliably, that becomes a requested favorite.
These bars are that recipe for me. And now they can be that for you too.
So grab your oats. Open that jar of peanut butter. Measure out that cocoa powder. And get ready to discover your new favorite healthy snack.
Your taste buds will thank you. Your body will thank you. And you’ll never look at store-bought granola bars the same way again.
Have you tried these Healthy Chocolate Oat Bars? What variation did you make? I’d love to hear about your experience in the comments below!
More Recipes You Might Like
-
Diabetic Strawberry Dessert: Sugar-Free, Low-Calorie, and Only 3 Ingredients!
Discover the ultimate guilt-free treat! This diabetic-friendly strawberry applesauce bread requires just 3 ingredients, has no added sugar, and is incredibly low in calories. Perfect for a healthy dessert or snack! Let me tell you about the dessert that changed how I think about healthy eating. I have a massive sweet tooth. Always have. But…
-
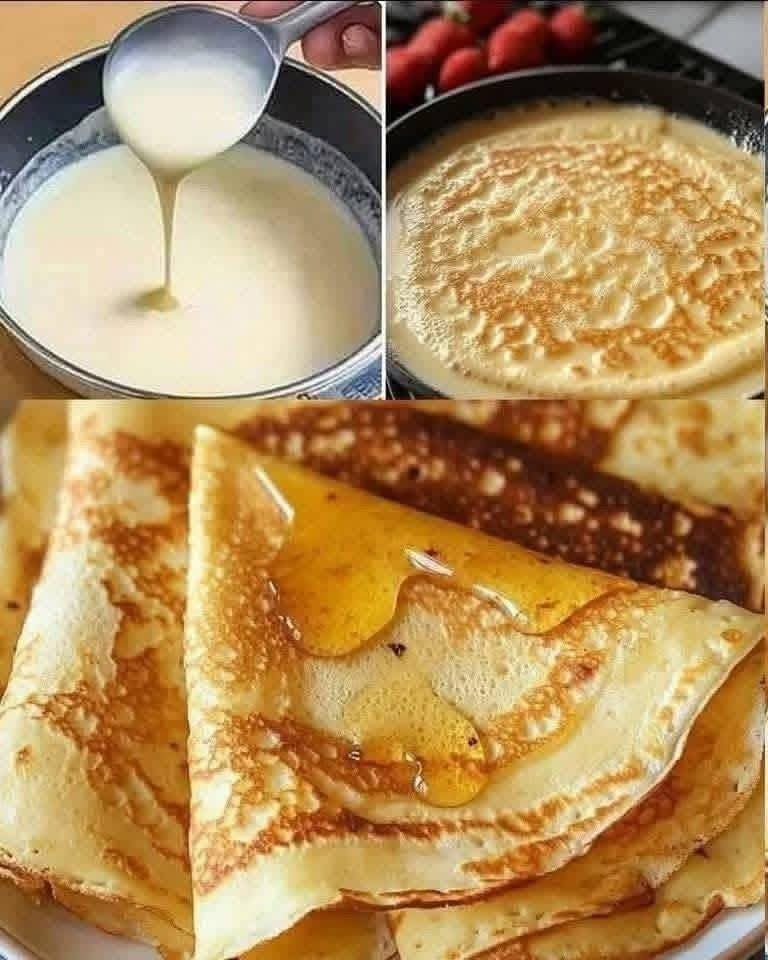
Classic French Crepes with Honey: A Taste of Paris at Home
Discover the secret to authentic Classic French Crepes with Honey! These paper-thin, buttery crepes are incredibly easy to make and absolutely divine drizzled with golden honey. Perfect for breakfast, dessert, or anytime! Close your eyes and imagine yourself sitting at a tiny sidewalk café in Paris. The Eiffel Tower looms in the distance, the scent…
-
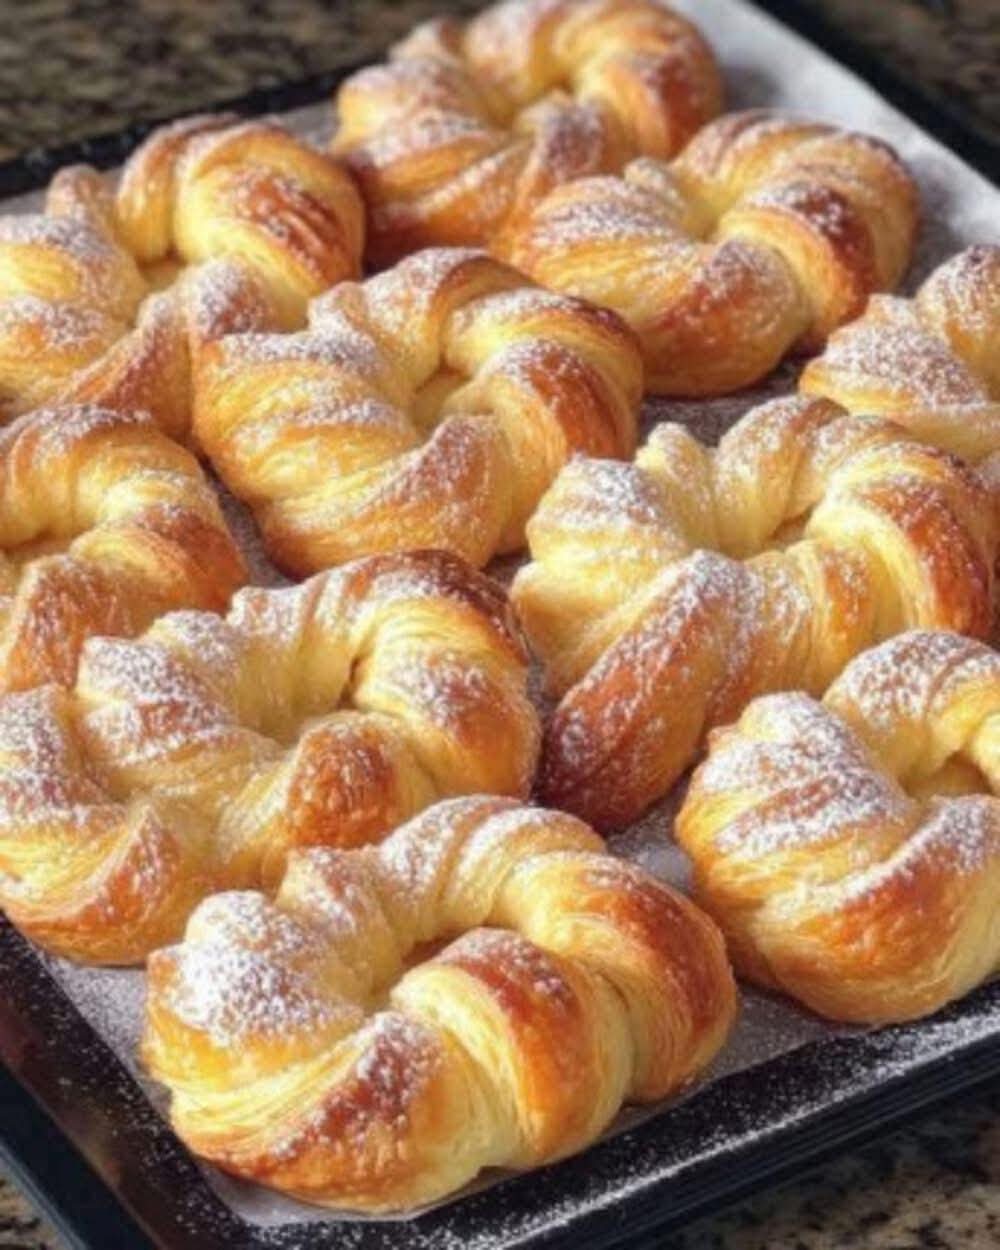
Puff Pastry Cinnamon Sugar Twists: 20-Minute Magic from the Freezer
Discover the magic of Puff Pastry Cinnamon Sugar Twists! With just a few simple ingredients, you can create golden, flaky, buttery pastries that taste like they came from a fancy bakery. Ready in under 20 minutes! Let me tell you about the dessert that makes people think I spent hours in the kitchen when I…