
There are some recipes that are more than just instructions on a page. They’re memories. They’re love. They’re the taste of childhood, the smell of holidays, the warmth of a grandmother’s kitchen wrapped up in a single bite.
Grandma Rita’s Soft Butter Rolls are that recipe for me.
I can still see her standing at the kitchen counter, a dusting of flour on her apron, her hands gently shaping dough that had been rising since early morning. The kitchen was always warm, always filled with that yeasty, buttery aroma that meant something wonderful was on its way. She never measured exactly—a pinch of this, a handful of that—but somehow, her rolls turned out perfect every single time.
When she passed, I thought those rolls might be lost forever. But my mother had watched and learned, and she passed the recipe to me. Over the years, I’ve measured and tested and written down every detail, until I could recreate Grandma Rita’s rolls with the same soft, buttery perfection she achieved by feel.
These aren’t just dinner rolls. They’re clouds of buttery goodness. They’re pillows of love. They’re the kind of rolls that people fight over at Thanksgiving, that disappear before the turkey even hits the table, that make you close your eyes on the first bite and remember.
Today, I’m sharing this family treasure with you. These are Grandma Rita’s Soft Butter Rolls.
Why Grandma Rita’s Rolls Are the Best You’ll Ever Taste
Incredibly soft and fluffy. These rolls have a texture that’s almost cloud-like—tender, pillowy, and absolutely irresistible.
Rich buttery flavor. Real butter in the dough and brushed on top makes these rolls sing. You’ll taste the love in every bite.
Family-tested for generations. This recipe has been passed down through decades of family dinners, holiday feasts, and Sunday suppers. It’s been perfected over time.
Perfect for any occasion. Holidays, potlucks, dinner parties, or just because. These rolls elevate any meal.
Freezer-friendly. Make a double batch and stash some for later. You’ll thank yourself.
Beginner-friendly but impressive. The steps are straightforward, but the results look and taste like you spent hours in a professional bakery.
The smell alone is worth it. Your kitchen will fill with the most incredible aroma. People will gather before you even call them.
Better than any store-bought roll. Once you’ve had homemade, you’ll never go back.
The Complete Ingredient Breakdown
For the Dough:
4 cups all-purpose flour (plus more for kneading)
All-purpose flour gives the perfect texture—tender but with enough structure to create those beautiful, fluffy rolls. Grandma always used Gold Medal, but any good brand works.
¼ cup granulated sugar
Adds a touch of sweetness and helps feed the yeast for better rise.
2¼ teaspoons active dry yeast (one packet)
The magic that makes these rolls rise. Active dry yeast needs to be activated in warm liquid. Make sure it’s fresh—old yeast won’t give you the rise you need.
1 teaspoon salt
Essential for flavor. Don’t skip it—it balances the sweetness and enhances everything.
1 cup warm milk (about 110°F)
Milk adds richness and tenderness. Whole milk gives the best result, but any milk works. The temperature is important—too hot kills the yeast, too cold won’t activate it.
½ cup warm water (about 110°F)
Water helps hydrate the dough and activate the yeast.
½ cup (1 stick) unsalted butter, melted and cooled slightly
This is where the butter flavor comes from. Real butter is non-negotiable. Melt it and let it cool so it doesn’t kill the yeast.
1 large egg, room temperature
Adds richness, structure, and helps with browning.
For the Butter Brushing:
¼ cup (½ stick) unsalted butter, melted
This gets brushed on hot rolls straight from the oven, creating that soft, buttery top and adding incredible flavor.
Step-by-Step Instructions
Step 1: Activate the Yeast
In a small bowl or the bowl of your stand mixer, combine:
· ½ cup warm water (110°F)
· 1 tablespoon of the sugar (from your ¼ cup total)
· 2¼ teaspoons active dry yeast
Stir gently and let sit for 5-10 minutes until foamy. This foam means your yeast is alive and ready to work. If it doesn’t foam, start over with fresh yeast.
Step 2: Combine Wet Ingredients
In a separate bowl or large measuring cup, whisk together:
· 1 cup warm milk
· ½ cup melted butter (cooled slightly)
· 1 large egg
· Remaining sugar (about 3 tablespoons)
Step 3: Combine Dry Ingredients
In a large bowl or the bowl of your stand mixer, whisk together:
· 4 cups flour
· 1 teaspoon salt
Step 4: Bring It Together
Add the yeast mixture and the milk mixture to the flour. Stir until a shaggy dough forms.
Step 5: Knead the Dough
If using a stand mixer: Fit with the dough hook and knead on medium-low speed for 5-7 minutes until the dough is smooth, elastic, and slightly tacky.
If kneading by hand: Turn the dough onto a lightly floured surface. Knead for 8-10 minutes, pushing the dough away with the heel of your hand, folding it back, and repeating. Add flour sparingly—just enough to prevent sticking. The dough should become smooth and elastic.
Step 6: First Rise
Place the dough in a lightly greased bowl, turning to coat all sides. Cover with a clean kitchen towel or plastic wrap.
Let rise in a warm, draft-free place until doubled in size, about 1-1½ hours. The dough should be puffy and hold an indentation when poked.
Step 7: Punch Down and Shape
Punch down the risen dough to release the air. Turn onto a lightly floured surface.
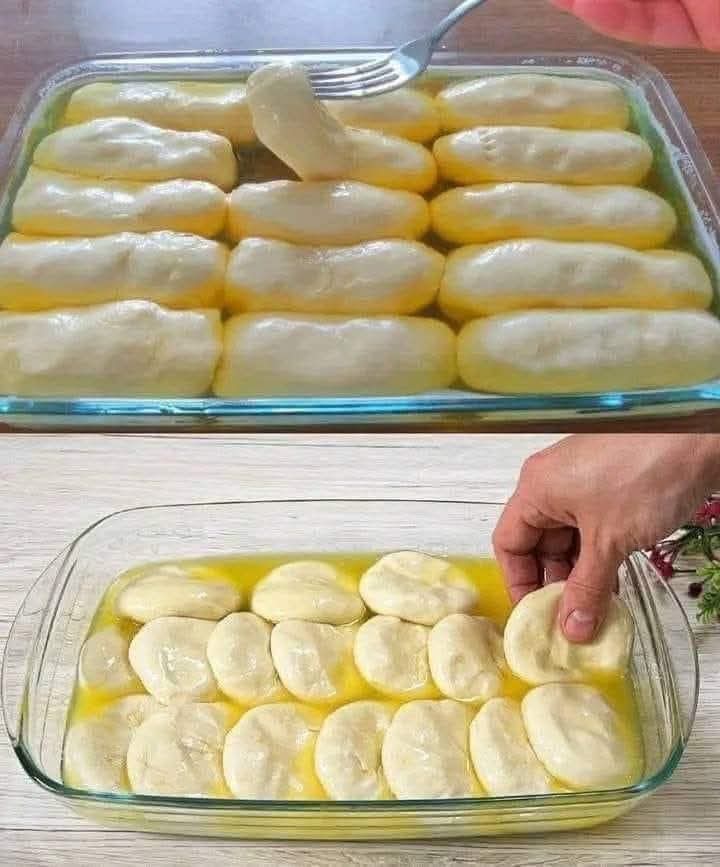
Divide the dough into 15 equal pieces. For uniform rolls, weigh them—about 50-55 grams each. For a more rustic look, eyeball it.
Shape each piece into a smooth ball by pulling the edges down and pinching underneath. Place the shaped rolls in a greased 9×13-inch baking pan or on a baking sheet lined with parchment. For soft-sided rolls, place them close together so they rise up rather than out. For crustier sides, space them apart.
Step 8: Second Rise
Cover the shaped rolls with a towel and let rise again until doubled and puffy, about 30-45 minutes. They should be touching each other and look pillowy.
Step 9: Preheat and Bake
About 20 minutes into the second rise, preheat your oven to 375°F (190°C).
Bake at 375°F for 18-22 minutes, until the rolls are golden brown on top and sound hollow when tapped. An instant-read thermometer inserted in the center should read 190°F.
Step 10: Butter the Tops
This step is non-negotiable. As soon as the rolls come out of the oven, brush the tops generously with melted butter. This adds incredible flavor and keeps the tops soft and shiny.
Step 11: Cool and Serve
Let the rolls cool in the pan for 10 minutes, then transfer to a wire rack or serve directly from the pan.
Serve warm, with plenty of extra butter on the side.
The Science Behind Grandma’s Perfect Rolls
Warm liquids activate yeast: Yeast is a living organism. It needs warmth (but not too hot) to wake up and start producing the carbon dioxide that makes dough rise.
Proper kneading develops gluten: Kneading aligns the gluten proteins, creating the structure that traps gas and gives rolls their light, airy texture.
Two rises create flavor: The first rise develops flavor and structure. The second rise (after shaping) creates the final texture and ensures the rolls are light and airy.
Butter adds richness: Fat coats flour particles, limiting gluten formation and creating tender rolls. It also adds incredible flavor.
Hot butter bath: Brushing hot rolls with melted butter immediately after baking adds flavor and creates that soft, luscious top.
Troubleshooting Common Issues
My Rolls Didn’t Rise
Several possible causes:
· Yeast was too old or dead (did it foam?)
· Liquid was too hot and killed the yeast
· Kitchen was too cold
· Too much salt inhibited yeast
Next time, proof your yeast first and ensure liquid is warm, not hot.
My Rolls Are Dense and Heavy
Likely causes:
· Not enough kneading (gluten didn’t develop)
· Too much flour worked in
· First rise wasn’t long enough
Knead thoroughly and use flour sparingly. The dough should be soft and slightly tacky.
My Rolls Are Too Dry
Usually means too much flour was added. Next time, use the lower amount and add gradually. Also, don’t overbake—check at the minimum time.
My Rolls Are Flat and Spread Out
The dough may have been too soft, or the second rise went too long. Shape more tightly next time and don’t overproof.
The Tops Are Too Dark
Your oven may run hot. Check with an oven thermometer and reduce temperature slightly next time. You can also tent loosely with foil during the last few minutes.
The Bottoms Are Burned
Try baking on a higher rack, or use a lighter-colored pan. Dark pans absorb more heat and can burn bottoms.
Grandma Rita’s Tips and Tricks
These are the things she never wrote down but always did:
“Let the dough tell you when it’s ready.” Grandma never watched the clock. She watched the dough. When it had doubled and felt puffy and alive, it was ready.
“Cold butter is for pie, warm butter is for rolls.” She always used melted butter in the dough, never cold. It incorporated more evenly and created a softer texture.
“Don’t be afraid of the flour.” She’d say this with a wink, dusting her hands and the counter generously. But she also knew not to add too much—just enough to keep the dough from sticking.
“The second rise is when the magic happens.” She’d let the shaped rolls rise until they were puffy and beautiful, pressing gently with her finger to test.
“Brush them twice.” Once when they came out of the oven, and again just before serving. “That’s the secret to a soft top,” she’d whisper.
Delicious Variations
Once you’ve mastered Grandma’s classic recipe, try these variations.
Garlic Butter Rolls
Add 2 cloves minced garlic to the melted butter for brushing. The garlic butter is incredible.
Honey Butter Rolls
Replace 2 tablespoons of the sugar with honey. Brush with honey butter (honey mixed with melted butter) after baking.
Herb Butter Rolls
Add 1 tablespoon dried rosemary, thyme, or a blend to the dough. Brush with herb butter after baking.
Cinnamon Sugar Rolls
Add 1 teaspoon cinnamon to the dough. Brush with butter and sprinkle with cinnamon sugar after baking for a sweet treat.
Cheese-Stuffed Rolls
Flatten each dough piece, place a small cube of cheese in the center, seal tightly, and shape into a ball. The cheese melts into pockets of deliciousness.
Everything Bagel Rolls
Before the second rise, brush rolls with egg wash and sprinkle with everything bagel seasoning. Bake as directed.
Whole Wheat Rolls
Replace half the all-purpose flour with whole wheat flour. You may need a little extra liquid, and the rolls will be denser but more nutritious.
Cheddar Herb Rolls
Add 1 cup shredded cheddar and 1 tablespoon fresh chopped chives to the dough. The cheese melts throughout.
What to Serve With Grandma Rita’s Soft Butter Rolls
Any soup: These rolls are the perfect partner for tomato soup, potato soup, broccoli cheddar, or any creamy soup.
Stews and chilis: For sopping up every last drop of that rich, savory liquid.
Roasted meats: Alongside roast chicken, pot roast, or Thanksgiving turkey.
Pasta dishes: Serve with spaghetti, lasagna, or any Italian meal.
Breakfast: Split, toast, and spread with jam or honey.
With butter and honey: Sometimes the simplest way is the best.
For dipping: Into olive oil and balsamic, into gravy, into anything delicious.
Storage and Make-Ahead Tips
Room temperature: Store in an airtight container at room temperature for up to 3 days.
Refrigerator: Store in the refrigerator for up to a week. Bring to room temperature or warm before serving.
Freezer: These rolls freeze beautifully. Cool completely, wrap individually in plastic wrap, and place in a freezer bag. Freeze for up to 3 months. Thaw at room temperature and reheat in a 300°F oven for 5-8 minutes.
Make-ahead for holidays: Shape the rolls, place in the pan, cover, and refrigerate overnight. The next day, let them come to room temperature and rise for about 1 hour before baking.
Reheating: Warm in a 300°F oven for 5-8 minutes for that fresh-baked taste and texture.
Why Grandma Rita’s Recipe Deserves a Place in Your Kitchen
Grandma Rita’s Soft Butter Rolls represent everything I love about family recipes. They’re not just food—they’re connection. They’re the taste of holidays past, the smell of a grandmother’s kitchen, the warmth of generations gathered around a table.
Every time I make these rolls, I think about her. I think about her flour-dusted apron, her gentle hands shaping dough, her smile as she pulled a golden pan from the oven. I think about all the family dinners, all the laughter, all the love that went into every batch.
And now, when I serve these rolls to my own family, I’m passing that love forward. I’m creating new memories around the same recipe that fed generations before me.
That’s the power of a recipe like this. It’s more than ingredients and instructions. It’s a legacy.
This recipe has become a treasure in my kitchen for good reason. It’s reliable, delicious, and filled with meaning.
And now it can be that for you too.
So proof that yeast. Melt that butter. Get your hands into that dough. And get ready to create rolls that will become a family treasure in your own home.
Grandma Rita would be so happy to know her recipe is still being made, still bringing people together, still filling kitchens with love.
Have you made Grandma Rita’s Soft Butter Rolls? What memories did they bring back? I’d love to hear about your experience in the comments below!
More Recipes You Might Like
-
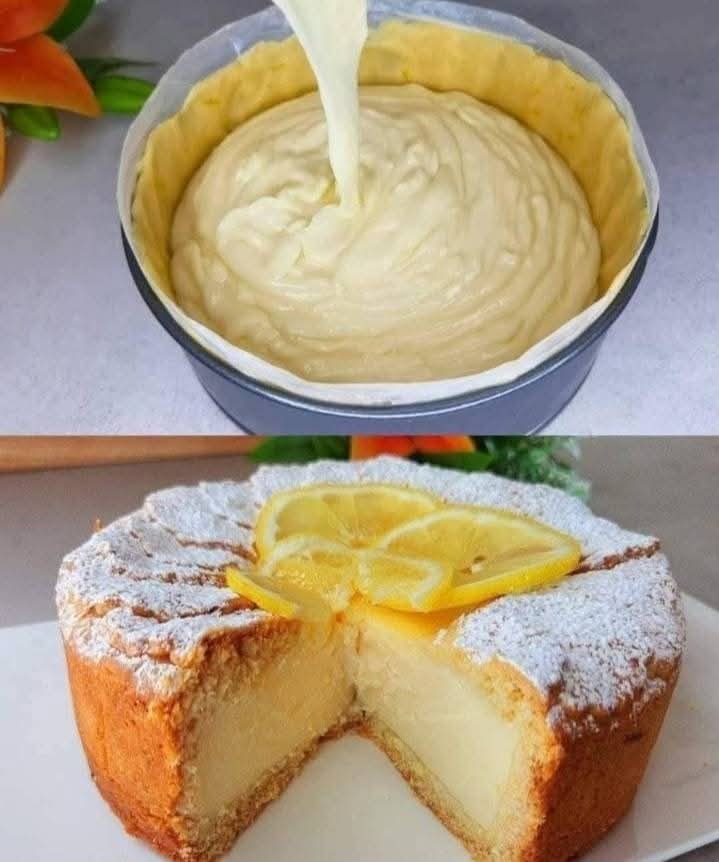
Italian Cloud Cake: The Most Loved Cake in Italy (You’ll Make It Every Week!)
Discover the magic of Italian Cloud Cake! This incredibly soft, buttery, lemon-scented cake lives up to its name—it’s light as a cloud. The most loved cake in Italy, and after one bite, you’ll understand why. Let me tell you about the cake that made me fall in love with Italian baking. I was wandering through…
-

DIY Aloe Vera Oil: The Natural Secret to Faster Hair Growth and Less Hair Loss
Learn how to make powerful aloe vera oil at home to combat hair fall and boost growth. We share 3 easy methods, pro tips, and the science behind why it works. Let me tell you about the moment I realized I needed to take my hair health into my own hands. After months of noticing…
-

Lemon and Garlic Chicken Bites: The 15-Minute Dinner That Disappears Fast
Discover the magic of Lemon and Garlic Chicken Bites! Juicy, golden chicken pieces coated in a luscious lemon garlic butter sauce. Ready in just 15 minutes, perfect for busy weeknights or party appetizers. Let me tell you about the recipe that has saved me on more busy weeknights than I can count. It was one…