

Learn how to make fried chicken legs with shatter‑crispy skin and juicy, tender meat. Buttermilk brine, seasoned flour, and pro frying tips for the best homemade fried chicken.
Let’s be honest: fried chicken legs are the unsung heroes of the poultry world. They’re cheaper than breasts, juicier than wings, and more forgiving than thighs. And when you fry them right – golden brown, shatter‑crisp skin, meat that drips with juice – they’re nothing short of soul food perfection.
But here’s the problem: most home cooks are afraid of frying. They worry about greasy results, burnt exteriors, or undercooked meat. They think they need a deep fryer or a vat of oil. They settle for oven‑baked or air‑fried imitations that never quite capture that irresistible crunch.
Not anymore.
This guide will teach you exactly how to make perfect fried chicken legs – the kind that would make your grandmother proud and your family beg for more. We’ll cover everything: the buttermilk brine that guarantees juicy meat, the seasoned flour that creates a shatter‑crisp crust, the oil temperature secrets, and the resting techniques that lock in every drop of moisture.
No deep fryer required. Just a heavy pot, a thermometer, and a little patience. Let’s fry.
Why Fried Chicken Legs Are the Best Cut for Frying
Before we dive into the recipe, let’s talk about why chicken legs (drumsticks) are the ideal choice for frying.
- Forgiving and Juicy
Dark meat has more fat and connective tissue than white meat. This means it stays moist even if you overcook it slightly – unlike chicken breasts, which turn into sawdust.
- Built‑in Handle
The bone acts as a natural handle, making drumsticks perfect for parties, picnics, and finger food. No utensils needed.
- Budget‑Friendly
Chicken legs are one of the cheapest cuts – often $1–2 per pound. You can feed a crowd for under $10.
- Flavorful
Dark meat has more flavor than breasts, period. The fat carries seasonings beautifully.
- Forgiving Frying
Legs are thick enough to develop a deep golden crust before the inside overcooks. Thin cuts like wings can dry out; thick cuts like breasts can be tricky to cook through. Legs are just right.
Ingredient Breakdown – For the Best Fried Chicken
For the Buttermilk Brine (Essential for Juiciness)
Buttermilk (2 cups) – The acid in buttermilk tenderizes the meat and helps the flour coating adhere. No buttermilk? Make your own: 2 cups milk + 2 tablespoons lemon juice or white vinegar. Let sit for 10 minutes.
Hot sauce (2 tablespoons, optional) – Adds a subtle heat and helps tenderize. Tabasco, Frank’s RedHot, or any vinegar‑based hot sauce.
Salt (1 tablespoon) – Penetrates the meat, seasoning it from the inside. Use kosher salt.
Garlic powder (1 teaspoon), onion powder (1 teaspoon), paprika (1 teaspoon) – Flavor foundation.
For the Seasoned Flour Coating
All‑purpose flour (2 cups) – The base. Creates a light, crispy crust.
Cornstarch (¼ cup, optional but recommended) – Adds extra crispiness. Cornstarch is the secret to shatter‑crisp, Korean‑style fried chicken.
Seasonings: Salt, black pepper, garlic powder, onion powder, paprika, cayenne (optional), dried thyme or oregano.
For Frying
Neutral oil with high smoke point – Peanut oil (best flavor), vegetable oil, canola oil, or avocado oil. Peanut oil is traditional for Southern fried chicken. You’ll need about 2–3 inches of oil in your pot.
The Recipe – Perfect Fried Chicken Legs
Prep time: 15 minutes + 2–24 hours brining
Cook time: 15–20 minutes (per batch)
Total time: 2.5 – 24 hours (mostly inactive)
Yield: 8–10 chicken legs (serves 4–5)
Ingredients
For the Brine Amount
Buttermilk 2 cups
Hot sauce (optional) 2 tbsp
Kosher salt 1 tbsp
Garlic powder 1 tsp
Onion powder 1 tsp
Paprika 1 tsp
Chicken legs (drumsticks) 8–10 (about 2–2.5 lbs)
For the Coating Amount
All‑purpose flour 2 cups
Cornstarch (optional) ¼ cup
Kosher salt 1 tbsp
Black pepper 1 tsp
Garlic powder 1 tbsp
Onion powder 1 tbsp
Paprika 1 tbsp
Cayenne pepper (optional) ½–1 tsp
For Frying
Peanut or vegetable oil Enough for 2–3 inches deep
Equipment
· Large bowl (for brining)
· Dutch oven or heavy‑bottomed pot (cast iron preferred)
· Deep‑fry thermometer
· Wire cooling rack + baking sheet
· Tongs
· Paper towels
Step‑by‑Step Instructions
Step 1: Brine the Chicken (Essential!)
In a large bowl, whisk together the buttermilk, hot sauce, salt, garlic powder, onion powder, and paprika.
Add the chicken legs, turning to coat. Cover and refrigerate for at least 2 hours, preferably 8–24 hours. The longer the brine, the juicier and more flavorful the chicken.
Why this works: The acid in buttermilk breaks down some of the protein fibers, making the meat more tender. The salt penetrates deeply, seasoning from within. The result? Juicy, flavorful chicken that won’t dry out during frying.
Step 2: Prepare the Seasoned Flour
In a large bowl or shallow dish, whisk together the flour, cornstarch (if using), salt, pepper, garlic powder, onion powder, paprika, and cayenne.
Step 3: Remove Chicken from Brine
Remove the chicken legs from the buttermilk brine, letting the excess drip off. Do not rinse the chicken – you want the buttermilk coating to help the flour stick.
Step 4: Dredge the Chicken
Working one piece at a time, dredge each chicken leg in the seasoned flour mixture. Press firmly to adhere, then shake off excess.
For extra crispy crust (double‑dredge): Dip the floured chicken back into the buttermilk brine, then dredge in flour again. This creates thick, craggy, extra‑crispy skin.
Place the dredged chicken legs on a wire rack set over a baking sheet. Let them rest for 10–15 minutes while you heat the oil. This allows the coating to set, preventing it from falling off during frying.
Step 5: Heat the Oil
Pour oil into a heavy‑bottomed pot (Dutch oven or cast iron) to a depth of about 2–3 inches. You want enough oil to fully submerge the chicken legs.
Heat the oil to 325°F (163°C). Use a deep‑fry thermometer to monitor the temperature – this is crucial.
Why 325°F? If the oil is too hot (350°F+), the outside will burn before the inside cooks through. If too low (below 300°F), the chicken will absorb oil and become greasy.
Step 6: Fry in Batches
Carefully add 3–4 chicken legs to the hot oil using tongs. Do not overcrowd – this lowers the oil temperature and makes the chicken greasy.
Fry for 12–15 minutes, turning occasionally with tongs, until the chicken is deep golden brown and cooked through. The internal temperature should reach 175°F (80°C) – dark meat needs higher temperature than breasts for tender results.
Monitor oil temperature: Adjust the heat as needed to maintain 325°F. If the temperature drops, the chicken will absorb oil. If it rises too high, the outside will burn.
Step 7: Drain and Rest
Remove the fried chicken legs with tongs and place them on a wire rack set over a baking sheet (not paper towels – the rack keeps the bottom crispy). Sprinkle immediately with a little extra salt.
Let the chicken rest for 5–10 minutes before serving. This allows the juices to redistribute.
Step 8: Serve
Serve hot. Fried chicken legs are perfect on their own or with classic sides: mashed potatoes, coleslaw, biscuits, baked beans, or mac and cheese.
Pro Tips for the Best Fried Chicken Legs
- Don’t Skip the Brine
This is the single most important step for juicy, flavorful chicken. Even 2 hours makes a difference; overnight is ideal.
- Use a Thermometer
Guessing oil temperature is the #1 reason fried chicken fails. A $10 deep‑fry thermometer is a game‑changer.
- Don’t Overcrowd the Pot
Adding too many pieces at once drops the oil temperature. Fry in small batches and let the oil come back to temperature between batches.
- Rest on a Wire Rack
Paper towels trap steam, making the bottom of your chicken soggy. A wire rack allows air to circulate, keeping all sides crispy.
- Double‑Dredge for Extra Crunch
The buttermilk‑flour‑buttermilk‑flour method creates thick, shaggy, ultra‑crispy skin that stays crunchy even after cooling.
- Let the Dredged Chicken Rest
After coating, let the chicken sit for 10–15 minutes before frying. This helps the flour adhere and prevents it from falling off in the oil.
- Use Peanut Oil for Best Flavor
Peanut oil has a high smoke point and a neutral, slightly nutty flavor that’s traditional for Southern fried chicken. Vegetable oil works too.
- Keep Finished Chicken Warm in the Oven
If frying multiple batches, place finished chicken on a wire rack in a 200°F oven to keep warm while you finish the rest.
Delicious Variations – Make It Your Own
Nashville Hot Chicken Legs
After frying, brush the hot chicken with a spicy oil mixture: ½ cup of frying oil + 2 tablespoons cayenne pepper + 1 tablespoon brown sugar + 1 teaspoon paprika + ½ teaspoon garlic powder. Serve with pickles and white bread.
Garlic Parmesan Fried Chicken
Add ¼ cup grated Parmesan to the flour mixture. After frying, toss hot chicken with 2 tablespoons melted butter + 2 minced garlic cloves + ¼ cup more Parmesan + fresh parsley.
Lemon Pepper Fried Chicken
Add 2 tablespoons lemon pepper seasoning to the flour. After frying, zest a lemon over the hot chicken and sprinkle with flaky salt.
Spicy Korean Fried Chicken (Yangnyeom)
Double‑dredge for extra crunch. After frying, toss in a sauce of: ¼ cup gochujang (Korean chili paste) + 2 tablespoons honey + 2 tablespoons ketchup + 1 tablespoon soy sauce + 1 teaspoon sesame oil. Top with sesame seeds.
Gluten‑Free Fried Chicken
Replace all‑purpose flour with 1½ cups gluten‑free flour blend + ½ cup cornstarch. Ensure your spices are gluten‑free. The texture will be slightly different but still crispy.
Air Fryer “Fried” Chicken Legs (Lighter Option)
Preheat air fryer to 375°F. Spray dredged chicken with oil. Cook for 20–25 minutes, flipping halfway, until golden and internal temperature reaches 175°F. Not as crispy as deep‑fried, but much lower in fat.
Storage & Reheating Instructions
Refrigerator
Store leftover fried chicken legs in an airtight container for up to 4 days. The skin will soften – that’s normal.
Freezer
Fried chicken freezes well. Cool completely, then wrap each leg in plastic wrap and place in a freezer bag. Freeze for up to 3 months. Thaw overnight in the refrigerator.
Reheating (To Restore Crispiness)
· Oven (best method): Preheat to 375°F. Place chicken on a wire rack over a baking sheet. Bake for 12–15 minutes until heated through and crispy.
· Air fryer: 350°F for 5–7 minutes.
· Microwave (worst method): The skin will become rubbery. Only use if you don’t care about texture.
Do not reheat in the microwave if you want crispy skin.
Nutrition Facts (Per Fried Chicken Leg – with skin, using buttermilk brine and seasoned flour)
Nutrient Amount
Calories 320
Protein 22g
Fat 19g
Saturated Fat 4.5g
Carbohydrates 14g
Fiber 1g
Sugar 2g
Sodium 580mg
Iron 8% DV
Calcium 4% DV
Nutritional information is an estimate. Values vary by oil absorption and specific ingredients.
Frequently Asked Questions (FAQs)
Q: Can I use boneless, skinless chicken thighs instead of legs?
Yes, but cooking time will be shorter (8–10 minutes). The skin is where the crispiness comes from, so boneless, skinless won’t be as crunchy. If you want crispy, stick with skin‑on.
Q: Why did my breading fall off in the oil?
Several reasons: (1) You didn’t let the dredged chicken rest before frying. (2) The oil wasn’t hot enough (below 325°F). (3) You overcrowded the pot, causing temperature drop. (4) You didn’t shake off excess flour before frying.
Q: Can I reuse frying oil?
Yes, up to 3–4 times. Let the oil cool completely, strain through a fine‑mesh sieve or cheesecloth to remove food particles, and store in a sealed container in a cool, dark place. Discard when it becomes dark, smells rancid, or smokes at normal temperature.
Q: How do I know when the chicken is done without a thermometer?
Pierce the thickest part of the leg near the bone with a knife tip. The juices should run clear, not pink. The meat should be opaque all the way through. However, a thermometer is much more reliable.
Q: Can I bake these instead of frying?
You can, but they won’t be “fried chicken.” For baked “fried” chicken, dredge as directed, spray generously with oil, and bake at 400°F for 40–45 minutes, flipping halfway. The texture is different – crispy in spots, but not the same as deep‑fried.
Q: How do I get thicker, craggier crust?
Use the double‑dredge method (flour → buttermilk → flour again). Also, add a little of the buttermilk brine to the flour mixture and work it in with your fingers to create small clumps – these clumps fry up into extra‑crispy bits.
Q: Can I make this dairy‑free?
Yes. Replace buttermilk with 2 cups unsweetened almond milk + 2 tablespoons lemon juice or white vinegar. Let sit for 10 minutes to curdle. Proceed as directed.
Q: Why are my chicken legs greasy?
Greasy chicken means the oil temperature was too low (below 300°F). The chicken sat in the oil longer, absorbing it instead of forming a quick crust. Use a thermometer and maintain 325°F.
Troubleshooting – What Went Wrong?
Problem Likely Cause Fix Next Time
Burnt outside, raw inside Oil too hot (>350°F) Maintain 325°F; reduce heat
Greasy, soggy chicken Oil too cold (<300°F) or overcrowded Heat to 325°F; fry in small batches
Breading fell off No rest after dredging, or oil not hot enough Rest 10–15 minutes; maintain 325°F
Dry, tough meat No brine, or overcooked Brine 2–24 hours; use thermometer (pull at 175°F)
Pale, not golden Oil too cold, or didn’t fry long enough Maintain 325°F; fry 12–15 minutes
Too salty Too much salt in brine or flour Reduce salt to 2 tsp in brine, 1 tbsp in flour
Spots of burnt flour Flour clumps or burnt bits in oil Shake off excess flour; strain oil between batches
The Science of Perfect Fried Chicken
Understanding what happens during frying helps you troubleshoot and improve.
The Maillard Reaction
When the chicken hits hot oil (325°F+), amino acids and reducing sugars react to create hundreds of new flavor compounds and that deep golden‑brown color. This is the Maillard reaction – the same process that browns bread and sears steak.
Steam vs. Oil
As the chicken fries, water inside the meat turns to steam and pushes outward. This steam prevents oil from penetrating the meat – that’s why properly fried chicken isn’t greasy inside. If the oil temperature is too low, steam doesn’t form quickly enough, and oil soaks in.
The Brine Effect
Salt in the buttermilk brine denatures the meat’s proteins, allowing them to hold more moisture. The acid in buttermilk also breaks down some connective tissue, making the meat more tender.
Resting is Non‑Negotiable
When you take chicken out of the oil, the juices are volatile and want to escape. Resting allows them to redistribute throughout the meat. Cutting into it immediately lets those juices run out onto the plate – leaving you with drier chicken.
Final Thoughts – Fried Chicken Legs Worth Every Crumb
Fried chicken legs are the ultimate comfort food. They’re nostalgic, satisfying, and surprisingly easy once you know the secrets: a buttermilk brine, a seasoned flour coating, proper oil temperature, and a little patience.
Whether you’re frying for a Sunday supper, a picnic, or just because you’re craving that golden crunch, this recipe delivers. The skin shatters, the meat juices, and the flavor is pure happiness.
So grab a pot, some peanut oil, and a pack of chicken legs. Brine, dredge, fry, and enjoy. Your family will thank you.
Now it’s your turn! Do you prefer dark meat or white meat for frying? What’s your go‑to dipping sauce – ranch, honey, or hot sauce? Drop a comment below – I’d love to hear your fried chicken secrets.
And if you found this guide helpful, share it with a friend who’s afraid of frying. Pin it for later, and subscribe to our newsletter for more classic comfort food recipes made from scratch.
Stay crispy, stay juicy, and keep frying with confidence. 🍗✨
More Recipes You Might Like
-

Cut a Lemon Into 4 Pieces Add Salt and Place It in Your Room – The Simple Home Trick Everyone Is Trying
Does placing salted lemon in your room really freshen air, boost mood, and remove odors? We explore the science, benefits, and limitations of this viral natural home hack. Let’s be honest: sometimes the simplest home tricks are the ones that surprise us the most. You’ve probably seen the posts – a cut lemon sprinkled with…
-

The Powerful Herbal Drink Everyone Is Talking About in 2025 – Benefits, Truth, and How to Use It Safely
The viral soursop-hibiscus-ginger drink has bold claims, but what can it really do? We separate science from hype, share a safe recipe, and explain how to use it for real wellness benefits. Let’s be honest: in today’s world, everyone is searching for a simple solution to better health. From social media posts to viral videos,…
-
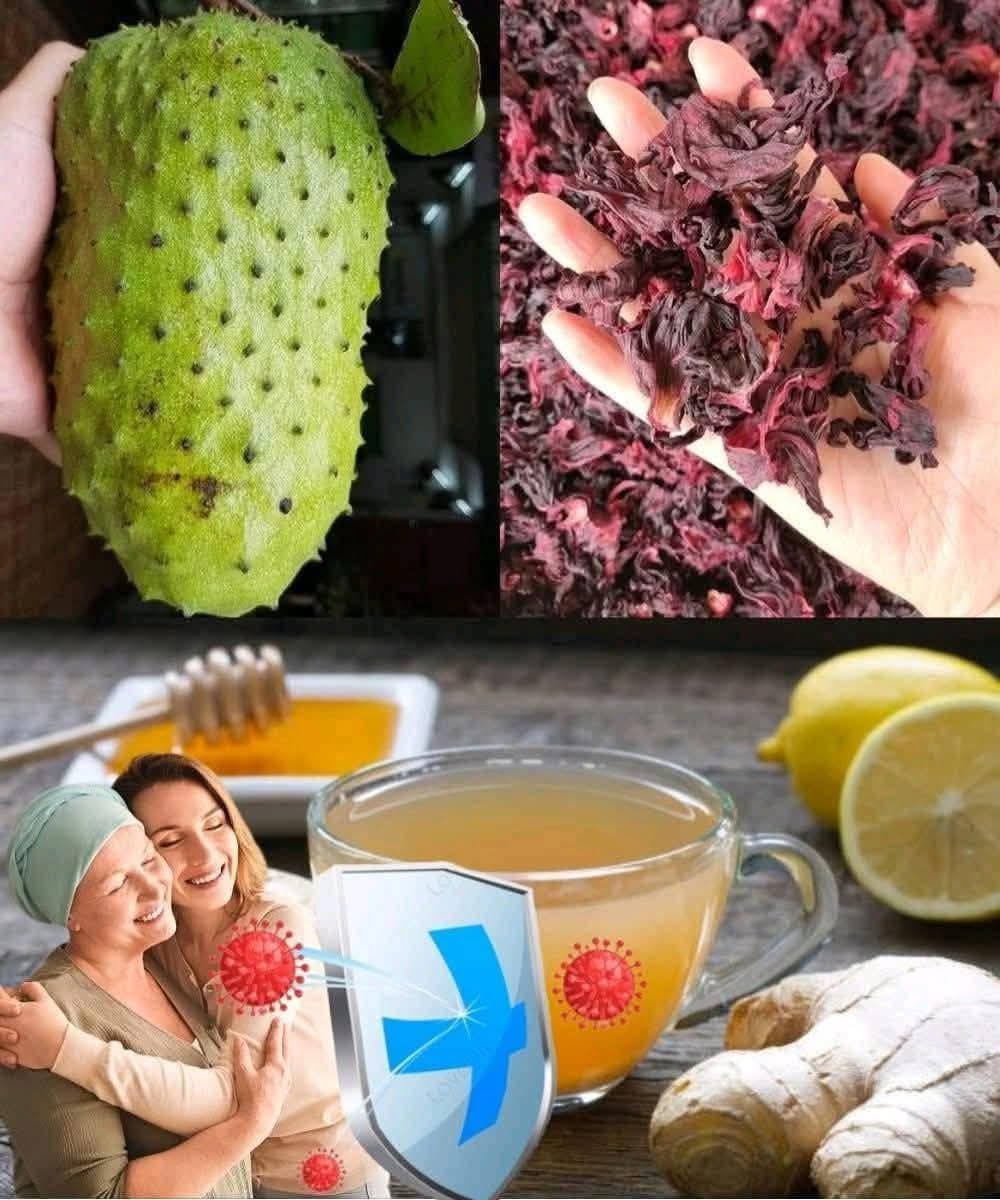
The Powerful Herbal Drink Everyone Is Talking About in 2025 – What It Really Does for Your Body
Viral herbal drinks with soursop, hibiscus, and ginger promise miracle cures. We separate fact from fiction. Learn the real benefits, a safe recipe, and when to see a doctor. Let’s be honest: you’ve seen the posts. A vibrant red drink in a mason jar, garnished with lemon and ginger, with captions that promise everything from…