
There are desserts that are good, and then there are desserts that stop conversations. The kind where someone takes their first bite, their eyes go wide, and they actually pause mid-sentence just to process what’s happening in their mouth. These Chewy Gooey Bars are that dessert.
I first encountered this recipe at a church potluck about fifteen years ago. You know how at those events, there are always a few desserts that disappear within the first twenty minutes while others sit there looking sad and untouched? These bars were the ones that vanished. People were actually hovering near the dessert table, hoping to snag one before the pan emptied.
I watched a grown woman physically move a toddler’s hand away from the last bar. That’s the kind of impact we’re talking about here.
I tracked down the baker, got the recipe, and have been making these bars ever since. They’ve become my signature dessert for every occasion—holiday gatherings, birthday parties, office potlucks, stressful Tuesdays that require emergency baked goods. And every single time, without fail, someone asks for the recipe.
Today, I’m sharing it with you, along with every tip and trick I’ve learned over fifteen years of perfecting these beauties.
What Makes These Bars So Special?
Let’s be honest—there are thousands of dessert bar recipes out there. So why do these particular ones inspire such devotion?
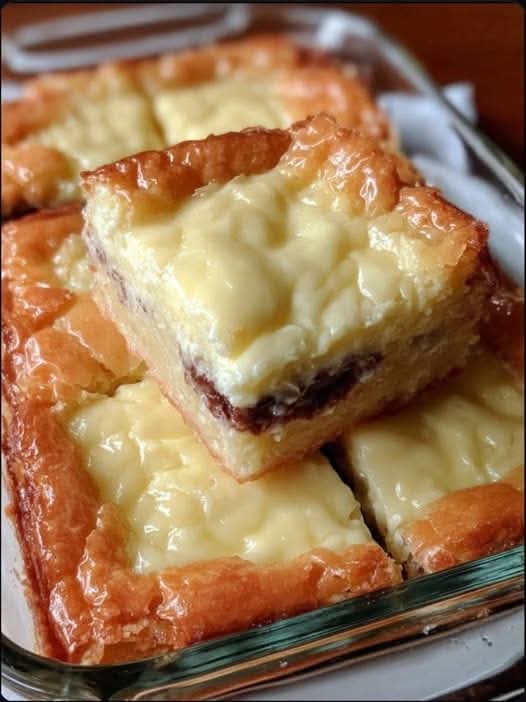
The texture is literally in the name. The crust provides the perfect chew—slightly firm, buttery, with just enough resistance to remind you that you’re eating something substantial. Then comes the gooey layer, which is essentially a cream cheese custard that stays soft, rich, and almost pudding-like even after cooling. When you bite into one, your teeth sink through that slightly firm top into pure, creamy bliss.
They’re deceptively simple. With only five main ingredients, these bars shouldn’t be this good. But somehow, the combination of cake mix, butter, cream cheese, eggs, and powdered sugar creates magic. It’s greater than the sum of its parts.
They’re endlessly adaptable. Once you master the basic formula, you can customize these bars for any occasion, any holiday, any craving. I’ll show you how.
They feed a crowd. A 9×13 pan yields 24 good-sized bars. Perfect for parties, perfect for sharing, perfect for keeping some and freezing the rest for emergencies.
The Complete Ingredient Breakdown
Before we dive into the method, let’s talk about each ingredient and why it matters. Understanding the role each component plays will help you troubleshoot and customize with confidence.
For the Crust:
1 box yellow cake mix (dry, not prepared)
This is the genius shortcut that makes these bars so accessible. The cake mix provides flour, leavening, sugar, and flavor all in one package. Yellow cake mix has a classic vanilla-buttermilk flavor that pairs beautifully with the cream cheese layer. You can use other flavors too—more on that later—but for the classic version, yellow is perfect.
Important: Use the dry mix straight from the box. Do NOT prepare it according to package directions. We’re using it as a baking mix, not as cake batter.
8 tablespoons melted butter
That’s one full stick of butter, melted. The butter binds the dry cake mix into a dough-like consistency and provides richness and flavor. When melted butter hits the dry mix, it creates a shortbread-like texture that bakes into the perfect chewy crust. Make sure your butter is fully melted but not boiling hot—you don’t want to cook the egg when you mix it in.
1 egg
The egg provides structure and helps bind the crust together. It also adds richness and helps the crust brown beautifully in the oven.
For the Gooey Layer:
8 ounces cream cheese, softened
This is non-negotiable. Full-fat cream cheese gives you that rich, tangy, creamy texture that makes the gooey layer so irresistible. Low-fat or Neufchatel cream cheese have higher water content and won’t set up the same way—your bars may end up runny rather than gooey. Let your cream cheese sit on the counter for at least an hour before starting. It should be soft enough that you can easily press a finger into it.
2 eggs, beaten
The eggs provide structure for the gooey layer while keeping it soft and creamy. They help the layer set just enough that you can cut clean bars, but not so much that it becomes firm like cheesecake.
16 ounces powdered sugar
That’s one standard box or about 4 cups. Powdered sugar is essential here because it dissolves completely into the cream cheese mixture, creating a smooth, lump-free filling. Granulated sugar would leave a gritty texture. The powdered sugar also contains a small amount of cornstarch, which helps stabilize the filling.
Step-by-Step Instructions for Perfect Bars Every Time
After making these bars dozens of times, I’ve refined the method to ensure consistent results. Follow these steps carefully, especially if it’s your first time.
Step 1: Preheat Your Oven
Preheat your oven to 350°F (175°C). Position a rack in the center of the oven.
While the oven heats, grease a 9×13-inch baking pan thoroughly. I prefer using butter or baking spray with flour. You can also line the pan with parchment paper, leaving overhang on the long sides. This makes removing the bars even easier—you can lift the entire slab out and cut it on a cutting board.
Step 2: Make the Crust
In a medium bowl, combine the dry cake mix, melted butter, and one egg.
Mix until everything comes together into a thick, cohesive dough. It will be quite stiff—this is correct. You’re essentially making a cookie dough.
Here’s a pro tip: use your hands for the final mixing. The heat of your hands helps bring the dough together, and you can feel when it’s uniformly mixed without overworking it. Overmixing can make the crust tough, so mix just until no dry streaks remain.
Press this mixture evenly into the bottom of your prepared pan. This is where patience matters. Take your time to press it into an even layer, reaching all the way to the corners. I use the bottom of a measuring cup or a flat glass to help press it firmly and evenly. The crust should be compact—not loosely packed—so it holds together after baking.
Set the pan aside while you make the filling.
Step 3: Make the Gooey Layer
In a large bowl, beat the softened cream cheese until it’s completely smooth. This is crucial. If your cream cheese has any lumps, they’ll remain in the finished bars. Use an electric mixer on medium speed and beat for 2-3 minutes, scraping down the sides and bottom of the bowl at least once.
The cream cheese should be silky and spreadable before you add anything else.
Add the two beaten eggs and continue beating for another minute or two until fully incorporated. The mixture will become lighter and smoother.
Now, here’s the important part: gradually add the powdered sugar. Don’t just dump it all in at once unless you want a powdered sugar cloud in your kitchen and lumps in your filling. Add it about a cup at a time, mixing on low speed until each addition is incorporated before adding the next.
Once all the sugar is added, increase the speed to medium and beat for another minute until the filling is completely smooth, glossy, and free of lumps. It will be thick but pourable.
Step 4: Assemble and Bake
Pour the cream cheese mixture over the crust. Use a spatula to spread it evenly, making sure it reaches all the corners.
Place the pan in your preheated oven and bake for 25-30 minutes.
Here’s the most important visual cue: the edges should be set and lightly golden, but the center should still be slightly jiggly when you gently shake the pan. This jiggle is what gives you that perfect gooey texture.
Whatever you do, do not overbake these bars. If you wait until the center is completely firm, you’ll have dry, cake-like bars instead of the luscious, gooey wonders you’re aiming for. The residual heat will continue cooking the bars as they cool, so removing them while the center is still slightly underdone is exactly right.
Step 5: Cool Completely
This is the hardest part of the entire recipe—waiting.
You must let these bars cool completely before cutting. I know the kitchen smells amazing. I know you’re tempted to dig in with a spoon while they’re warm. But if you cut too soon, you’ll have a beautiful, gooey mess rather than clean, presentable bars.
Let them cool on a wire rack at room temperature for at least 2 hours. For the cleanest cuts, refrigerate them for an additional hour after they’ve reached room temperature. The chilling firms up the gooey layer just enough that you can cut perfect squares while still maintaining that soft, luscious texture when you bite into them.
Step 6: Cut and Serve
Once completely cooled, cut into 24 bars (6 rows by 4 rows). For the cleanest cuts, use a sharp knife and wipe it clean between each cut.
Serve at room temperature for the softest, gooey-est texture. Some people actually prefer them chilled—they become denser and almost fudge-like. Both are delicious, so experiment and find your preference.
The Science Behind the Perfection
Why do these bars work so well? Let’s geek out for a minute.
The crust is essentially a shortbread made from cake mix. The high fat content from the butter inhibits gluten formation, keeping the crust tender rather than tough. The single egg provides just enough structure to hold it together without making it bready.
The gooey layer is a fascinating hybrid. With 16 ounces of powdered sugar to only 8 ounces of cream cheese and 2 eggs, it’s extremely high in sugar relative to its other components. This high sugar concentration interferes with protein coagulation (how eggs set) and keeps the texture soft and almost underbaked even when fully cooked. The sugar essentially “protects” the eggs from setting too firmly.
The cornstarch in the powdered sugar provides just enough stabilization to allow clean cutting, while the fat from the cream cheese and eggs keeps everything rich and smooth.
It’s a beautiful piece of food science disguised as a simple dessert.
Troubleshooting Common Issues
Even after fifteen years, I occasionally have a batch that doesn’t turn out perfectly. Here’s how to fix the most common problems.
My Crust Is Too Hard
This usually happens from overmixing or overbaking. When you mix the crust, stop as soon as it comes together. When you bake, pull the bars when the center is still jiggly—don’t wait for the crust to get deeply golden.
My Gooey Layer Is Runny
This can happen if you underbaked significantly, but more often it’s because your cream cheese wasn’t fully softened, leading to uneven incorporation. Next time, make sure your cream cheese is truly at room temperature. If your bars are already baked and runny, refrigerate them for several hours or overnight—they’ll firm up considerably when cold.
My Bars Are Too Sweet
The 16 ounces of powdered sugar isn’t a typo. These are meant to be decadently sweet. However, you can balance the sweetness by serving them with fresh berries or a dollop of lightly sweetened whipped cream. The tartness of raspberries, in particular, cuts through the sweetness beautifully.
The Top Cracked While Baking
This is actually normal and happens with many cream cheese-based desserts. As the bars bake, the top sets while the center continues to rise slightly, causing cracks. If you want a perfectly smooth top, try baking at 325°F for a slightly longer time. But honestly? The cracks add character.
Endless Variations
Once you’ve mastered the basic recipe, the possibilities are endless. Here are some of my favorite variations.
Chocolate Chewy Gooey Bars
Use a chocolate cake mix for the crust. For extra chocolate intensity, add ½ cup mini chocolate chips to the cream cheese mixture before pouring over the crust. The little pockets of melted chocolate take these over the top.
Lemon Chewy Gooey Bars
Use a lemon cake mix. Add 2 tablespoons of fresh lemon juice and 1 tablespoon of lemon zest to the cream cheese mixture. The bright, citrusy tang is perfect for spring and summer gatherings.
Pumpkin Chewy Gooey Bars (Fall Favorite)
Use a spice cake mix. Add ½ cup canned pumpkin puree and 1 teaspoon pumpkin pie spice to the cream cheese mixture. These are always a hit at Thanksgiving—they’re like pumpkin cheesecake in bar form.
Red Velvet Chewy Gooey Bars
Use a red velvet cake mix. Add 1 tablespoon of cocoa powder to the cream cheese mixture for extra chocolate depth. These are stunning for Valentine’s Day or Christmas.
Peanut Butter Chewy Gooey Bars
Use a yellow cake mix. Add ½ cup creamy peanut butter to the cream cheese mixture and beat until smooth. For extra decadence, swirl additional peanut butter on top before baking.
Mint Chocolate Chewy Gooey Bars
Use a chocolate cake mix. Add ½ teaspoon peppermint extract to the cream cheese mixture and stir in ½ cup mini chocolate chips. These are perfect for the holidays.
Cookies and Cream Chewy Gooey Bars
Use a yellow cake mix. Crush 10-12 chocolate sandwich cookies (like Oreos) and fold them into the cream cheese mixture. Sprinkle additional crushed cookies on top before baking.
Seasonal Adaptations
These bars are perfect for every season with simple tweaks.
Spring: Add pastel sprinkles to the cream cheese mixture before baking for Easter. Or use a lemon cake mix with fresh berries on top when serving.
Summer: Top with fresh sliced strawberries or a blueberry compote. The bright fruit cuts through the richness beautifully.
Fall: Use pumpkin or spice cake mix. Dust the cooled bars with cinnamon-sugar for extra warmth.
Winter: Add crushed candy canes to the cream cheese mixture when using chocolate cake mix. Or dust with powdered sugar to look like snow.
Serving Suggestions and Pairings
While these bars are spectacular on their own, here are some ways to elevate them further:
With coffee or espresso: The bitterness of coffee balances the sweetness perfectly. These are my go-to for coffee dates at home.
With vanilla ice cream: Warm a bar slightly (about 10 seconds in the microwave) and top with vanilla bean ice cream. The temperature contrast is incredible.
With fresh berries: A handful of raspberries or sliced strawberries adds brightness and cuts through the richness.
Dusted with powdered sugar: A light dusting right before serving makes them look extra special.
Drizzled with chocolate: Melt some chocolate chips with a teaspoon of coconut oil and drizzle over the cooled bars for a professional touch.
Storage and Make-Ahead Tips
Room Temperature: Store in an airtight container at room temperature for up to 3 days. Layer them with parchment paper between layers to prevent sticking.
Refrigerator: These bars keep beautifully in the refrigerator for up to a week. In fact, many people prefer them chilled. The texture becomes denser and almost fudge-like.
Freezer: These freeze like a dream. Wrap individual bars tightly in plastic wrap, then place in a freezer bag or container. They’ll keep for up to 3 months. Thaw at room temperature for about an hour before serving, or enjoy them slightly frozen for a treat similar to ice cream cake.
Make-Ahead for Parties: These are perfect for entertaining because you can make them a day or two ahead. In fact, they’re even better the next day after the flavors have melded. Just keep them covered in the refrigerator and bring to room temperature before serving if desired.
Why This Recipe Deserves a Permanent Spot in Your Rotation
In a world of complicated, multi-step desserts that require specialty ingredients and hours of work, these Chewy Gooey Bars are a beautiful reminder that simple can be spectacular.
With five ingredients and about ten minutes of active work, you can create something that people will genuinely fight over. Something that becomes “that dessert” you’re asked to bring to every gathering. Something that makes ordinary days feel like celebrations.
The crust provides the perfect chew. The cream cheese layer delivers that signature gooey texture. Together, they create something that’s somehow both familiar and extraordinary, simple and special, everyday and celebratory all at once.
I’ve made these bars for fifteen years, and I’m still not tired of them. I’ve made them for church potlucks and birthday parties, for holiday gatherings and Tuesday night cravings. I’ve made the classic version and every variation I could imagine. And every single time, they deliver.
Now it’s your turn. Preheat that oven. Open that box of cake mix. Soften that cream cheese. And get ready to fall in love with your new favorite dessert.
Just be prepared to share the recipe. Because trust me—everyone’s going to ask.
Have you tried these Chewy Gooey Bars? Did you try one of the variations? I’d love to hear how they turned out! Drop a comment below and share your experience.
More Recipes You Might Like
-
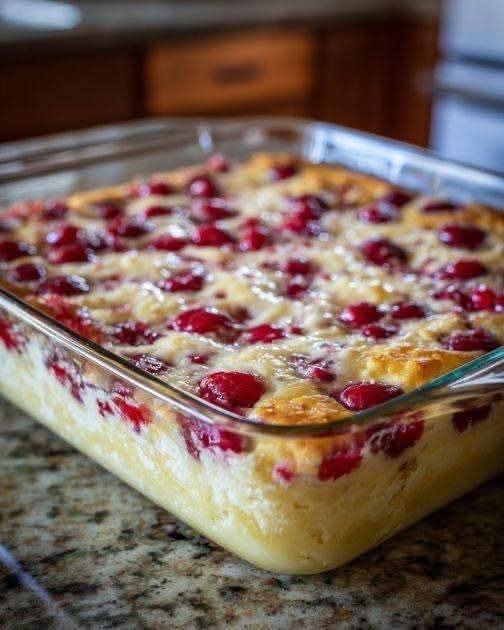
Cherry Dump Cake: The 3-Ingredient Dessert That’s Almost Too Easy
Discover the magic of Cherry Dump Cake! With just 3 ingredients and 5 minutes of prep, this impossibly easy dessert creates a golden, buttery topping over sweet, tart cherry filling. Perfect for last-minute craving Let me tell you about the dessert that saved my reputation as a baker. I love to bake. I really do.…
-

Apple Pie Prepared with Only 3 Apples and in 10 Minutes – It Drives Me Crazy!
Discover the magic of this incredible apple pie made with just 3 apples and ready in 10 minutes! It’s the easiest, most delicious dessert you’ll ever make. Perfect for last-minute cravings and unexpected guests. Let me tell you about the apple pie that changed my life. I know that sounds dramatic, but hear me out.…
-
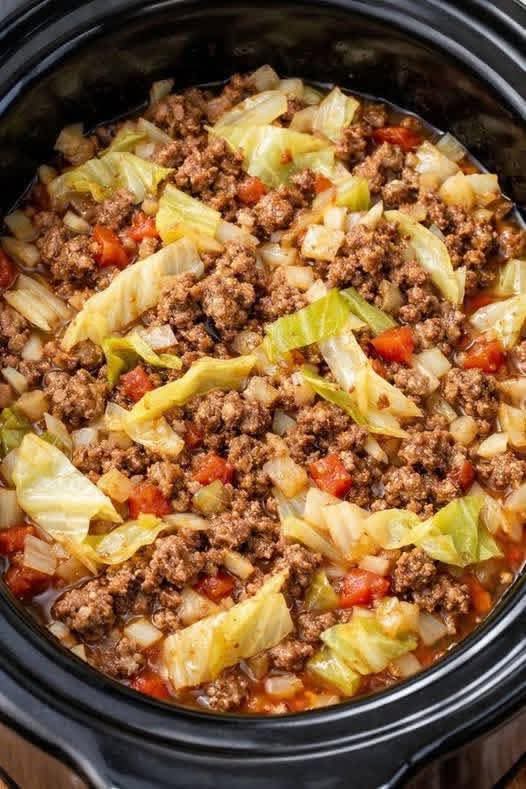
4 Ingredient Slow Cooker Unstuffed Cabbage Beef: The Easiest Comfort Food Ever
Discover the magic of 4-Ingredient Slow Cooker Unstuffed Cabbage Beef! All the flavor of traditional cabbage rolls without the fuss. Just toss it in the slow cooker and come home to a hearty, delicious dinner. Let me tell you about the recipe that saved my sanity on a hundred busy weeknights. I love cabbage rolls.…