
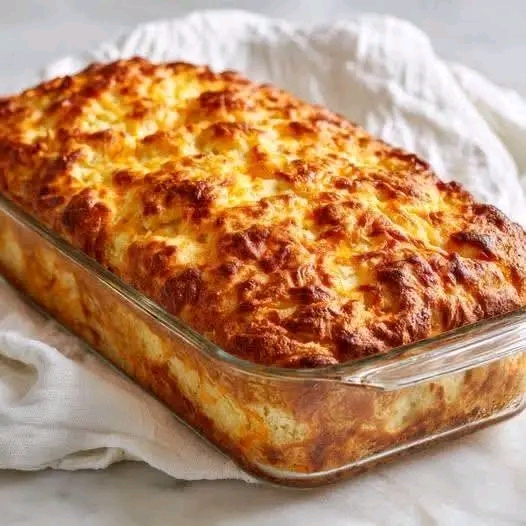
Discover the magic of Cheesy Pull Apart Bread! Soft, fluffy bread stuffed with gooey cheese, garlic butter, and herbs, then baked to golden perfection. Perfect for parties, game day, or any gathering.
Let me introduce you to the appetizer that disappears faster than anything else at every party I’ve ever hosted.
I first made Cheesy Pull Apart Bread for a casual get-together with friends. I was looking for something impressive but simple—something that would let people snack while we chatted. I grabbed a loaf of bread, some cheese, butter, and garlic, and threw it together in minutes. When I pulled it from the oven, golden and bubbling, the entire room fell silent for a moment. Then everyone lunged. Within ten minutes, there was nothing left but a few crumbs and a chorus of requests for the recipe.
That’s the magic of this dish. It’s ridiculously easy, uses everyday ingredients, and transforms into a warm, cheesy, pull-apart masterpiece that makes any gathering feel special. Whether you’re hosting a game day party, a holiday dinner, or just craving something indulgent, this bread delivers.
In this guide, I’ll share everything you need to know to make the perfect Cheesy Pull Apart Bread. Plus, I’ll give you pro tips, delicious variations, and answers to all your burning questions.
Why You’ll Love This Cheesy Pull Apart Bread
Incredibly Easy
With just a few simple ingredients and about 10 minutes of prep, you can create a show-stopping appetizer. No complicated techniques, no fancy equipment.
Perfect for Sharing
The pull-apart style is interactive and fun. Guests love tearing off their own cheesy, buttery pieces.
Endlessly Customizable
Change up the cheeses, add herbs, spice it up with jalapeños, or stuff it with bacon—the possibilities are endless.
Crowd-Pleasing
Cheese, bread, garlic—it’s a combination that’s universally loved. Kids and adults alike can’t resist.
Make-Ahead Friendly
You can assemble the bread hours before baking and pop it in the oven when guests arrive.
Ingredients for Perfect Cheesy Pull Apart Bread
The Core Ingredients:
Ingredient Amount Notes
Round loaf of bread 1 (about 1 lb) Sourdough, artisan, or French loaf
Unsalted butter ½ cup (1 stick) Melted
Garlic 4 cloves Minced (or 1½ tsp garlic powder)
Fresh parsley 2 tbsp Chopped (optional, for color)
Mozzarella cheese 2 cups Shredded
Parmesan cheese ½ cup Grated (optional, for extra flavor)
Optional Add-Ins:
· ½ cup cooked bacon, crumbled
· ¼ cup chopped fresh chives
· ½ teaspoon red pepper flakes (for heat)
· ¼ cup sliced green onions (for garnish)
Step-by-Step Instructions
Step 1: Preheat and Prepare
Preheat your oven to 350°F (175°C) . Line a baking sheet with parchment paper or foil.
Step 2: Cut the Bread
Using a serrated knife, cut the bread in a crosshatch pattern without cutting all the way through:
· Slice vertically every 1–1½ inches, stopping about ½ inch from the bottom.
· Then slice horizontally in the same pattern, creating a grid of bread cubes still attached at the base.
Step 3: Make the Garlic Butter
In a small bowl, combine the melted butter, minced garlic, and parsley (if using). Stir well.
Step 4: Stuff with Cheese
Gently pull apart the bread sections and insert mozzarella cheese into the crevices. Don’t be shy—stuff as much as you can. Sprinkle Parmesan over the top.
Step 5: Drizzle with Butter
Spoon or brush the garlic butter evenly over the bread, making sure it seeps into the cuts. If you’re adding bacon, sprinkle it over the top now.
Step 6: Wrap and Bake
Wrap the bread loosely in aluminum foil, leaving the top slightly open to allow steam to escape. Bake for 15 minutes. Then, remove the foil and bake for an additional 5–10 minutes, until the cheese is melted and bubbly and the top is golden.
Step 7: Serve Immediately
Transfer to a serving platter. Garnish with additional parsley or green onions if desired. Serve warm, letting guests pull apart pieces.
Pro Tips for the Best Cheesy Pull Apart Bread
- Choose the Right Bread
A sturdy round loaf like sourdough or artisan bread works best. It holds its shape and has a nice crust. Avoid soft sandwich bread—it will get soggy.
- Don’t Cut All the Way Through
Cutting to within ½ inch of the bottom keeps the loaf intact while allowing the cheese and butter to penetrate every crevice.
- Use Freshly Grated Cheese
Pre-shredded cheese has anti-caking agents that prevent it from melting as smoothly. Grate your own mozzarella for that perfect, gooey stretch.
- Let It Rest Before Serving
Let the bread cool for 2–3 minutes after baking—this helps the cheese set slightly and prevents burns.
- Make It Ahead
Assemble the bread completely (without baking), wrap in foil, and refrigerate for up to 4 hours. Bake when ready, adding 5 minutes to the covered baking time.
Delicious Variations
- Bacon Jalapeño Popper Bread
Add ½ cup cooked, crumbled bacon and 1–2 diced jalapeños to the cheese stuffing. Sprinkle extra cheddar on top.
- Pesto & Mozzarella Bread
Spread ¼ cup pesto inside the cuts along with the cheese. The herbaceous flavor is incredible.
- Four-Cheese Bread
Mix mozzarella, provolone, fontina, and Parmesan for a rich, complex cheese blend.
- Spinach Artichoke Bread
Fold ½ cup chopped spinach (thawed and drained) and ¼ cup chopped artichoke hearts into the cheese mixture.
- Italian Herb Bread
Add 1 teaspoon dried oregano and ½ teaspoon dried basil to the garlic butter. Sprinkle with extra Parmesan.
- Sun-Dried Tomato & Mozzarella
Toss ¼ cup chopped sun-dried tomatoes (in oil, drained) with the cheese for a tangy, savory twist.
- Gluten-Free Version
Use a gluten-free round loaf. Check that all other ingredients are gluten-free.
Serving Suggestions
As an Appetizer
Place the bread on a large platter with small plates and napkins. Let guests tear off pieces.
With Dipping Sauces
Serve alongside marinara sauce, ranch dressing, or a garlic aioli for extra dipping.
For a Meal
Pair with a simple green salad or a bowl of tomato soup for a cozy dinner.
For Parties
Make two loaves—one classic and one with a fun variation—to please a crowd.
Storage and Reheating
Refrigerator Storage
Store leftover bread in an airtight container in the refrigerator for up to 3 days.
Reheating Instructions
· Oven: Wrap in foil and warm at 350°F for 8–10 minutes.
· Air fryer: Reheat at 350°F for 3–4 minutes.
· Microwave: Quick but will soften the bread; use 30-second bursts.
Freezer Instructions
Assemble the unbaked bread, wrap tightly in foil, and freeze for up to 1 month. Bake from frozen, adding 10–15 minutes to the covered baking time.
Frequently Asked Questions (FAQs)
Q: Can I use a different type of bread?
A: Yes! A baguette or ciabatta works, but you’ll need to adjust the cutting pattern. For baguettes, slice crosswise at an angle, stuff cheese, and arrange in a single layer.
Q: How do I prevent the bread from getting too crispy?
A: Baking covered for the first part keeps the bread soft. If you prefer a crispier top, leave it uncovered the entire time.
Q: Can I use garlic powder instead of fresh garlic?
A: Yes. Use 1½ teaspoons of garlic powder mixed into the melted butter.
Q: What’s the best cheese for pulling?
A: Mozzarella is classic for its stretch. Mixing it with provolone or fontina adds extra creaminess.
Q: Can I make this dairy-free?
A: Yes. Use dairy-free butter and vegan cheese shreds. Choose a dairy-free bread.
Q: How many people does this serve?
A: One loaf serves about 6–8 as an appetizer. If it’s the main snack, it might serve 4–6 hungry guests.
Nutritional Information
Please note that the following is an estimate and will vary based on specific ingredients and portion sizes (based on 8 servings).
Nutrient Amount per Serving
Calories ~280-350
Total Fat 16-20g
Saturated Fat 10-12g
Cholesterol 45-60mg
Sodium 450-550mg
Total Carbohydrates 24-28g
Dietary Fiber 1-2g
Sugars 2-3g
Protein 10-12g
Conclusion
Cheesy Pull Apart Bread is the ultimate comfort food appetizer. It’s warm, gooey, buttery, and absolutely irresistible. With just a few simple ingredients and minimal prep, you can create a dish that will have everyone gathered around the table, tearing off piece after piece.
Whether you’re hosting a game day party, a holiday dinner, or just looking for a cozy treat, this bread delivers. And with all the variations, you can make it your own—spicy, herby, loaded with bacon, or classic and simple.
I hope this guide has given you everything you need to make the perfect Cheesy Pull Apart Bread. Remember the key tips: use a sturdy loaf, cut without slicing through, stuff generously, and bake covered first.
Now it’s your turn! Grab a loaf, some cheese, and garlic butter, and get ready to watch it disappear. When you do, we’d love to hear about it. Leave a comment below and share your favorite variation.
And if you’re looking for more crowd-pleasing appetizers, check out our guides for Garlic Knots, Spinach Artichoke Dip, and Loaded Nachos.
Happy baking! 🧀🍞✨
Did you make this Cheesy Pull Apart Bread? We’d love to see your creations! Leave a comment below and share your photos. Don’t forget to pin this recipe for your next gathering!
More Recipes You Might Like
-

Sandwich Crust Garlic Rolls – The Zero-Waste Appetizer You’ll Make Again and Again
Don’t throw away your sandwich crusts! Turn them into crispy, buttery garlic rolls in minutes. This zero-waste recipe is perfect for snacks, soups, or party appetizers. Let’s be honest: how many sandwich crusts have you tossed in the trash over the years? If you have kids (or picky adults) at home, the answer is probably…
-

Hospital Emptying Drink: What Science Really Says About This Healthy Blend
“hospital emptying” drinks promise to cure everything from cancer to high blood pressure. We separate fact from fiction, examine the science behind soursop, hibiscus, and turmeric, and offer a safe, realistic recipe. Let’s be honest: every few months, the internet finds a new “miracle drink.” One week it’s a detox tonic. The next, it’s a…
-

Air Fryer Sliced Potatoes – Crispy, Golden, and Ready in 20 Minutes
These air fryer sliced potatoes are crispy on the outside, tender on the inside, and ready in 20 minutes. Perfect for a quick side dish, breakfast hash, or snack. Only 4 ingredients! Let’s be honest: roasted potatoes are a comfort food classic. But who has time to wait 45 minutes for the oven to do…