
There are certain desserts that feel intimidating. Classic apple pie, with its intricate lattice crust and precisely crimped edges, is one of them. It’s beautiful, yes. Delicious, absolutely. But let’s be honest—it’s also a project. Rolling, fitting, trimming, lattice-weaving, crimping. By the time you’re done, you’ve earned that first bite.
Enter apple slab pie.
This is the pie for people who love apple pie but don’t love pie drama. It’s the pie for feeding a crowd, for potlucks and picnics, for Thanksgiving when you need dessert for 12 but only have one oven. It’s the pie that delivers all the flavor of classic apple pie with about half the work and twice the servings.
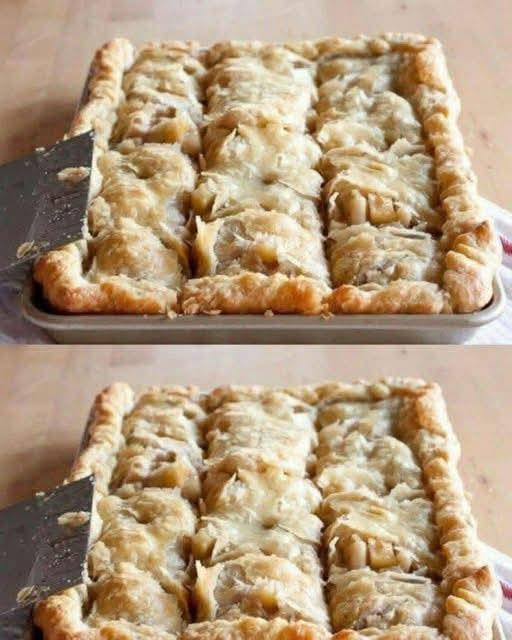
The concept is simple: instead of a deep, round pie pan, you use a rimmed baking sheet. The result is a thinner, rectangular pie with more surface area—more crust, more filling, more opportunities for that glorious golden-brown top. Each slice is a perfect rectangle, easy to serve, easy to eat, and absolutely delicious.
I discovered slab pie years ago when I needed to bring dessert to a large gathering and realized my single pie just wouldn’t cut it. I adapted my favorite apple pie recipe to fit a sheet pan, and the result was so much better than I expected that I’ve never looked back. The crust-to-filling ratio is perfect. Every bite has plenty of flaky crust and tender, spiced apples. And serving is a breeze—just cut into squares and watch them disappear.
Today, I’m sharing my complete guide to apple slab pie, with all the tips and tricks I’ve learned along the way.
Why You’ll Fall in Love With Apple Slab Pie
Feeds a crowd. A standard 9-inch pie serves 8 modestly. A slab pie in a 10×15-inch pan serves 12-15 easily. Perfect for potlucks, holidays, and parties.
Easier than traditional pie. No deep dish to wrestle with, no lattice weaving required. The filling goes in a shallow pan and the top crust goes on simply.
Better crust-to-filling ratio. That’s right—slab pie actually has more crust per bite than traditional pie. For crust lovers like me, this is heaven.
Portable. A slab pie travels beautifully in its pan. Just cover and go.
Customizable. Use any apple variety, any spice blend, any crust. The format is endlessly adaptable.
Beautiful presentation. That big, golden rectangle of pie is stunning. Dust it with powdered sugar or drizzle with glaze, and it’s picture-perfect.
Freezes beautifully. Make ahead, freeze, and bake when needed.
Kid-friendly. Rectangular slices are easy for little hands to hold. No pointy pie wedges to worry about.
The Complete Ingredient Breakdown
For the Crust:
4 cups all-purpose flour
All-purpose gives the perfect balance of flakiness and structure. For a more tender crust, you can replace 1 cup with cake flour.
1 tablespoon sugar
Adds a touch of sweetness and helps with browning.
1½ teaspoons salt
Essential for flavor. Don’t skip it.
1½ cups (3 sticks) cold unsalted butter, cut into small pieces
Ice-cold butter is crucial for flaky crust. The butter pieces create steam as they melt in the oven, forming those delicate layers. Keep everything cold.
½ to ¾ cup ice water
Just enough to bring the dough together. The exact amount varies based on humidity and flour.
For the Apple Filling:
6-7 cups peeled, cored, and sliced apples (about 6-8 medium apples)
The apples are the star. Choose a mix of varieties for complexity.
Best apple choices:
· Granny Smith: Firm, tart, holds shape well
· Honeycrisp: Sweet, juicy, holds shape
· Braeburn: Excellent flavor, holds shape
· Jonagold: Sweet-tart, holds shape
· Pink Lady: Firm, sweet-tart
½ cup granulated sugar
Adjust based on apple sweetness. If your apples are very sweet, reduce slightly.
¼ cup brown sugar, packed
Adds depth and a hint of molasses flavor.
3 tablespoons all-purpose flour
Thickens the juices so the filling isn’t runny.
1 tablespoon lemon juice
Brightens the apple flavor and prevents browning.
1½ teaspoons ground cinnamon
Warm, aromatic, essential.
¼ teaspoon ground nutmeg
Adds warmth and depth.
⅛ teaspoon ground cloves or allspice (optional)
A tiny hint adds complexity.
1 teaspoon vanilla extract
Enhances all the flavors.
For Assembly:
1 egg, beaten with 1 tablespoon water (egg wash)
For brushing on top crust. Creates that beautiful golden sheen.
Coarse sugar (turbinado or demerara) for sprinkling
Adds sparkle and a delightful crunch.
Optional Glaze:
1 cup powdered sugar
2-3 tablespoons milk or cream
½ teaspoon vanilla extract
Step-by-Step Instructions
Step 1: Make the Dough
In a large bowl, whisk together the flour, sugar, and salt.
Add the cold butter pieces. Using a pastry blender, two forks, or your fingertips, cut the butter into the flour until the mixture resembles coarse meal with some pea-sized butter pieces remaining. These chunks are what create flaky layers.
Gradually add ice water, 1 tablespoon at a time, tossing with a fork after each addition. Stop adding water when the dough just begins to come together. It should hold together when pressed but not be wet or sticky.
Divide the dough into two portions, one slightly larger than the other (the larger portion will be the bottom crust). Shape each into a rectangle (to match your sheet pan), wrap in plastic, and refrigerate for at least 1 hour, or up to 2 days.
Step 2: Prepare the Filling
While the dough chills, prepare the apples. Peel, core, and slice them about ¼-inch thick. You want them thin enough to cook through but thick enough to maintain some texture.
In a large bowl, combine the sliced apples with both sugars, flour, lemon juice, cinnamon, nutmeg, cloves (if using), and vanilla. Toss until the apples are evenly coated. Set aside while the dough finishes chilling. This allows the apples to release some of their juices.
Step 3: Preheat and Prep
Preheat your oven to 375°F (190°C). Lightly grease a 10×15-inch rimmed baking sheet (jelly roll pan) or line with parchment paper.
Step 4: Roll the Bottom Crust
On a lightly floured surface, roll the larger portion of dough into a rectangle about 13×18 inches—large enough to cover the bottom and sides of your pan with some overhang.
Carefully transfer the dough to your prepared pan. Gently press it into the bottom and up the sides, letting the excess hang over the edges. Don’t stretch the dough—it will shrink back during baking if stretched.
Step 5: Add the Filling
Pour the apple filling into the crust and spread into an even layer. The apples should mound slightly but will settle during baking.
Step 6: Roll the Top Crust
Roll the remaining dough into a rectangle about 11×16 inches—large enough to cover the filling.
You have options for the top crust:
Solid top: Simply place the rolled dough over the filling. Cut several slits to allow steam to escape.
Lattice top: Cut the rolled dough into strips and weave a lattice. This looks beautiful and allows steam to escape easily.
Simple strips: Cut the dough into strips and lay them in a simple grid pattern.
Whatever you choose, place the top crust over the filling.
Step 7: Seal and Crimp
Trim the excess dough from the edges, leaving about ½ inch overhang. Fold the overhang under itself and crimp or press with a fork to seal.
Step 8: Egg Wash and Sugar
Brush the top crust generously with egg wash. This creates that beautiful golden shine.
Sprinkle liberally with coarse sugar. Don’t be shy—the sugar adds wonderful crunch and sparkle.
Step 9: Bake
Place the pan on a baking sheet (to catch any potential drips) and bake at 375°F for 45-55 minutes, until the crust is golden brown and the filling is bubbly. If the edges brown too quickly, tent loosely with foil.
The filling should be bubbling visibly—that’s how you know the thickener has activated.
Step 10: Cool
Let the pie cool in the pan on a wire rack for at least 2 hours before cutting. This allows the filling to set so your slices hold together.
Step 11: Optional Glaze
If desired, whisk together powdered sugar, milk, and vanilla until smooth. Drizzle over the cooled pie before serving.
Step 12: Cut and Serve
Cut into squares or rectangles. Serve as is, with vanilla ice cream, or with whipped cream.
The Science Behind Perfect Slab Pie
Crust-to-filling ratio: The shallow pan creates more crust area relative to filling volume. Each bite has the perfect balance.
Cold butter is crucial: Butter pieces create steam as they melt, pushing apart the layers of dough and creating flakiness. If your butter warms up, you’ll lose those layers.
Resting time: Letting the dough chill relaxes the gluten and prevents shrinkage. Letting the baked pie cool allows the filling to set properly.
Apple variety matters: Different apples have different textures and moisture content. A mix of varieties creates the most interesting and balanced filling.
Troubleshooting Common Issues
My Bottom Crust Is Soggy
Several possible causes:
· Filling was too wet (let apples sit longer to release juice, then drain slightly)
· Not enough thickener (add an extra tablespoon of flour next time)
· Oven temperature too low (use an oven thermometer)
You can also pre-bake (blind bake) the bottom crust for 10-12 minutes before adding filling.
My Top Crust Browned Too Quickly
Tent loosely with foil during the last 15-20 minutes of baking. If your oven runs hot, use a thermometer to verify temperature.
My Filling Is Runny After Cooling
Either the pie wasn’t baked long enough (the filling should be bubbling visibly) or there wasn’t enough thickener. Next time, add an extra tablespoon of flour and ensure you’re baking until bubbly.
My Crust Shrank During Baking
The dough was stretched when placed in the pan, or it wasn’t chilled long enough. Gently fit the dough without stretching, and ensure adequate chilling time.
The Slices Don’t Hold Together
The pie needs to cool completely. I know it’s tempting to cut into a warm pie, but patience is rewarded with clean slices. Cool at least 2 hours, preferably longer.
Apple Variety Guide
Apple Flavor Texture After Baking Best Use
Granny Smith Tart, bright Holds shape well Base of any mix
Honeycrisp Sweet, juicy Holds shape well Adds sweetness
Braeburn Sweet-tart Holds shape All-around great
Jonagold Sweet-tart Holds shape Complex flavor
Pink Lady Sweet-tart Firm Colorful, flavorful
Fuji Very sweet Slightly soft Sweet tooth option
Gala Mildly sweet Soft Use in mix only
McIntosh Tart Breaks down Good for applesauce, not pie
My recommendation: Use 3-4 varieties for the most complex, interesting flavor. Granny Smith + Honeycrisp + Braeburn is a winning combination.
Delicious Variations
Once you’ve mastered the basic recipe, try these variations.
Caramel Apple Slab Pie
Drizzle ½ cup caramel sauce over the filling before adding the top crust. The caramel bakes into the apples beautifully.
Cranberry Apple Slab Pie
Add 1 cup fresh or frozen cranberries to the apple filling. The tart berries contrast wonderfully with the sweet apples.
Pear Apple Slab Pie
Replace half the apples with firm, ripe pears (like Bosc or Anjou). Pears add a different texture and delicate flavor.
Bourbon Apple Slab Pie
Add 2 tablespoons bourbon to the apple mixture. The bourbon adds warmth and depth.
Salted Caramel Apple Slab Pie
Make the caramel version and sprinkle flaky sea salt over the glaze.
Dutch Apple Slab Pie
Skip the top crust and make a streusel topping instead: combine 1 cup flour, ½ cup brown sugar, ½ cup oats, and ½ cup cold butter, cut in until crumbly. Sprinkle over filling and bake.
Chai-Spiced Apple Slab Pie
Add 1 teaspoon cardamom and ½ teaspoon ginger to the spice blend. The warm chai spices are incredible.
Maple Apple Slab Pie
Replace the granulated sugar with maple sugar, or add ¼ cup maple syrup to the filling (reduce sugar slightly to compensate).
Cheddar Cheese Crust
Add 1 cup sharp cheddar cheese to the crust dough. Cheddar and apple pie are a classic combination.
What to Serve With Apple Slab Pie
Vanilla ice cream: The classic pairing. The cold, creamy ice cream melting over warm pie is unbeatable.
Whipped cream: Lighter than ice cream but equally delicious.
Caramel sauce: Drizzle over individual slices.
Cheddar cheese: A slice of sharp cheddar alongside apple pie is a traditional New England pairing that might surprise you.
Coffee or tea: The perfect accompaniment.
Hard cider: For adults, a glass of hard cider pairs beautifully.
Storage and Make-Ahead Tips
Room temperature: Cover and store at room temperature for up to 2 days.
Refrigerator: Store in the refrigerator for up to 5 days. Bring to room temperature or warm slightly before serving.
Freezer (unbaked): Assemble the pie completely but do not bake. Cover tightly and freeze for up to 3 months. Bake from frozen, adding 15-20 minutes to baking time.
Freezer (baked): Cool completely, wrap tightly, and freeze for up to 3 months. Thaw at room temperature and reheat in a 300°F oven for 10-15 minutes.
Make-ahead for holidays: Assemble the pie a day ahead, cover, and refrigerate. Bake fresh the day of serving.
The Beauty of Slab Pie
There’s something deeply satisfying about a big, beautiful rectangle of pie. It’s democratic—every slice is the same size, the same shape, the same perfect ratio of crust to filling. No fighting over the end piece or the middle slice.
It’s practical—it travels well, serves easily, and feeds a crowd without requiring multiple pies.
And it’s delicious—that extra crust, that shallow pan, that perfect balance of flavors and textures.
I’ve made slab pie for Thanksgiving when oven space was at a premium. I’ve made it for potlucks where it disappeared before the main course. I’ve made it for no reason at all except that a big pan of apple pie makes everything feel like a celebration.
Why This Recipe Deserves a Permanent Place in Your Kitchen
This Apple Slab Pie represents everything I love about smart recipe adaptation. It takes a classic, beloved dessert and makes it more accessible, more practical, and in some ways even better than the original.
The process is forgiving enough for beginner bakers but the results are impressive enough for holidays and special occasions. The ingredients are simple but the final product tastes like you spent hours in the kitchen.
I’ve made this pie countless times, and it never fails. It’s become my go-to for large gatherings, for Thanksgivings when multiple pies are needed, for any occasion that calls for apple pie but not pie drama.
Every time I pull that big, golden rectangle from the oven, I’m reminded why I love this recipe. The smell alone is enough to make people gather in the kitchen. The first bite confirms what the aroma promised.
This pie is that recipe for me. And now it can be that for you too.
So roll up your sleeves. Get that butter cold. Slice those apples. And get ready to discover your new favorite way to make apple pie.
Your crowd is about to be very, very happy.
Have you made slab pie before? What’s your favorite variation? I’d love to hear about your experience in the comments below!
More Recipes
-

Diabetic Strawberry Dessert: Sugar-Free, Low-Calorie, and Only 3 Ingredients!
Discover the ultimate guilt-free treat! This diabetic-friendly strawberry applesauce bread requires just 3 ingredients, has no added sugar, and is incredibly low in calories. Perfect for a healthy dessert or snack! Let me tell you about the dessert that changed how I think about healthy eating. I have a massive sweet tooth. Always have. But…
-
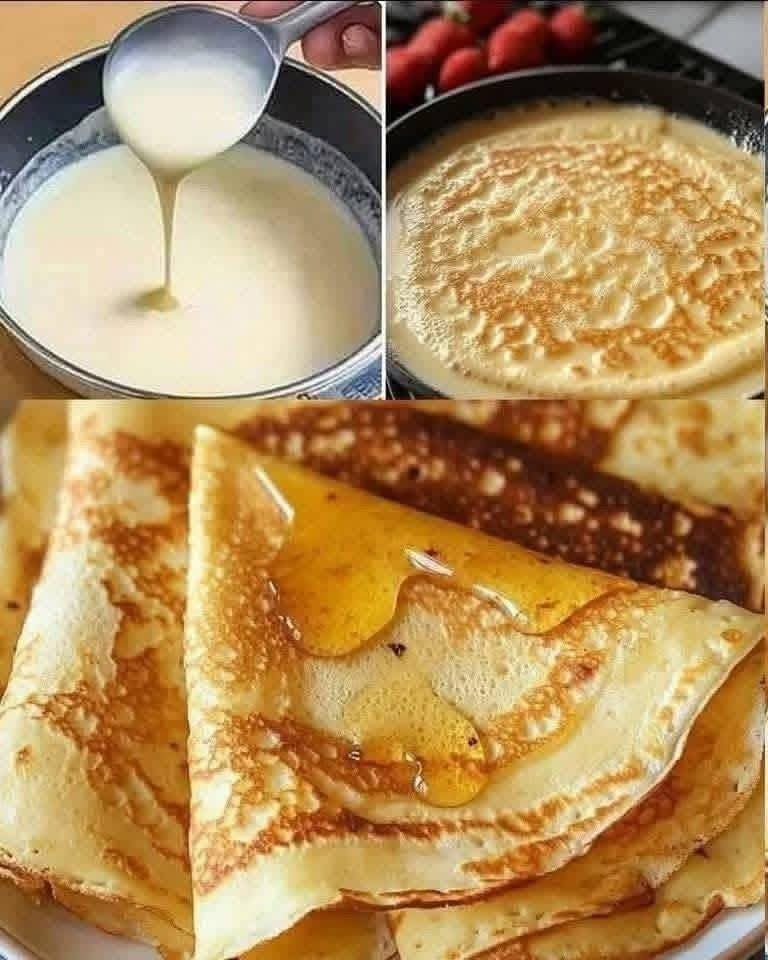
Classic French Crepes with Honey: A Taste of Paris at Home
Discover the secret to authentic Classic French Crepes with Honey! These paper-thin, buttery crepes are incredibly easy to make and absolutely divine drizzled with golden honey. Perfect for breakfast, dessert, or anytime! Close your eyes and imagine yourself sitting at a tiny sidewalk café in Paris. The Eiffel Tower looms in the distance, the scent…
-
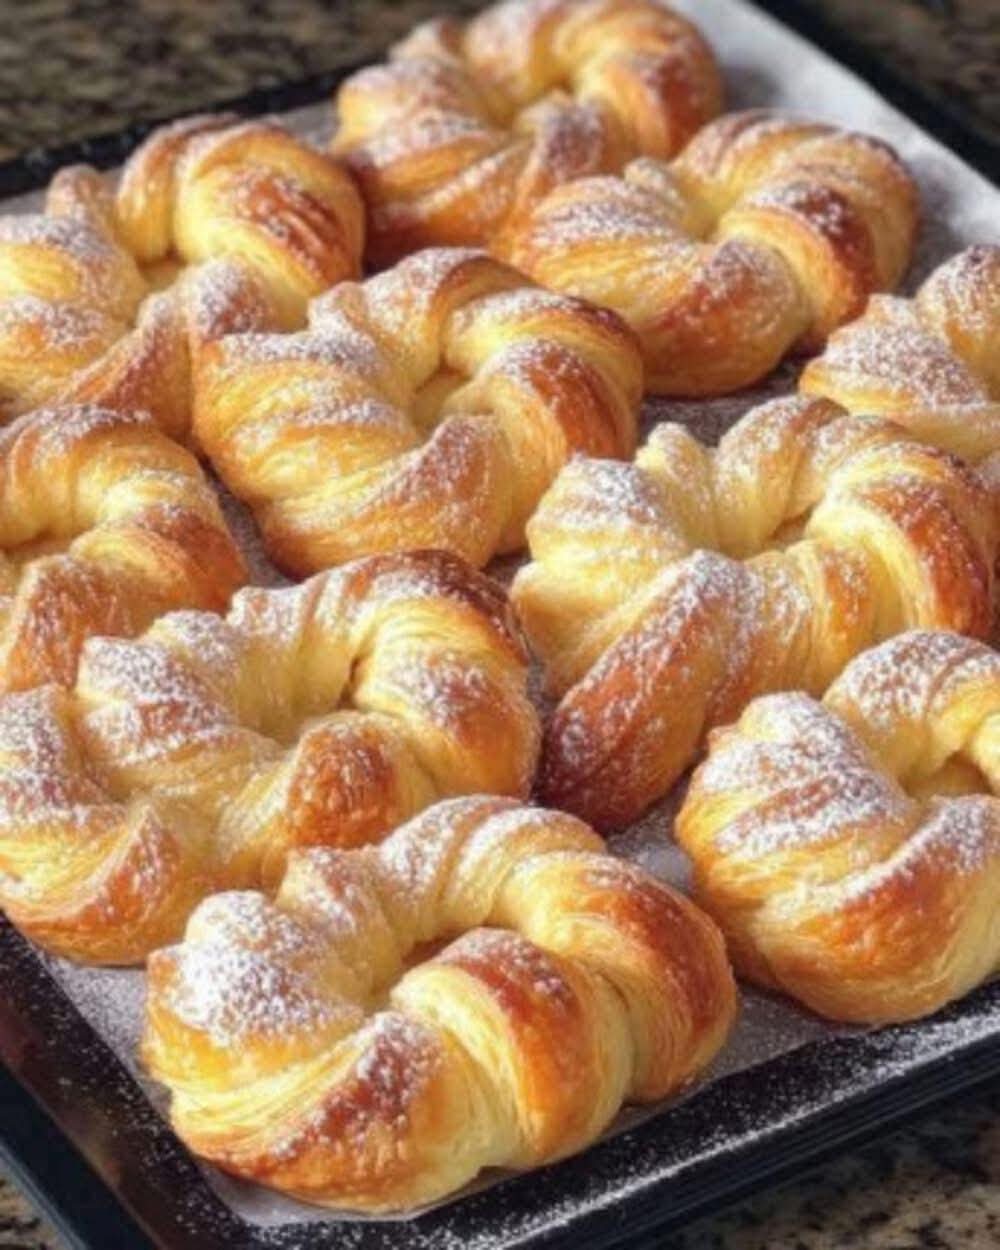
Puff Pastry Cinnamon Sugar Twists: 20-Minute Magic from the Freezer
Discover the magic of Puff Pastry Cinnamon Sugar Twists! With just a few simple ingredients, you can create golden, flaky, buttery pastries that taste like they came from a fancy bakery. Ready in under 20 minutes! Let me tell you about the dessert that makes people think I spent hours in the kitchen when I…