
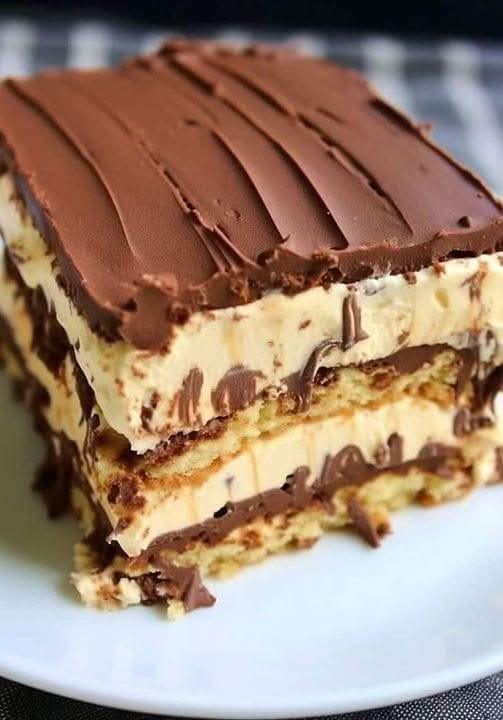
There are desserts that require hours of baking, and then there is this No Bake Peanut Butter Eclair Cake – the kind of treat that makes you wonder why anyone ever turns on an oven. Imagine layers of honey graham crackers, sandwiched between a velvety peanut butter pudding and a glossy, fudgy chocolate ganache. The whole thing rests in the refrigerator, allowing the crackers to soften into a cake‑like texture while the peanut butter cream sets into a luscious, mousse‑like filling. Each bite is a perfect balance of salty peanut butter, sweet chocolate, and tender graham cracker “cake.” No eggs, no flour, no heat – just stirring, layering, and chilling. If you are searching for a no bake peanut butter eclair cake that will earn you rave reviews, this is the one.
Whether you need a quick dessert for a summer barbecue, a make‑ahead Thanksgiving treat, or simply a way to satisfy your peanut butter and chocolate cravings, this eclair cake delivers. It is naturally no‑bake, budget‑friendly, and tastes even better the next day. This peanut butter chocolate eclair dessert will become a family favorite.
In this complete guide, you will learn the master recipe for no bake peanut butter eclair cake, including pro tips for the perfect texture, delicious variations (add a peanut butter drizzle, use chocolate grahams, or make it nut‑free), storage and freezing instructions, and why this layered dessert is pure magic. Let’s get layering.
Why No Bake Peanut Butter Eclair Cake Is a Legendary Dessert
The classic eclair cake (also called “lazy eclair cake” or “icebox cake”) has been a potluck staple for decades. It typically features layers of graham crackers, vanilla pudding, and chocolate frosting. This peanut butter version takes it to another level. The peanut butter pudding is rich, creamy, and satisfying, while the chocolate ganache topping adds a decadent finish. Because it is no‑bake, it is perfect for hot days when you do not want to heat up the kitchen. Plus, it comes together in 20 minutes – the refrigerator does the rest. This is a homemade peanut butter eclair cake that tastes like it came from a bakery.
Here is why you will love it:
No oven required – Perfect for summer or busy days.
Only 20 minutes of prep – Then chill.
Incredibly creamy and rich – Like a peanut butter mousse.
Uses simple ingredients – Graham crackers, pudding mix, peanut butter, milk.
Make‑ahead and freezer‑friendly
Customizable – Add chocolate chips, a peanut butter drizzle, or crushed peanuts.
Kid‑approved and adult‑loved
Once you try this easy no bake peanut butter dessert, you will never look back.
The Complete No Bake Peanut Butter Eclair Cake Recipe
This recipe makes a 9×13 inch cake (about 12‑15 servings). It can easily be doubled for two pans.
Ingredients – For the Peanut Butter Pudding Layer:
1 box (5.1 oz / 144g) instant vanilla pudding mix (sugar‑free works too)
2 cups (480ml) cold milk (whole milk gives best creaminess)
1 cup (240g) creamy peanut butter (not natural; use standard like Jif or Skippy)
8 oz (226g) cream cheese, softened to room temperature
1 cup (120g) powdered sugar
1 teaspoon vanilla extract
1 tub (8 oz / 226g) frozen whipped topping (Cool Whip), thawed – or 2 cups homemade whipped cream
Ingredients – For the Layers and Topping:
1 box (14.4 oz) honey graham crackers (about 3 sleeves)
1 cup (175g) semi‑sweet chocolate chips
3 tablespoons unsalted butter
3 tablespoons milk
2 tablespoons light corn syrup (or honey, for shine)
Optional Garnishes:
Chopped peanuts
Mini chocolate chips
Peanut butter drizzle (melt ¼ cup peanut butter with 1 tbsp coconut oil)
Sea salt flakes
Equipment:
9×13 inch baking dish
Electric mixer
Mixing bowls
Rubber spatula
Saucepan or microwave‑safe bowl (for ganache)
Step‑by‑Step Instructions
Step 1 – Make the Peanut Butter Pudding Base
In a large bowl, whisk together the instant vanilla pudding mix and cold milk for 2 minutes until thickened. Set aside. In another large bowl, beat the softened cream cheese and peanut butter together until smooth and creamy. Add the powdered sugar and vanilla extract, beating until fully combined. Gradually beat in the prepared pudding mixture until smooth. Finally, fold in the thawed whipped topping (Cool Whip) with a rubber spatula until no white streaks remain. The mixture will be thick, creamy, and dreamy.
Step 2 – Layer the Graham Crackers
Arrange a single layer of graham crackers in the bottom of a 9×13 inch baking dish. Break crackers as needed to fit snugly. You want full coverage.
Step 3 – Add the Peanut Butter Layer
Spread half of the peanut butter pudding mixture evenly over the graham crackers. Smooth with a spatula.
Step 4 – Repeat Layers
Add another layer of graham crackers on top of the pudding. Press down gently. Spread the remaining peanut butter pudding mixture over the crackers. Smooth the top.
Step 5 – Final Cracker Layer (Optional)
For a more cake‑like texture, add a third layer of graham crackers on top before the chocolate ganache. This is optional but recommended. If you prefer a thicker chocolate topping, omit the third cracker layer.
Step 6 – Make the Chocolate Ganache Topping
In a small saucepan over low heat (or in a microwave‑safe bowl), combine the chocolate chips, butter, milk, and corn syrup. Heat, stirring constantly, until the chocolate is melted and the mixture is smooth and glossy. Do not boil. Remove from heat and let cool for 5‑10 minutes until slightly thickened but still pourable.
Step 7 – Top and Chill
Pour the chocolate ganache over the final layer of graham crackers (or directly over the pudding if you skipped the final cracker layer). Spread evenly to the edges. Cover the dish with plastic wrap and refrigerate for at least 6 hours, preferably overnight. The graham crackers will soften into a cake‑like texture, and the pudding will set.
Step 8 – Slice and Serve
Use a sharp knife to cut into squares. Wipe the blade between cuts for clean edges. Serve cold. Garnish with chopped peanuts, a drizzle of melted peanut butter, or a sprinkle of sea salt if desired.
Pro Tips for the Best No Bake Peanut Butter Eclair Cake
Follow these expert tips for perfect no bake eclair cake every time:
Use instant pudding, not cook‑and‑serve – Instant pudding sets without heat. Cook‑and‑serve will not work correctly.
Use whole milk for the creamiest texture – Lower‑fat milk will result in a thinner pudding. You can also use half‑and‑half for extra richness.
Soften cream cheese fully – Cold cream cheese creates lumps. Leave it on the counter for 1‑2 hours before starting.
Do not use natural peanut butter – Natural peanut butter separates and can make the filling oily. Standard creamy peanut butter (like Jif or Skippy) works best.
Let the cake chill overnight – The graham crackers need time to soften. A few hours may not be enough; overnight is ideal.
For clean slices, use a sharp knife and wipe between cuts – The chocolate topping can stick; wiping with a warm, damp cloth helps.
Store leftovers covered in the refrigerator – This cake must be kept cold.
Delicious Variations (Same No‑Bake Method)
Once you master the classic peanut butter eclair cake, try these fun twists. These eclair cake variations will keep your dessert game strong.
1. Chocolate Peanut Butter Eclair Cake
Add ¼ cup of unsweetened cocoa powder to the pudding mixture (reduce powdered sugar by 2 tablespoons). Use chocolate graham crackers instead of honey. This is a chocolate peanut butter eclair dessert for double chocolate lovers.
2. Nutty Peanut Butter Eclair Cake
Sprinkle ½ cup of chopped roasted peanuts between the layers and on top of the chocolate ganache. The crunch adds wonderful texture.
Slice 2 ripe bananas and arrange them over the first layer of graham crackers before adding the peanut butter pudding. The banana and peanut butter combination is classic.
4. Reese’s Peanut Butter Eclair Cake
Chop 1 cup of miniature peanut butter cups and fold them into the peanut butter pudding mixture. Garnish with additional chopped peanut butter cups on top of the ganache.
Want the full truth and the practical next steps?
Page 2 continues with the real explanation, the key details many readers skip, and the simple takeaways that make this guide more useful.