
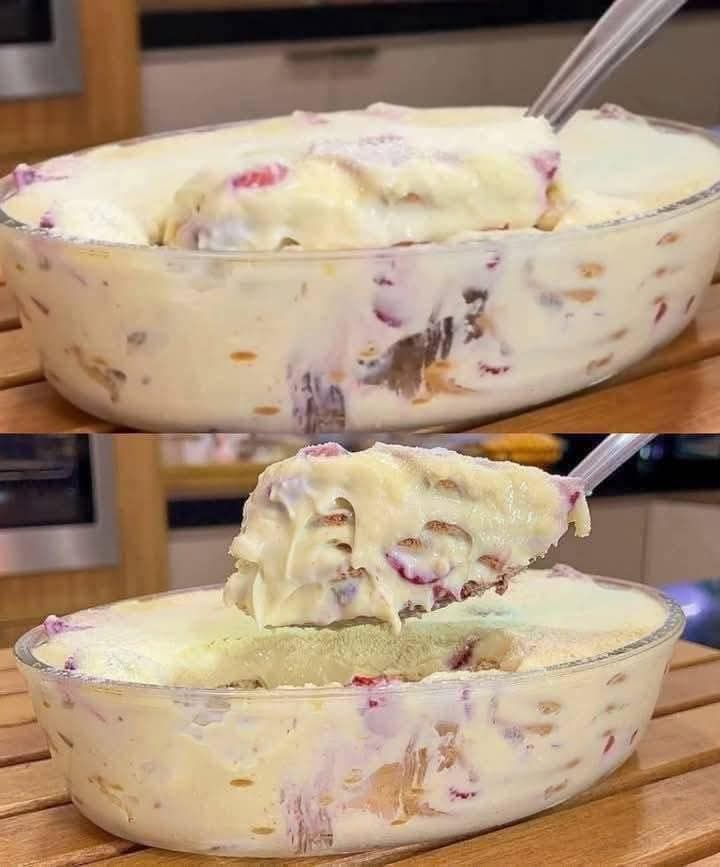
There are desserts that are complicated, and then there is this Layered Dessert with Cream Biscuits and Fruit – the kind of stunning, make‑ahead sweet that looks like it came from a fancy bakery but comes together with astonishing ease. Imagine tender, flaky cream biscuits (made with nothing but cream and self‑rising flour), broken into golden chunks, layered with sweet, juicy berries, and clouds of lightly sweetened whipped cream. Every spoonful is a perfect balance of buttery, crisp‑tender biscuit, tart‑sweet fruit, and airy cream. This dessert is the love child of strawberry shortcake and a classic British trifle, but simpler and more rustic. If you are searching for an easy fruit and biscuit trifle that will earn rave reviews, this is the one.
Whether you need a last‑minute Fourth of July dessert, a way to use up a bounty of summer berries, or simply a no‑fuss dessert that feeds a crowd, this layered dessert delivers. The cream biscuits take 10 minutes to make and bake in 12 – no cutting in cold butter, no buttermilk. Just cream and flour. Then you layer, chill, and serve. This homemade shortcake dessert will become your summer signature.
In this complete guide, you will learn the master recipe for layered dessert with cream biscuits and fruit, including the foolproof two‑ingredient cream biscuit recipe, pro tips for the perfect texture, delicious variations (use any fruit, add pudding or custard, make it lemon), make‑ahead and storage instructions, and why this rustic dessert is pure magic. Let’s preheat that oven.
Why This Layered Dessert Is a Summer Classic
The concept of layering biscuits, fruit, and cream is not new – it is the essence of strawberry shortcake. But this version elevates it by using cream biscuits (the easiest biscuits you will ever make) and building tall, dramatic layers in a glass trifle dish or a simple bowl. The beauty is in the simplicity: the biscuits stay slightly crunchy on the edges but soak up the berry juices just enough, the cream is light and airy, and the fruit provides bright, fresh acidity. You can use any fruit – strawberries, blueberries, raspberries, peaches, or a mix. This is a summer berry dessert that celebrates peak season produce.
Here is why you will love it:
Only 10 minutes of active prep – The biscuits bake quickly; the rest is assembly.
Two‑ingredient cream biscuits – Self‑rising flour + heavy cream. No butter, no shortening.
No complicated techniques – Break biscuits into chunks, layer with fruit and whipped cream.
Incredibly versatile – Use strawberries, peaches, blueberries, raspberries, or a mix.
Make‑ahead friendly – Assemble hours before serving; the biscuits soften beautifully.
Naturally egg‑free (biscuits) and customizable
Feeds a crowd – Perfect for potlucks, holidays, and backyard barbecues.
Once you try this cream biscuit strawberry shortcake, you will never buy a boxed biscuit mix again.
The Complete Layered Dessert with Cream Biscuits and Fruit Recipe
This recipe serves 8‑10 people. It fits a 3‑quart trifle dish or a large glass bowl.
Ingredients – For the Cream Biscuits:
2 cups (240g) self‑rising flour – plus more for dusting
1 ½ cups (360ml) cold heavy cream (whipping cream) – plus 2 tablespoons if needed
Optional: 2 tablespoons granulated sugar for slightly sweet biscuits
Ingredients – For the Fruit Layer:
4 cups (about 600g) fresh fruit – strawberries (hulled and sliced), blueberries, raspberries, blackberries, or sliced peaches
2 tablespoons granulated sugar – or honey (adjust based on fruit sweetness)
1 tablespoon fresh lemon juice
Ingredients – For the Whipped Cream Layer:
2 cups (480ml) cold heavy cream
¼ cup (30g) powdered sugar (or to taste)
1 teaspoon vanilla extract
Optional Additions:
1 teaspoon vanilla bean paste or seeds from ½ vanilla bean
¼ cup toasted sliced almonds or chopped pecans
2 tablespoons liqueur (Grand Marnier, amaretto, or limoncello) to brush on biscuits
Equipment:
Baking sheet
Parchment paper
Large trifle dish or glass bowl (3‑quart capacity)
Electric mixer (hand or stand)
Mixing bowls
Wire rack
Step‑by‑Step Instructions
Step 1 – Make the Cream Biscuits
Preheat your oven to 450°F (230°C). Line a baking sheet with parchment paper. In a large mixing bowl, whisk the self‑rising flour (and sugar if using). Make a well in the center. Pour in the cold heavy cream. Stir with a fork or spatula until a shaggy dough forms. If the dough seems dry, add an extra tablespoon of cream. Do not overmix – the dough should just come together. Turn the dough out onto a lightly floured surface. Pat it into a ½‑inch thick rectangle. Fold it in half, pat again, and repeat twice (this creates flaky layers). Finally, pat the dough to ¾‑inch thickness. Use a 2‑inch biscuit cutter or a knife to cut into 8‑10 biscuits. Place them on the prepared baking sheet, barely touching. Bake for 10‑12 minutes until golden brown. Transfer to a wire rack to cool completely. These biscuits are incredibly tender, flaky, and buttery – without any butter.
Step 2 – Prepare the Fruit
While the biscuits cool, prepare the fruit. Wash and slice strawberries, halve larger berries, or slice peaches. In a medium bowl, combine the fruit with the granulated sugar and lemon juice. Stir gently. Let sit for 10‑15 minutes – the sugar will draw out the fruit’s natural juices, creating a light syrup. This is the secret to a juicy, flavorful layered dessert.
Step 3 – Whip the Cream
In a large, chilled bowl (or the bowl of a stand mixer), combine the cold heavy cream, powdered sugar, and vanilla extract. Beat on medium‑high speed until soft peaks form (about 2‑3 minutes). Do not overbeat into stiff peaks – you want creamy, pillowy peaks that will spread easily. If you accidentally overbeat, add a tablespoon of fresh cream and whisk gently by hand to loosen.
Step 4 – Break the Biscuits
Once the biscuits are completely cool, break them into rustic, bite‑sized chunks (about 1‑2 inches). You should have roughly 4‑5 cups of biscuit pieces. Leave some slightly larger for texture. If you want to add a liqueur, lightly brush the cut sides of the biscuit pieces with your chosen liqueur – this is optional but adds a wonderful adult twist.
Step 5 – Assemble the Layers
In a large trifle dish or glass bowl, start with a layer of biscuit chunks (about 1/3 of them). Top with about 1/3 of the fruit mixture (including its juices). Spoon about 1/3 of the whipped cream over the fruit and spread gently to the edges. Repeat the layers (biscuits, fruit, cream) two more times, ending with a final layer of cream. You should have three complete layers. Use the back of a spoon to create swirls in the top cream layer. Garnish with extra fresh fruit, a sprinkle of toasted nuts, or a dusting of powdered sugar.
Step 6 – Chill (Optional but Recommended)
For the best texture, refrigerate the layered dessert for at least 1‑2 hours before serving. This allows the biscuit pieces to absorb some of the berry juices and the cream to set slightly. The dessert can be made up to 8 hours ahead. Do not assemble more than 12 hours in advance, or the biscuits may become too soft.
Step 7 – Serve
Scoop generous spoonfuls into bowls or dessert glasses. The layers will be beautifully visible. Serve chilled or at room temperature. This no‑bake fruit layers dessert (the biscuits are baked, but assembly is no‑bake) is a perfect ending to any summer meal.
Pro Tips for the Best Layered Dessert
Follow these expert tips for a perfect cream biscuit shortcake every time:
Use self‑rising flour – It already contains baking powder and salt. If you only have all‑purpose flour, add 1 tablespoon baking powder and 1 teaspoon salt per cup of flour.
Keep cream and equipment cold – Cold cream whips better. Chill your mixing bowl and beaters for 10 minutes before whipping.
Do not overmix biscuit dough – Overworking develops gluten, making tough biscuits. Stir just until the dough comes together, then pat gently.
Cool biscuits completely before assembling – Warm biscuits will melt the whipped cream and make the dessert runny.
Adjust sugar based on fruit – Very sweet berries need less added sugar; tart fruit (like raspberries or early strawberries) may need a little more.
Make the dessert your own – Add a layer of lemon curd, chocolate pudding, or crushed cookies for extra flair.
Assemble in a clear glass dish – Part of the beauty of this dessert is seeing the layers. A trifle dish or large glass bowl is ideal.
Delicious Variations (Same Layered Method)
Once you master the classic layered dessert, try these fun twists. These fruit and biscuit trifle variations will keep your dessert game strong.
1. Strawberry Shortcake Layered Dessert
Use only sliced strawberries (2 lbs, hulled and sliced). Macerate with ¼ cup sugar and 1 tablespoon lemon juice. Add a drop of red food coloring if desired (optional). This is the quintessential summer dessert.
2. Peach and Blueberry Layered Dessert
Use 3 cups sliced fresh peaches and 2 cups fresh blueberries. Add 1 teaspoon of cinnamon to the fruit mixture. The peach‑blueberry combination is divine. Brush the biscuits with amaretto or bourbon for a grown‑up twist.
Add 1 tablespoon of lemon zest to the whipped cream. Use a mix of raspberries, blackberries, and blueberries. The lemon cream brightens the berries beautifully.
4. Tropical Layered Dessert (Mango, Coconut, Pineapple)
Use 2 cups diced fresh mango, 2 cups diced pineapple, and 1 cup shredded toasted coconut. Add ½ cup coconut cream to the whipped cream (reduce heavy cream to 1 ½ cups). Garnish with extra coconut and macadamia nuts.
5. Chocolate Cream Biscuit Layered Dessert
Add ¼ cup cocoa powder to the biscuit dough (reduce flour by ¼ cup). For the cream layer, fold in ¼ cup of chocolate pudding or chocolate shavings. This is a chocolate fruit trifle that chocolate lovers will devour.
6. No‑Bake Cheesecake Layered Dessert
Replace the whipped cream with a no‑bake cheesecake filling: beat 8 oz cream cheese, ½ cup powdered sugar, and 1 tsp vanilla until smooth, then fold in 1 cup whipped cream. Layer with fruit and biscuits. This version is extra rich and creamy.
Want the full truth and the practical next steps?
Page 2 continues with the real explanation, the key details many readers skip, and the simple takeaways that make this guide more useful.