
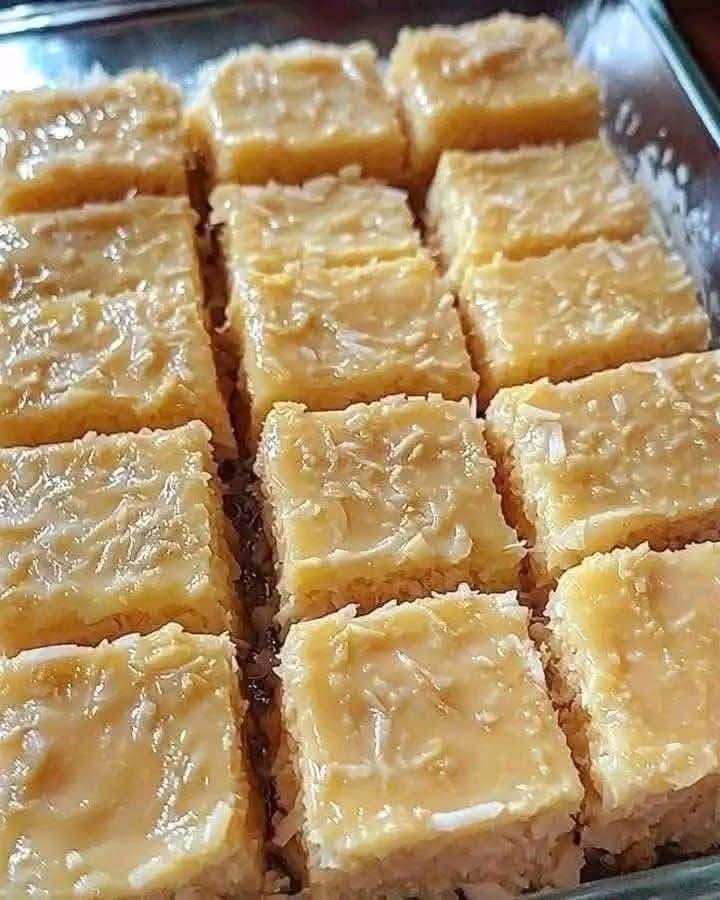
There are candies that are complicated, and then there is Cocada con Leche Condensada – the kind of sweet that takes you back to a sun‑drenched plaza, where a vendor sells golden coconut confections from a wooden cart. Imagine biting into a soft, chewy, slightly caramelized disk of shredded coconut, sweetened just right with creamy condensed milk, and kissed with a hint of vanilla or cinnamon. Each piece is sticky, rich, and utterly satisfying. Made with just a handful of pantry ingredients, this cocada comes together on the stovetop in under 30 minutes and requires no candy thermometer. If you are searching for an easy coconut candy recipe that delivers authentic Latin American flavor, this is for you.
Whether you need a homemade gift for the holidays, a sweet snack for a fiesta, or simply a way to use up that can of condensed milk, this cocada is easy, forgiving, and guaranteed to impress. This cocada con leche condensada tradicional will become a family favorite.
In this complete guide, you will learn the authentic recipe for cocada, including pro tips for the perfect chewy texture, delicious variations (add chocolate, nuts, or spices), storage advice, and why this classic coconut candy has been beloved for generations. Let’s get cooking.
Why Cocada con Leche Condensada Is a Latin American Treasure
Cocada is a traditional coconut candy found throughout Latin America – from Mexico to Brazil to the Caribbean. Each region has its own twist: some are baked, some are made with grated fresh coconut, some include eggs or dulce de leche. This version uses sweetened condensed milk, which gives the candy a creamy, caramel‑like sweetness and a perfectly chewy texture. The coconut shreds become tender and slightly toasted as the mixture cooks, creating a complex, nutty flavor. This homemade Latin American candy is beloved for its simplicity and rustic charm.
Here is why you will love it:
- Only 5 simple ingredients – Shredded coconut, sweetened condensed milk, sugar, vanilla, butter.
- No candy thermometer required – The visual “pull away from the pan” test works perfectly.
- Ready in under 30 minutes – Faster than most fudge or pralines.
- Incredibly chewy and satisfying – The coconut stays tender, not tough.
- Customizable – Add pecans, chocolate chips, or a pinch of cinnamon.
- Perfect for gifting – Wrap in wax paper or pack in colorful boxes.
- Make‑ahead friendly – Stays fresh for weeks.
Once you try this chewy coconut treat, you will never buy store‑bought coconut candy again.
The Complete Cocada con Leche Condensada Recipe
This recipe makes about 20‑30 small cocadas (depending on size). It can easily be doubled.
Ingredients:
3 cups (240g) sweetened shredded coconut – or unsweetened (add an extra ¼ cup sugar if using unsweetened)
1 can (14 oz / 397g) sweetened condensed milk
¼ cup (50g) granulated sugar (reduce or omit if using sweetened coconut)
2 tablespoons unsalted butter, plus more for greasing
1 teaspoon vanilla extract
¼ teaspoon salt (optional, but balances sweetness)
Optional mix‑ins: ½ cup chopped pecans or walnuts, ¼ cup mini chocolate chips, 1 teaspoon cinnamon
Equipment:
- Large non‑stick skillet or heavy‑bottomed saucepan
- Wooden spoon or silicone spatula
- Baking sheet lined with parchment paper or a silicone mat
- Tablespoon or small cookie scoop
- Butter or cooking spray (for greasing the spoon)
Step‑by‑Step Instructions
Step 1 – Prepare Your Workspace
Line a baking sheet with parchment paper or a silicone mat. Lightly butter a tablespoon or small cookie scoop – this will prevent the sticky candy from clinging. Clear your counter because once the cocada is ready, you need to work quickly.
Step 2 – Combine Ingredients in a Skillet
In a large non‑stick skillet or heavy‑bottomed saucepan, combine the shredded coconut, sweetened condensed milk, sugar (if using), butter, salt, and vanilla. Stir to blend everything together. Do not turn on the heat yet.
Step 3 – Cook Over Medium Heat
Place the skillet over medium heat. Stir constantly with a wooden spoon or silicone spatula. The mixture will start to bubble and thicken. Continue stirring to prevent scorching – the coconut can burn easily. After about 5‑7 minutes, you will see the mixture pulling away from the sides and bottom of the pan. It should look like a thick, cohesive paste.
Step 4 – Test for Doneness
Scoop a small amount of the cocada mixture onto a spoon and let it cool for 10 seconds. It should be firm enough to hold its shape but still slightly pliable. If it is too runny, cook for another 1‑2 minutes. If it is too dry and crumbly, add a tablespoon of milk or condensed milk. This no‑thermometer candy making method relies on your eyes and touch – the mixture should pull cleanly away from the pan when you drag your spatula across the bottom.
Step 5 – Add Mix‑Ins (Optional)
If you are adding nuts, chocolate chips, or spices, stir them in now, off the heat. Chocolate chips will melt slightly – that’s fine. Work quickly so the mixture doesn’t cool too much.
Step 6 – Drop onto Parchment Paper
Using your greased tablespoon or cookie scoop, drop generous spoonfuls of the hot cocada mixture onto the prepared baking sheet. Space them about 1 inch apart. If the mixture sticks to the spoon, re‑grease it with butter. You can also shape them with your fingers (buttered) into neat rounds or pyramids. Traditional cocadas are often slightly mound‑shaped.
Step 7 – Let Cool Completely
Allow the cocadas to cool at room temperature for at least 30 minutes. They will firm up as they cool. Do not refrigerate while warm – condensation can make them sticky. Once fully set, they should be chewy and slightly firm to the touch.
Step 8 – Serve or Store
Peel the cocadas off the parchment paper. They are ready to eat! Serve at room temperature.
Pro Tips for the Best Cocada con Leche Condensada
Follow these expert tips for a perfect coconut candy recipe every time:
Use fine‑shredded coconut – Large, wide coconut flakes can be harder to shape and may not cook evenly. Look for “finely shredded” or “desiccated coconut.”
Do not stop stirring – The mixture can burn quickly because of the sugar and milk. Constant stirring ensures even cooking and prevents scorched spots.
Cook until the mixture leaves the pan – This is the classic candy‑maker’s sign: when you drag your spatula across the bottom of the pan and see a clear path that doesn’t immediately fill with liquid, the cocada is ready.
Butter your spoon and your hands – This sticky candy will cling to everything. A little butter or cooking spray is your best friend.
Work quickly after cooking – The mixture hardens as it cools. Have your baking sheet and greased scoop ready before you start cooking.
For a softer, fudgier cocada – Cook for 1‑2 minutes less. For a drier, more crumbly cocada, cook for 1‑2 minutes more.
Use a non‑stick pan – This makes cleanup infinitely easier and prevents sticking even before the mixture pulls away.
Delicious Variations (Same Easy Method)
Once you master the classic cocada, try these fun twists. These coconut candy variations will keep your treat tray exciting.
1. Chocolate Cocada
Stir in ½ cup of semi‑sweet chocolate chips immediately after removing the pan from the heat. The residual heat will melt them into ribbons. For a more intense chocolate flavor, use dark chocolate chunks.
2. Pecan or Walnut Cocada
Add ½ cup of finely chopped toasted pecans or walnuts. The nutty crunch pairs beautifully with the chewy coconut. Toast the nuts in a dry skillet for 3‑4 minutes first for extra flavor.
3. Cinnamon Vanilla Cocada
Add 1 teaspoon of ground cinnamon along with the vanilla. For an extra touch, sprinkle a pinch of cinnamon on top of each cocada before they set. This is a spiced coconut candy that tastes like churros.
4. Dulce de Leche Cocada
Replace half of the sweetened condensed milk with dulce de leche (about 7 oz each). The result is a deeper, caramel‑like flavor. This version is very popular in Argentina and Uruguay.
5. Lime or Orange Zest Cocada
Add 1 tablespoon of fresh lime zest or orange zest. The citrus cuts through the sweetness and adds a bright, tropical note. Great for summer celebrations.
6. Coconut‑Pineapple Cocada
Add ¼ cup of finely chopped dried pineapple (or ½ cup of crushed pineapple, cooked down until most liquid evaporates). The pineapple brings a tangy sweetness.
7. Vegan Cocada con Leche Condensada
Use a plant‑based sweetened condensed milk (such as Nature’s Charm or homemade from coconut milk and sugar). Use vegan butter or coconut oil. The texture will be slightly different but still delicious. This dairy‑free coconut candy is perfect for vegan guests.
8. Toasted Coconut Cocada
Before mixing, spread the shredded coconut on a baking sheet and toast at 325°F for 5‑7 minutes, stirring once, until light golden. Then proceed with the recipe. Toasted coconut adds a nutty, deep caramel flavor.
How to Store, Freeze, and Gift Cocada
Proper storage ensures you can enjoy this sweetened condensed milk dessert for weeks.
Room Temperature
Store in an airtight container at a cool room temperature (below 70°F) for up to 1 week. Keep away from heat and direct sunlight, which can soften the candy.
Refrigerator
Cocada keeps well in the refrigerator for up to 3 weeks. Place in an airtight container with parchment paper between layers. Bring to room temperature for 10‑15 minutes before serving – cold cocada is firmer but still tasty.
Freezer
This candy freezes beautifully. Arrange cocadas in a single layer on a baking sheet and freeze until solid (about 1 hour). Transfer to a freezer‑safe bag or container, separating layers with wax paper. Freeze for up to 3 months. Thaw at room temperature for 20‑30 minutes.
Want the full truth and the practical next steps?
Page 2 continues with the real explanation, the key details many readers skip, and the simple takeaways that make this guide more useful.