
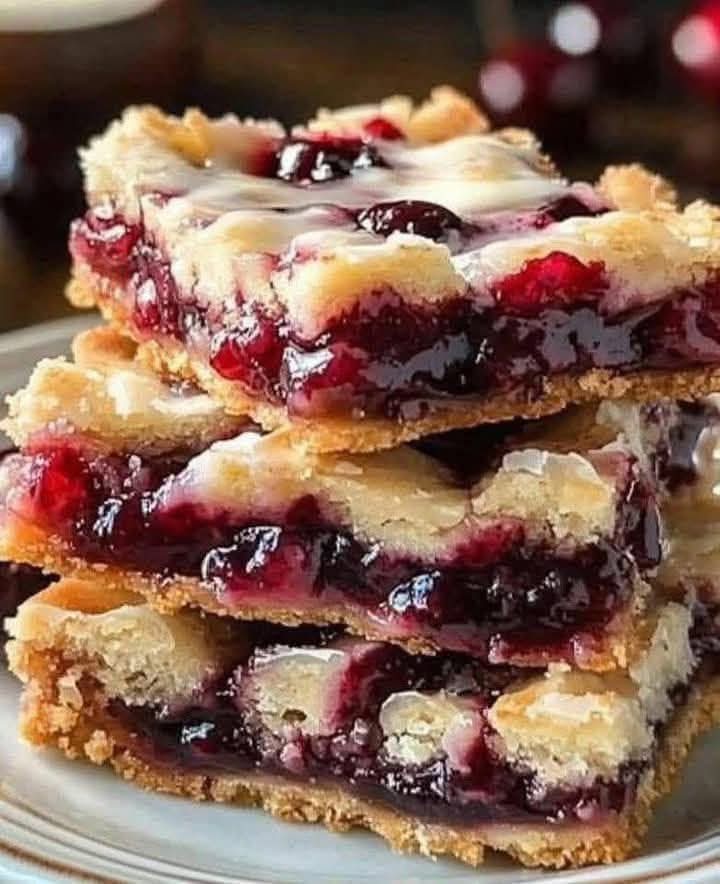
Cherry pie bars take everything you love about classic cherry pie – the sweet‑tart filling, the buttery, flaky crust – and turn it into an easy, portable, sliceable bar. No rolling out pie dough, no lattice top, no messy slicing. Just a buttery shortbread crust, a luscious cherry filling, and a crumbly streusel topping, all baked in a single pan. They are perfect for potlucks, bake sales, summer barbecues, holiday dessert tables, or simply when you want a taste of cherry pie without the fuss.
In this guide, you will learn how to make the best cherry pie bars from scratch, using either fresh, frozen, or canned cherries. You will discover pro tips for preventing a soggy crust, thickening the filling perfectly, and getting that golden, crumbly topping. Plus, you will find delicious variations (add a glaze, use different fruits, or make them gluten‑free) and answers to common questions. These bars are so easy and so delicious that they will become your new go‑to dessert.
Why Cherry Pie Bars Are a Game‑Changer
Traditional cherry pie is wonderful, but it can be finicky. The crust must be rolled out, transferred carefully, and crimped. The lattice top takes patience. Slicing a pie into neat wedges can be messy. Cherry pie bars solve all those problems. They are baked in a standard 9×13‑inch pan, cut into squares, and served with a fork or even by hand. The buttery shortbread crust is pressed into the pan – no rolling pin required. The filling is spooned over the crust, and a simple crumble topping finishes it off. The result is every bit as delicious as pie, with half the effort and none of the drama.
Here is why you will love them:
· No rolling dough – Just press the crust into the pan.
· No lattice – A simple crumb topping is easy and beautiful.
· Perfect for sharing – Cut into bars, not wedges.
· Make‑ahead friendly – Tastes even better the next day.
· Crowd‑pleaser – Everyone loves cherry dessert.
· Freezer‑friendly – Make a double batch and save some for later.
· Customizable – Swap cherries for blueberries, raspberries, or peaches.
Once you try cherry pie bars, you may never make a traditional cherry pie again.
The Complete Cherry Pie Bars Recipe
This recipe makes one 9×13‑inch pan of bars (about 24 squares). It can be doubled for a larger crowd.
Ingredients
For the Crust and Topping (Shortbread Base & Crumble):
· 2½ cups (300g) all‑purposeark
· ¾ cup (150g) granulated sugar
· ½ teaspoon salt
· 1 cup (226g) cold unsalted butter, cut into small cubes
· 1 teaspoon vanilla extract
· 1 large egg (optional – for a more cohesive crust, add 1 egg; for a more crumbly shortbread, omit)
For the Cherry Filling:
· 4 cups (about 20 oz / 570g) fresh or frozen tart cherries, pitted (or use canned cherry pie filling)
· ¾ cup (150g) granulated sugar (adjust to taste)
· 3 tablespoons cornstarch
· 2 tablespoons fresh lemon juice
· ½ teaspoon almond extract (optional, enhances cherry flavor)
For the Glaze (Optional):
· ½ cup (60g) powdered sugar
· 1‑2 tablespoons milk or cherry juice
Equipment
· 9×13‑inch baking pan
· Parchment paper or cooking spray
· Large mixing bowl
· Pastry blender or fork
· Medium saucepan
Step‑by‑Step Instructions
Part 1 – Make the Crust and Topping Mixture
Step 1 – Preheat and Prepare
Preheat your oven to 375°F (190°C). Line a 9×13‑inch baking pan with parchment paper or lightly grease with cooking spray.
Step 2 – Combine Dry Ingredients
In a large bowl, whisk together the flour, sugar, and salt.
Step 3 – Cut in the Butter
Add the cold butter cubes to the flour mixture. Use a pastry blender, two knives, or your fingertips to work the butter into the flour until the mixture resembles coarse crumbs with pea‑sized pieces of butter. Do not overmix.
Step 4 – Add Vanilla and Egg (If Using)
Stir in the vanilla extract. If you want a firmer, more cookie‑like crust, add the egg and mix until just combined. For a more tender, shortbread‑style crust, omit the egg.
Step 5 – Reserve Topping and Press Crust
Measure out 1 cup of the crumb mixture and set aside for the topping. Press the remaining mixture firmly and evenly into the bottom of the prepared pan. Use the bottom of a measuring cup or a flat glass to press down firmly.
Part 2 – Make the Cherry Filling
Step 1 – Prepare the Cherries
If using fresh or frozen cherries: pit them if necessary. Frozen cherries do not need to be thawed. If using canned cherry pie filling, skip to step 4.
Step 2 – Cook the Filling
In a medium saucepan, combine the cherries, sugar, cornstarch, lemon juice, and almond extract (if using). Cook over medium heat, stirring constantly, until the mixture thickens and becomes glossy, about 5‑7 minutes. The cornstarch will activate and the filling will become syrupy.
Step 3 – Cool Slightly
Remove from heat and let the filling cool for 10‑15 minutes. It will thicken further as it cools.
Step 4 – Spread Over Crust
Pour the cherry filling evenly over the pressed crust, spreading to the edges.
Part 3 – Add the Topping and Bake
Step 1 – Sprinkle Topping
Sprinkle the reserved crumb mixture evenly over the cherry filling.
Step 2 – Bake
Bake at 375°F for 30‑35 minutes, until the topping is golden brown and the filling is bubbly around the edges. If the topping browns too quickly, loosely cover with foil for the last 10 minutes.
Step 3 – Cool Completely
Let the bars cool in the pan on a wire rack for at least 1 hour, then refrigerate for another 1‑2 hours to set the filling. This step is crucial for clean slicing.
Part 4 – Add Glaze (Optional) and Serve
Step 1 – Make the Glaze
In a small bowl, whisk together the powdered sugar and milk or cherry juice until smooth. The glaze should be thick but pourable.
Step 2 – Drizzle
Drizzle the glaze over the cooled bars in a zigzag pattern. Let set for 10 minutes.
Step 3 – Slice and Serve
Use a sharp knife to cut into squares. Wipe the knife clean between cuts. Serve at room temperature or chilled.
Want the full truth and the practical next steps?
Page 2 continues with the real explanation, the key details many readers skip, and the simple takeaways that make this guide more useful.