
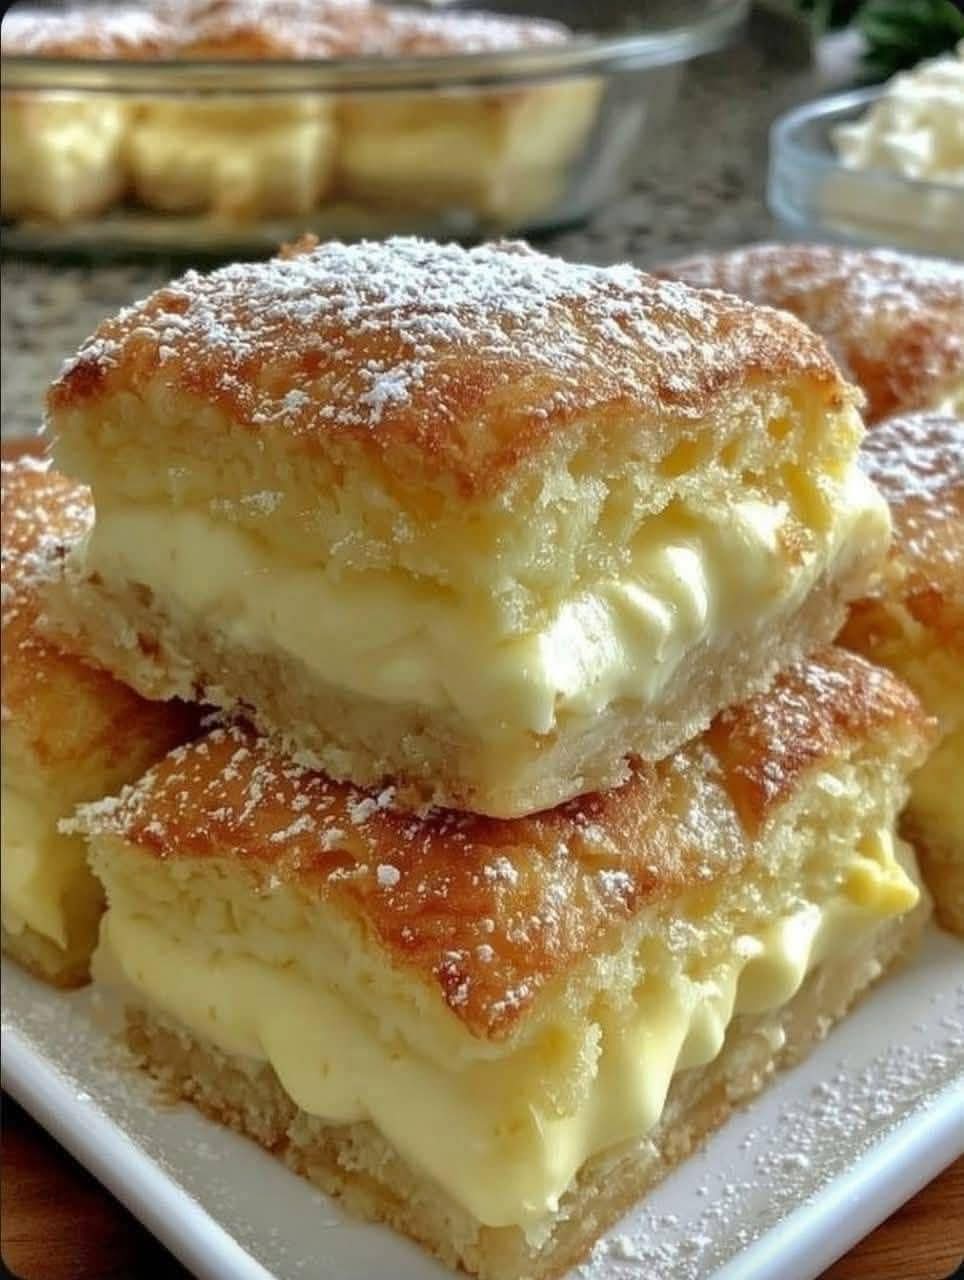
There are desserts that are complicated, and then there are desserts that are pure, simple bliss. The Vanilla Custard Cream Square – also known as a vanilla slice, custard square, or mille‑feuille – falls into the second category. Two layers of golden, buttery puff pastry sandwiching a thick, velvety vanilla custard, all topped with a glossy white icing and a drizzle of chocolate. Every bite is a perfect harmony of crisp, flaky pastry and smooth, creamy custard. It is the kind of dessert that looks incredibly impressive but is surprisingly easy to make with store‑bought puff pastry.
Whether you call it a vanilla slice, a custard square, or a Napoleon, this classic dessert is beloved in bakeries around the world – from Australia to France to your own kitchen. In this guide, you will learn the complete recipe for the perfect vanilla custard cream square, including how to make silky custard from scratch, how to get that signature flaky pastry, and pro tips for clean, beautiful slices. You will also discover delicious variations (chocolate, passionfruit, caramel), storage advice, and why this dessert is a timeless crowd‑pleaser.
What Is a Vanilla Custard Cream Square?
A vanilla custard cream square is a layered dessert consisting of:
· Two sheets of puff pastry – Baked until golden, puffed, and crispy.
· A thick layer of vanilla custard – Rich, creamy, and smooth, made from milk, egg yolks, sugar, and vanilla.
· A topping of icing – Usually a simple powdered sugar glaze, sometimes with a chocolate drizzle.
The combination of textures – the shattering crispness of the pastry and the silky, melt‑in‑your‑mouth custard – is pure heaven. It is a staple in bakeries across the UK, Australia, and France, where it is often called a vanilla slice or mille‑feuille.
Here is why you will love it:
· Looks bakery‑professional – Impressive without hours of work.
· Uses store‑bought puff pastry – No need to laminate dough.
· Make‑ahead friendly – Assemble a day in advance.
· Customizable – Change the custard flavor or icing.
· Crowd‑pleaser – Everyone loves vanilla custard and puff pastry.
· Perfect for afternoon tea, birthdays, or holidays – Elegant but unfussy.
Once you master this recipe, you will never buy a store‑bought vanilla slice again.
The Complete Vanilla Custard Cream Square Recipe
This recipe makes one 8×8‑inch square (about 9‑12 slices). It can be doubled for a 9×13‑inch pan.
Ingredients
For the Puff Pastry Layers:
· 1 sheet (about 8‑10 oz / 230‑280g) frozen puff pastry, thawed (all‑butter is best)
· Powdered sugar (for dusting while baking – optional, helps prevent sogginess)
For the Vanilla Custard Filling:
· 2 cups (480ml) whole milk
· 1 cup (240ml) heavy cream (or use all milk for lighter version)
· ¾ cup (150g) granulated sugar (divided)
· 1 vanilla bean pod (or 1 tablespoon vanilla bean paste, or 2 teaspoons vanilla extract)
· 6 large egg yolks
· ½ cup (60g) cornstarch (cornflour)
· 2 tablespoons unsalted butter (for extra richness)
For the Icing:
· 1 cup (120g) powdered sugar (icing sugar)
· 2‑3 tablespoons milk or water
· ½ teaspoon vanilla extract
· Optional: 2 tablespoons melted dark chocolate (for drizzling)
Equipment
· 8×8‑inch square baking pan
· Parchment paper
· Heavy‑bottomed saucepan
· Whisk
· Fine mesh strainer (optional)
· Plastic wrap
Step‑by‑Step Instructions
Part 1 – Bake the Puff Pastry
Step 1 – Preheat and Prepare
Preheat your oven to 400°F (200°C). Line a baking sheet with parchment paper. Roll out the thawed puff pastry slightly to smooth the creases, then cut it into two 8×8‑inch squares (or bake a large sheet and cut later).
Step 2 – Prick and Bake
Prick the pastry all over with a fork to prevent excessive puffing. For extra flat, even layers, place another sheet of parchment on top and weigh it down with another baking sheet. Bake for 15‑20 minutes until golden brown and crisp. If using a weight, remove it halfway through to allow the pastry to crisp. Cool completely on a wire rack.
Part 2 – Make the Vanilla Custard
Step 1 – Heat the Milk and Cream
In a heavy‑bottomed saucepan, combine the whole milk, heavy cream, and half of the sugar (6 tablespoons / 75g). If using a vanilla bean pod, split it lengthwise, scrape the seeds into the milk, and add the pod as well. Heat over medium heat until steaming but not boiling.
Step 2 – Whisk Egg Yolks, Sugar, and Cornstarch
In a separate bowl, whisk the egg yolks, remaining sugar (6 tablespoons / 75g), and cornstarch until pale and thick.
Step 3 – Temper the Eggs
Slowly pour about 1 cup of the hot milk mixture into the egg mixture while whisking constantly. This raises the temperature of the eggs without scrambling them.
Step 4 – Combine and Cook
Pour the tempered egg mixture back into the saucepan with the remaining hot milk. Whisk continuously over medium heat. The mixture will thicken quickly – in about 2‑3 minutes. Keep whisking until it becomes very thick and begins to bubble. Remove from heat.
Step 5 – Add Butter and Vanilla
If you used a vanilla bean pod, remove it now. Stir in the butter and vanilla extract (or vanilla bean paste). Whisk until the butter melts and the custard is smooth.
Step 6 – Strain (Optional but Recommended)
For an ultra‑smooth custard, pour it through a fine mesh strainer into a clean bowl.
Step 7 – Cool
Press a piece of plastic wrap directly onto the surface of the custard to prevent a skin from forming. Refrigerate for at least 2 hours, or until completely chilled and firm.
Part 3 – Assemble the Custard Squares
Step 1 – Prepare the Pan
Line an 8×8‑inch square baking pan with parchment paper, leaving overhang on two sides for easy removal. Place one of the baked puff pastry squares in the bottom of the pan.
Step 2 – Add the Custard
Spoon the chilled custard over the pastry layer and spread evenly with a spatula.
Step 3 – Top with Second Pastry
Place the second puff pastry square on top of the custard, pressing down gently to adhere. Cover and refrigerate for at least 4 hours, preferably overnight. The custard needs time to set completely.
Part 4 – Make the Icing and Finish
Step 1 – Whisk the Icing
In a small bowl, whisk together the powdered sugar, 2 tablespoons of milk or water, and vanilla extract. Add more liquid 1 teaspoon at a time until you have a thick, pourable consistency.
Step 2 – Spread the Icing
Pour the icing over the top pastry layer and spread evenly with an offset spatula.
Step 3 – Add Chocolate Drizzle (Optional)
Melt 2 tablespoons of dark chocolate and drizzle over the white icing. Use a toothpick to create swirls.
Step 4 – Let the Icing Set
Allow the icing to set at room temperature for about 30 minutes, or refrigerate for 10 minutes.
Part 5 – Slice and Serve
Use a sharp knife, dipping it in hot water and wiping clean between cuts, to cut the custard square into 9‑12 pieces. Serve chilled. Store in the refrigerator.
Pro Tips for Perfect Vanilla Custard Cream Squares
Keep the Puff Pastry Crisp
To maintain flakiness, bake the pastry until very golden and crisp. Cool completely before assembling. Serve within 24 hours – the pastry will soften over time. Some bakers brush the pastry with melted butter or egg white before baking to create a moisture barrier.
Get a Silky Smooth Custard
· Whisk constantly while cooking to prevent lumps.
· Strain the finished custard for absolute smoothness.
· Do not overcook – remove from heat as soon as it thickens and bubbles.
Prevent a Skin on the Custard
Press plastic wrap directly onto the surface while chilling.
Clean Cuts Every Time
· Use a serrated knife for the pastry layers.
· Dip the knife in hot water and wipe dry between each slice.
· For the cleanest slices, refrigerate the assembled dessert for at least 6 hours or overnight.
Make It Ahead
This dessert is perfect for making a day in advance. Keep refrigerated. Add the icing up to 4 hours before serving.
Want the full truth and the practical next steps?
Page 2 continues with the real explanation, the key details many readers skip, and the simple takeaways that make this guide more useful.