
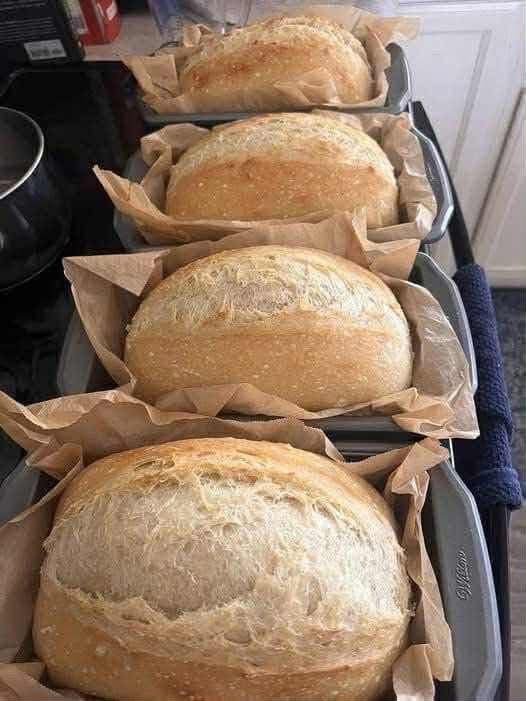
There is sourdough that is crusty, holey, and artisanal – and then there is sourdough sandwich bread. The latter is softer, more tender, and designed specifically for spreading butter, stacking meats and cheeses, or toasting to golden perfection. This sourdough sandwich bread has all the complex, tangy flavor of a traditional sourdough loaf but with a fine, even crumb and a pliable crust that won’t tear the roof of your mouth. It is the best of both worlds: artisanal taste with everyday practicality.
In this guide, you will learn how to make a soft, delicious sourdough sandwich bread from scratch, using an active sourdough starter. No commercial yeast required (though you can use a little for insurance). You will also discover pro tips for achieving that perfect sandwich loaf texture, variations (whole wheat, seeded, honey), storage advice, and answers to common sourdough questions. Whether you are a seasoned baker or a sourdough beginner, this recipe will become a staple in your kitchen.
Why Sourdough Sandwich Bread?
Traditional no‑knead artisan sourdough is wonderful, but its large holes and hard crust can make it difficult to use for sandwiches. Mayonnaise and mustard drip through, and the crust can be tough on delicate mouths. Sandwich sourdough solves these problems by:
· Using a pan – Baking in a loaf pan forces the dough to rise upward and take a classic sandwich shape.
· Enriching the dough – A little butter, milk, or oil adds tenderness and softness.
· Shorter bulk fermentation – Prevents large irregular holes.
· Lower hydration – A firmer dough creates a tighter crumb.
The result is a loaf that is still unmistakably sourdough – tangy, chewy, and deeply flavorful – but with a soft, uniform crumb that makes the best toast and sandwiches you have ever had.
The Complete Sourdough Sandwich Bread Recipe
This recipe makes one 9×5‑inch loaf. It requires an active, bubbly sourdough starter.
Ingredients
For the Levain (if your starter is not freshly fed):
· 50g active sourdough starter
· 100g all‑purpose flour
· 100g water (lukewarm)
For the Dough:
· 500g bread flour (or all‑purpose flour for a softer crumb)
· 100g active sourdough starter (fed within 4‑6 hours)
· 310g warm water (about 85°F / 30°C)
· 30g granulated sugar (or honey or maple syrup) – feeds the yeast and tenderizes
· 10g salt
· 30g unsalted butter, softened (or olive oil for dairy‑free)
For the Pan:
· Butter or cooking spray for greasing
Equipment
· 9×5‑inch loaf pan
· Large mixing bowl
· Bench scraper
· Parchment paper (optional)
Step‑by‑Step Instructions
Step 1 – Prepare Your Starter
Ensure your sourdough starter is active and bubbly. Feed it 4‑6 hours before mixing the dough. It should have doubled in volume and be full of bubbles.
Step 2 – Mix the Dough
In a large bowl, combine the warm water, active starter, and sugar. Stir to dissolve the starter. Add the flour and salt. Mix with a spoon or your hands until a shaggy dough forms. Add the softened butter and incorporate it by squeezing the dough between your fingers. The butter should be fully absorbed.
Step 3 – Rest (Autolyse)
Cover the bowl and let the dough rest for 30 minutes. This allows the flour to fully hydrate and makes later kneading easier.
Step 4 – Knead
Turn the dough out onto a lightly floured surface. Knead for 8‑10 minutes until the dough becomes smooth, elastic, and passes the windowpane test (stretch a small piece thin enough to see light through without tearing). Alternatively, use a stand mixer with a dough hook on medium speed for 6‑8 minutes.
Step 5 – Bulk Fermentation
Place the dough back in the bowl, cover, and let it rise at room temperature (about 70‑75°F) for 4‑6 hours. During the first 2 hours, perform 3‑4 sets of stretch and folds every 30 minutes. This builds strength without over‑kneading. The dough should double in volume and feel airy.
Step 6 – Shape the Loaf
Turn the dough out onto a lightly floured surface. Gently press it into a rectangle about 8×10 inches. Roll it up tightly from the short end into a log. Pinch the seam to seal.
Step 7 – Final Rise in the Pan
Grease the 9×5‑inch loaf pan. Place the shaped dough seam‑side down into the pan. Cover loosely with plastic wrap or a damp towel. Let it rise until it crests about 1 inch above the rim of the pan. This typically takes 2‑4 hours, depending on temperature.
Step 8 – Preheat and Score
About 30 minutes before baking, preheat your oven to 375°F (190°C). Optionally, score the top of the loaf with a sharp lame or knife (a single deep slash or several small ones) to control expansion.
Step 9 – Bake
Bake for 35‑45 minutes. The loaf should be deep golden brown and sound hollow when tapped on the bottom. For a softer crust, you can tent with foil after 30 minutes. Internal temperature should reach 200‑205°F (93‑96°C).
Step 10 – Cool
Remove the bread from the pan immediately and transfer to a wire rack. Cool completely before slicing – at least 1‑2 hours. Cutting warm sourdough can make it gummy.
Pro Tips for Perfect Sourdough Sandwich Bread
Use a Strong Starter
A weak or young starter will produce a dense loaf. Feed your starter regularly and use it at its peak (when it has doubled and is domed on top).
Control the Temperature
If your kitchen is cold, bulk fermentation will take longer. Use warm water (85°F) and place the dough near a warm oven or in a turned‑off microwave with a cup of hot water.
Do Not Over‑Proof
The final rise is critical. If the dough over‑proofs, it may collapse in the oven or have a coarse, sour crumb. When poked gently with a floured finger, the dough should slowly spring back, leaving a small indentation.
Add Milk for Extra Softness
Replace half the water with whole milk for a richer, softer crumb. Reduce the sugar slightly.
For a Tangier Flavor
Use a longer, cooler bulk fermentation. Refrigerate the dough after shaping overnight (cold retard) for 12‑24 hours, then bring to room temperature and allow the final rise before baking.
Use Parchment Paper
If you are worried about sticking, line the loaf pan with parchment paper leaving overhangs on two sides. This makes removal effortless.
For a Glossy Crust
Brush the top of the loaf with an egg wash (1 egg beaten with 1 tablespoon water) before baking.
Delicious Variations (Same Method)
Once you master the classic sourdough sandwich bread, try these easy twists.
- Whole Wheat Sourdough Sandwich Bread
Replace half the bread flour with whole wheat flour. Increase water by 1‑2 tablespoons. The loaf will be denser but more nutritious.
- Honey Oat Sourdough
Replace sugar with honey. After shaping, roll the top of the loaf in rolled oats before placing in the pan.
- Seeded Sourdough Sandwich Bread
Add ½ cup of mixed seeds (sunflower, pumpkin, sesame, flax) to the dough during mixing. Sprinkle seeds on top before baking.
- Cinnamon Raisin Sourdough
Add 1 tablespoon of cinnamon and 1 cup of raisins (plumped in warm water and drained) during the final stretch and folds.
- Cheese and Herb Sourdough
Add 1 cup of shredded cheddar or Parmesan and 1 tablespoon of dried rosemary or thyme during the last folds.
- Dairy‑Free Sourdough Sandwich Bread
Replace butter with olive oil or coconut oil. Use water instead of milk.
- Gluten‑Free Sourdough Sandwich Bread
This recipe is not designed for gluten‑free flour. Use a dedicated gluten‑free sourdough recipe.
How to Store, Slice, and Freeze
Room Temperature
Store sourdough sandwich bread in a bread box or wrapped in a kitchen towel for 2‑3 days. Do not store in plastic immediately – it will soften the crust.
Refrigerator
Do not refrigerate whole bread – it stales faster. Slice and freeze instead.
Freezer
Slice the cooled loaf, then place slices in a freezer bag. Freeze for up to 3 months. Toast or thaw as needed.
Slicing Tips
Use a serrated bread knife. Let the loaf cool completely. Slice with a gentle sawing motion; do not press down hard.
Want the full truth and the practical next steps?
Page 2 continues with the real explanation, the key details many readers skip, and the simple takeaways that make this guide more useful.