
Imagine scooping into a bowl of rich, velvety ice cream that you made entirely from scratch — without an ice cream maker, without endless stirring, and without complicated steps. This Quick and Easy Homemade Ice Cream recipe delivers exactly that. With just a few simple ingredients — heavy cream, sweetened condensed milk, and vanilla — you can create a base that is smooth, creamy, and endlessly customizable. Add a luscious chocolate swirl, and you have a dessert that rivals any premium store‑bought brand.
The best part? No machine required. No rock salt. No ice. No endless churning. Just a hand mixer or a whisk, a few minutes of whipping, and a freezer. In this guide, you will learn the complete recipe, the science behind no‑churn ice cream, pro tips for the creamiest texture, delicious variations (strawberry, cookies and cream, mint chocolate chip, and more), storage advice, and why this recipe will become your go‑to for last‑minute desserts.
Why No‑Churn Ice Cream Works So Well
Traditional ice cream requires constant churning to incorporate air and prevent large ice crystals from forming. This recipe uses a brilliant shortcut: sweetened condensed milk. The high sugar and fat content in condensed milk lowers the freezing point, preventing the mixture from becoming rock solid. Whipped heavy cream provides the air and volume, creating a light, scoopable texture without a machine.
Here is why you will love this recipe:
· No ice cream maker needed – Just a bowl and a hand mixer.
· Only 3 base ingredients – Heavy cream, sweetened condensed milk, vanilla.
· Creamy, scoopable texture – No ice crystals, no graininess.
· Endlessly customizable – Add chocolate, fruit, cookies, or nuts.
· Ready in minutes – Active time is less than 10 minutes.
· Make‑ahead friendly – Freeze overnight and enjoy anytime.
· Budget‑friendly – Much cheaper than premium store‑bought ice cream.
This is the dessert you will make for summer parties, birthday celebrations, or just because you crave something sweet and cold.
The Complete No‑Churn Ice Cream Recipe
This recipe makes about 1.5 quarts (1.5 liters) of ice cream, serving 8–10 people.
For the Vanilla Ice Cream Base
· 2 cups (480 ml) heavy whipping cream (cold)
· 1 can (400g / 14 oz) sweetened condensed milk
· 1 teaspoon vanilla extract
For the Chocolate Swirl
· 3 tablespoons unsweetened cocoa powder (or 3 tablespoons melted dark chocolate)
· 2–3 tablespoons milk (to loosen – use whole milk or any milk)
Equipment
· Large mixing bowl
· Electric hand mixer or stand mixer
· Rubber spatula
· Loaf pan or 8×8‑inch square container
· Parchment paper (optional)
Step‑by‑Step Instructions (No Machine)
Step 1 – Chill Your Bowl and Cream
For best results, place your mixing bowl and beaters in the refrigerator for 15 minutes before starting. Cold cream whips faster and holds its shape better.
Step 2 – Whip the Heavy Cream
Pour the cold heavy cream into the chilled bowl. Beat on medium‑high speed until stiff peaks form. This usually takes 2–3 minutes. The cream should be thick, fluffy, and hold its shape when you lift the beaters. Do not overbeat, or it will turn into butter.
Step 3 – Mix the Sweetened Condensed Milk Base
In a separate large bowl, combine the sweetened condensed milk and vanilla extract. Stir until smooth.
Step 4 – Fold in the Whipped Cream
Add about one‑third of the whipped cream to the condensed milk mixture. Gently fold with a spatula to lighten the mixture. Then add the remaining whipped cream and fold until no white streaks remain. Do not overmix — you want to keep as much air as possible.
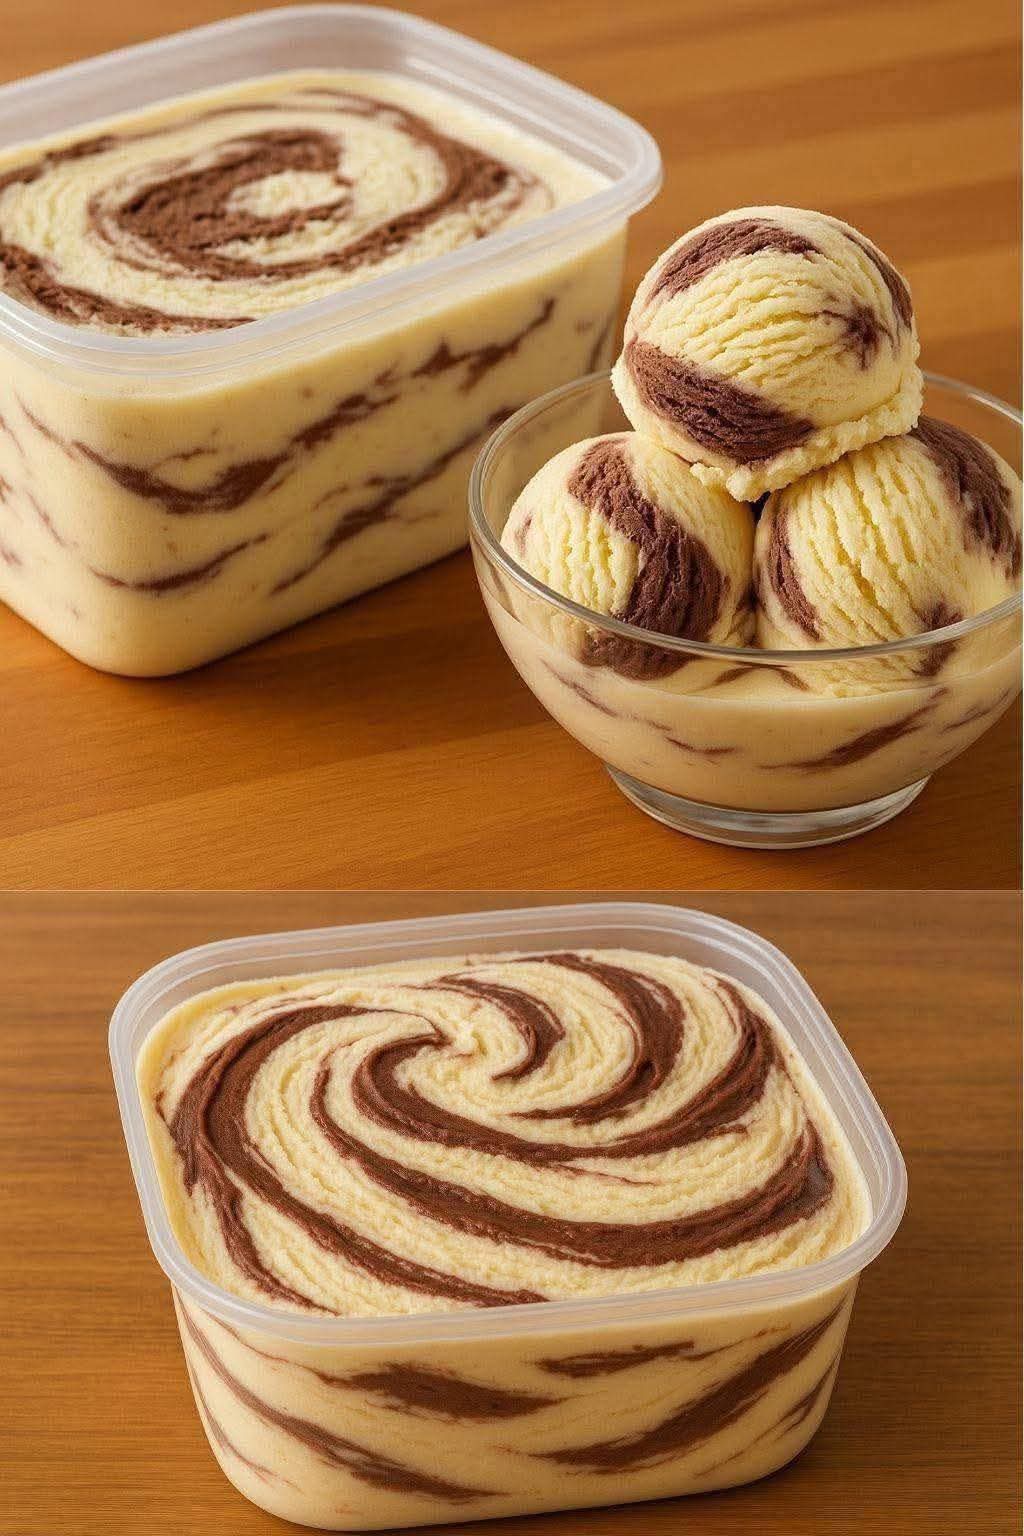
Step 5 – Make the Chocolate Swirl
In a small bowl, combine the cocoa powder and milk (or use melted chocolate). Stir until you have a smooth, pourable sauce. If using cocoa powder, adjust the milk to reach a consistency similar to hot fudge — not too thick, not too runny.
Step 6 – Assemble the Ice Cream
Line a loaf pan or 8×8‑inch square container with parchment paper (for easy removal). Pour half of the vanilla ice cream mixture into the pan and spread evenly. Drizzle half of the chocolate swirl over the top. Repeat with the remaining vanilla mixture and the rest of the chocolate swirl.
Step 7 – Swirl with a Knife
Use a butter knife or a skewer to gently swirl the chocolate into the vanilla ice cream. Make figure‑eight motions or gentle back‑and‑forth strokes. Do not over‑swirl, or you will lose the beautiful marbled effect.
Step 8 – Freeze
Cover the container with plastic wrap or a lid. Freeze for at least 6 hours, preferably overnight. The ice cream needs time to firm up completely.
Step 9 – Serve
Remove the ice cream from the freezer and let it sit at room temperature for 2–3 minutes before scooping. This makes scooping easier. Scoop into bowls or cones and enjoy.
Pro Tips for the Perfect No‑Churn Ice Cream
Use Very Cold Heavy Cream
Cold cream whips faster and produces stiffer peaks. If your cream is not cold enough, it may not whip properly.
Do Not Overbeat the Cream
Stop when stiff peaks form. Overbeaten cream becomes grainy and will separate into butter and buttermilk. The cream should look smooth and fluffy, not curdled.
Fold Gently
Folding, not stirring, keeps the air in the whipped cream. Use a spatula to cut down through the center, scrape along the bottom, and fold over. Repeat until just combined.
Use Full‑Fat Sweetened Condensed Milk
Low‑fat or fat‑free condensed milk does not have the same sugar and fat content, which is essential for a creamy, scoopable texture. Use the real thing.
Customize the Swirl
The chocolate swirl is just one option. You can use caramel sauce, fruit puree, peanut butter, or cookie crumbs. See the variations section for more ideas.
Freeze Overnight for Best Texture
While 6 hours is the minimum, overnight freezing ensures the ice cream is firm and easy to scoop. Patience pays off.
Store Properly
Press a piece of plastic wrap directly onto the surface of the ice cream before sealing the container. This prevents ice crystals from forming on top.
Delicious Variations (Same No‑Churn Method)
Once you master the classic vanilla base, try these fun twists.
- Chocolate Chip Ice Cream
Fold in ½ cup of mini chocolate chips after combining the whipped cream and condensed milk. Do not add a swirl.
- Strawberry Swirl Ice Cream
Replace the chocolate swirl with ½ cup of strawberry puree (fresh or frozen strawberries blended with 2 tablespoons of sugar). Swirl into the base before freezing.
- Cookies and Cream Ice Cream
Fold in 1 cup of crushed Oreo cookies (about 10–12 cookies) after combining the base. Omit the chocolate swirl.
- Mint Chocolate Chip Ice Cream
Add 1 teaspoon of peppermint extract to the condensed milk mixture. Add a few drops of green food coloring if desired. Fold in ½ cup of mini chocolate chips.
- Peanut Butter Cup Ice Cream
Fold in ½ cup of chopped peanut butter cups and swirl in ¼ cup of melted peanut butter.
- Salted Caramel Ice Cream
Replace the chocolate swirl with ½ cup of salted caramel sauce. Sprinkle flaky sea salt on top before freezing.
- Coconut Lime Ice Cream
Add 1 teaspoon of coconut extract and the zest of 2 limes to the condensed milk mixture. Fold in ½ cup of toasted shredded coconut.
- Coffee Ice Cream
Add 2 tablespoons of instant coffee granules dissolved in 1 tablespoon of hot water to the condensed milk mixture. Omit the chocolate swirl or add a chocolate fudge swirl.
- Dairy‑Free / Vegan Ice Cream
Use full‑fat coconut cream instead of heavy cream. Use sweetened condensed coconut milk (available in many stores). The texture will be slightly different but still delicious.
- Low‑Sugar / Keto Ice Cream
Replace sweetened condensed milk with 1 cup of allulose or erythritol + ½ cup heavy cream + 1 teaspoon xanthan gum (not a 1:1 substitution). This is more advanced; for best results, look for a specific keto no‑churn recipe.
Want the full truth and the practical next steps?
Page 2 continues with the real explanation, the key details many readers skip, and the simple takeaways that make this guide more useful.