
These easy whole wheat butter cookies use just 4 ingredients and come together in minutes. No chilling, no rolling pins – just simple, crumbly, buttery perfection. A healthier take on classic shortbread.
Let’s be honest: nothing beats a simple butter cookie. Buttery, crumbly, melt‑in‑your‑mouth – they’re the ultimate comfort treat. But most recipes call for refined white flour and a mountain of sugar. What if you could have the same satisfying texture with the nutty, wholesome flavor of whole wheat flour?
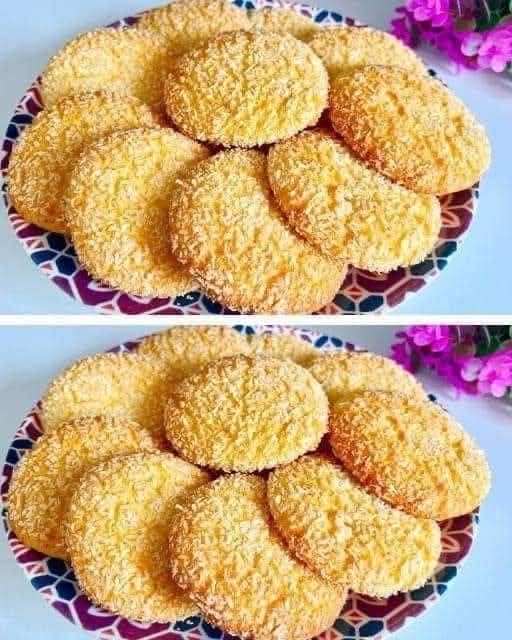
These easy whole wheat butter cookies are exactly that. They’re made with just 4 basic ingredients: whole wheat flour, butter, sugar, and vanilla. No chilling, no rolling pins, no cookie cutters (unless you want to). Just mix, shape, bake, and enjoy. They’re crisp around the edges, tender in the center, and have a rich, nutty depth that white flour cookies just can’t match.
Perfect for tea time, holiday cookie exchanges, or whenever you need a quick, homemade treat. Plus, they’re made with 100% whole grains – so you can feel a little better about reaching for a second one.
In this guide, I’ll walk you through the complete recipe, share the science behind why whole wheat works, offer pro tips for the perfect texture, and provide endless variations (chocolate chip, lemon zest, cinnamon, and more). You’ll also get storage advice, nutrition facts, and answers to all your questions.
Let’s bake a healthier butter cookie that doesn’t compromise on taste.
Why You’ll Love These Whole Wheat Butter Cookies
✔ Only 4 ingredients ✔ Ready in 20 minutes
✔ No chilling required ✔ No rolling pin needed
✔ 100% whole grain ✔ Crumbly, buttery, delicious
✔ Perfect for beginners ✔ Kid‑approved
✔ Great for tea, coffee, or milk ✔ Endlessly customizable
These cookies are proof that whole wheat baking can be simple, forgiving, and absolutely delicious.
Whole Wheat vs. White Flour – What’s the Difference?
Whole wheat flour is made from the entire wheat kernel – bran, germ, and endosperm. White flour has the bran and germ removed. That means whole wheat flour has:
· More fiber – about 3–4 grams per ¼ cup, compared to 1 gram in white flour.
· More protein – around 4–5 grams per ¼ cup.
· More vitamins and minerals – B vitamins, iron, magnesium, and zinc.
· A nuttier, earthier flavor – which pairs beautifully with butter and vanilla.
The trade‑off? Whole wheat flour absorbs more liquid and can make baked goods denser. But with the right technique – and this recipe – you can achieve a cookie that’s light, crumbly, and perfectly tender.
Ingredient Breakdown – Why Each One Matters
🌾 1. Whole Wheat Flour (1½ cups)
Role: The structure. Whole wheat flour provides a nutty, slightly sweet flavor and a hearty texture.
Best type: Fine or white whole wheat flour is ideal – it’s lighter and milder than traditional red whole wheat. If you only have standard whole wheat flour, it works fine; the cookies will be a bit denser.
Pro tip: Measure by spooning the flour into the measuring cup and leveling with a knife – don’t scoop directly from the bag (it packs too much flour).
🧈 2. Unsalted Butter (½ cup, softened – 1 stick)
Role: The flavor and texture foundation. Butter gives these cookies their signature crumbly, melt‑in‑your‑mouth quality.
Why unsalted: You control the salt level. If you only have salted butter, reduce the added salt to a pinch.
Pro tip: Use high‑quality European‑style butter (like Kerrygold) for a richer flavor. Let the butter soften at room temperature for 30–60 minutes before starting – cold butter won’t cream properly.
🍬 3. Sugar (½ cup)
Role: Sweetness and texture. Granulated sugar adds sweetness and helps create crisp edges.
Substitution: Coconut sugar works (use the same amount; cookies will be darker and slightly less crisp). For a lower‑sugar version, use ⅓ cup sugar or substitute with monk fruit sweetener.
Pro tip: For extra depth, use light brown sugar – the molasses adds a subtle caramel note.
🌿 4. Vanilla Extract (1 tsp)
Role: Warmth and flavor depth. Vanilla rounds out the butter and flour, making the cookies taste more complex.
Substitution: Almond extract (¼ tsp – it’s strong), lemon zest, or even a pinch of cinnamon.
🧂 5. Salt (¼ tsp – not counted as an ingredient)
Role: Flavor enhancer. Salt makes the sweetness more pronounced and balances the richness of the butter.
Optional Add‑Ins
Ingredient Amount Effect
Chocolate chips ½ cup Sweet, melty pockets
Lemon zest 1 tbsp Bright, citrusy note
Cinnamon 1 tsp Warm spice
Finely chopped nuts (walnuts, pecans) ½ cup Crunch and healthy fats
Dried cranberries or raisins ½ cup Chewy, tart bursts
Cocoa powder (replace ¼ cup flour) ¼ cup Chocolate cookies
The Recipe – Easy Whole Wheat Butter Cookies
Prep time: 10 minutes
Bake time: 12–15 minutes
Total time: 25 minutes
Yield: 18–24 cookies
Ingredients
Ingredient Amount Notes
Whole wheat flour 1½ cups Spooned and leveled
Unsalted butter, softened ½ cup (1 stick) Room temperature
Granulated sugar ½ cup
Vanilla extract 1 tsp
Salt ¼ tsp
Optional: chocolate chips, nuts, etc. ½ cup
Equipment
· Large mixing bowl
· Electric mixer (hand or stand) – or a strong whisk
· Spatula
· Baking sheet
· Parchment paper
Step‑by‑Step Instructions
Step 1: Preheat and Prepare
Preheat your oven to 350°F (175°C). Line a baking sheet with parchment paper.
Step 2: Cream Butter and Sugar
In a large bowl, beat the softened butter and sugar together until light and fluffy – about 2–3 minutes with an electric mixer (or 4–5 minutes by hand). The mixture should be pale and creamy.
Step 3: Add Vanilla and Salt
Beat in the vanilla extract and salt until combined.
Step 4: Add Flour
Gradually add the whole wheat flour, mixing on low speed (or with a spatula) until just combined. Do not overmix – stop when the dough comes together. It will be crumbly at first, then form a soft dough. If it’s too dry, add 1 tablespoon of milk. If too sticky, add 1 tablespoon of flour.
Step 5: Fold in Add‑ins (Optional)
If using chocolate chips, nuts, or other add‑ins, fold them in gently with a spatula.
Step 6: Shape the Cookies
Scoop tablespoon‑sized balls of dough (about 1 inch in diameter) and roll them between your palms. Place them on the prepared baking sheet, spacing about 2 inches apart. Flatten slightly with the palm of your hand or the bottom of a glass. For a classic butter cookie look, use a fork to press a criss‑cross pattern on top.
Step 7: Bake
Bake for 12–15 minutes, until the edges are lightly golden brown. The centers will still be soft – they’ll firm up as they cool. For crispier cookies, bake 2–3 minutes longer.
Step 8: Cool and Serve
Let the cookies cool on the baking sheet for 5 minutes, then transfer to a wire rack to cool completely. Serve with tea, coffee, or a cold glass of milk.
Want the full truth and the practical next steps?
Page 2 continues with the real explanation, the key details many readers skip, and the simple takeaways that make this guide more useful.