
This simple homemade night cream uses coconut oil, honey, and aloe vera for deep hydration and a natural glow. No miracle claims – just real results for softer, healthier skin.
Let’s be honest: the skincare industry loves to sell you miracles. “Erase wrinkles overnight!” “Boost collagen instantly!” “Look 10 years younger by morning!” These claims are designed to grab your attention – and your wallet. But if you’ve ever tried a $100 night cream only to wake up looking exactly the same, you already know the truth.
That’s where a simple homemade night cream comes in. No fancy packaging. No unpronounceable chemicals. No inflated promises. Just three (or four) natural ingredients that actually do what they’re supposed to do: hydrate, soften, and support your skin’s natural barrier while you sleep.
This recipe combines coconut oil, honey, and aloe vera gel – plus an optional drop of vitamin E oil. It’s gentle, affordable, and takes about two minutes to make. But let’s be clear about what it can and cannot do. This cream will not erase deep wrinkles. It will not create new collagen. It will not replace professional treatments or sunscreen. What it will do is provide deep hydration, improve skin texture, and give you a natural, healthy glow – with consistent use over time.
In this guide, I’ll walk you through the exact recipe, explain how each ingredient works (and what the science says), share realistic expectations, and answer all your questions about skin health, collagen, and natural beauty. No hype. Just honest, useful information.
Let’s get mixing.
Why Make Your Own Night Cream?
Before we dive into the recipe, let’s talk about why homemade skincare is worth considering – and when it’s not.
- You Control the Ingredients
Commercial night creams often contain preservatives, fragrances, alcohol, and silicones that can irritate sensitive skin. With this recipe, you know exactly what you’re putting on your face: coconut oil, honey, aloe, and maybe vitamin E. That’s it.
- It’s Incredibly Affordable
A jar of high‑end night cream can cost $50–$200. This homemade version costs pennies per batch. Coconut oil, honey, and aloe vera are pantry staples or inexpensive buys.
- No Harsh Chemicals or Synthetic Fragrances
If you have sensitive skin, eczema, or rosacea, many commercial products can trigger flare‑ups. This gentle blend is free from common irritants.
- It’s Satisfying and Fun
There’s something deeply rewarding about making your own skincare. It connects you to a simpler, more intentional way of caring for yourself.
- It’s Not a Miracle Cure
And that’s the honest truth. This cream will not reverse aging or replace medical treatments. But for everyday hydration and a healthy glow? It works beautifully.
The Complete Ingredient Breakdown
Let’s look at each ingredient – what it does, how it works, and what the science actually says.
Coconut Oil (1 tablespoon)
Role: Deep moisturizer and occlusive barrier.
How it works: Coconut oil is rich in medium‑chain triglycerides (MCTs), particularly lauric acid. These fatty acids penetrate the skin’s outer layer, helping to repair the lipid barrier and lock in moisture. Unlike many plant oils that sit on top of the skin, coconut oil absorbs relatively well.
What the science says: A 2018 study found that topical coconut oil improves skin hydration and increases lipid levels on the skin’s surface. It also has mild antimicrobial properties due to lauric acid, which can help reduce surface bacteria.
Important caveat: Coconut oil is comedogenic – meaning it can clog pores. For people with acne‑prone or oily skin, this may cause breakouts. If that’s you, consider using a lighter oil like jojoba or grapeseed instead (see Variations section).
Best for: Dry, normal, or mature skin. Patch test first.
Honey (1 teaspoon)
Role: Humectant (draws moisture in) + gentle exfoliant + antibacterial.
How it works: Honey is a natural humectant – it attracts water from the air and holds it against the skin. It also contains gluconic acid, a very mild alpha‑hydroxy acid (AHA) that gently exfoliates dead skin cells over time, revealing a smoother surface.
What the science says: Numerous studies confirm honey’s wound‑healing, anti‑inflammatory, and antimicrobial properties. Raw honey (unpasteurized) contains enzymes that produce small amounts of hydrogen peroxide, which helps keep the skin clean. However, for a night cream, regular pasteurized honey works fine – it just lacks some of the enzymes.
Important note: Honey can feel sticky. In this cream, the coconut oil and aloe help thin it out, but you may still notice a slight tackiness. That’s normal. It absorbs within 10–15 minutes.
Aloe Vera Gel (1 teaspoon)
Role: Hydration + soothing + cooling.
How it works: Aloe vera is about 99% water, but the remaining 1% contains vitamins, minerals, enzymes, and polysaccharides that soothe irritated skin, reduce redness, and provide lightweight hydration without greasiness.
What the science says: Aloe has been studied for its ability to accelerate wound healing, reduce inflammation, and increase collagen production in the deeper layers of skin (though topically applied aloe has minimal effect on existing wrinkles – more on that later).
Pro tip: Use pure aloe vera gel from a plant or a store‑bought brand with no added alcohol, dyes, or fragrances. Avoid “aloe vera juice” meant for drinking – it’s too thin.
Vitamin E Oil (Optional – 2–3 drops)
Role: Antioxidant + skin barrier support + natural preservative.
How it works: Vitamin E (tocopherol) is a fat‑soluble antioxidant that neutralizes free radicals – unstable molecules that damage skin cells and accelerate aging. It also helps stabilize the coconut oil, extending the shelf life of your homemade cream.
What the science says: Topical vitamin E has been shown to reduce UV‑induced skin damage (though it’s not a replacement for sunscreen) and improve moisturization when combined with other oils.
Where to find it: Most drugstores sell pure vitamin E oil in small bottles. You can also puncture a vitamin E capsule.
The Recipe – Simple Homemade Night Cream
Prep time: 2 minutes
Yield: About 2 tablespoons (lasts 5–7 days)
Storage: Small glass jar or container
Ingredients
Ingredient Amount Notes
Coconut oil (unrefined, virgin) 1 tablespoon Solid at room temperature
Honey (raw or regular) 1 teaspoon Any honey works
Aloe vera gel (pure) 1 teaspoon No alcohol or additives
Vitamin E oil (optional) 2–3 drops For antioxidant boost
Equipment
· Small bowl
· Spoon or small whisk
· Small clean jar with lid (glass is best)
Step‑by‑Step Instructions
Step 1: Soften the Coconut Oil (If Solid)
If your coconut oil is solid, scoop out 1 tablespoon and let it sit at room temperature for 10–15 minutes, or microwave for 5–10 seconds. You want it soft and creamy – not melted into a clear liquid. Soft is easier to mix; fully melted will separate from the honey.
Step 2: Combine Ingredients
Add the softened coconut oil, honey, and aloe vera gel to a small bowl. Add vitamin E oil if using.
Step 3: Mix Thoroughly
Stir with a spoon or small whisk until smooth and creamy. The mixture may be slightly grainy at first (if the coconut oil wasn’t fully softened), but keep stirring. It will come together into a soft, emulsion‑like cream.
What to expect: The texture won’t be as silky as a commercial cream. Coconut oil and honey don’t fully emulsify without an emulsifier. You’ll have a soft, slightly separated blend – that’s fine. Just stir before each use.
Step 4: Transfer to Jar
Spoon the mixture into a clean glass jar. Tap gently to settle.
Step 5: Store Properly
Keep in a cool, dark place (like a bathroom cabinet). Because this cream contains no synthetic preservatives, it will last 5–7 days at room temperature. For longer storage, keep it in the refrigerator – it will firm up but still be usable. Refrigerated, it lasts 2–3 weeks.
Important: Make small batches. Don’t make a month’s worth. Fresh is better.
How to Use It – Nighttime Routine
Step 1: Cleanse Your Face
Wash your face with a gentle cleanser. Pat dry – don’t rub.
Step 2: Apply a Small Amount
Using clean fingers, scoop out about a pea‑sized amount (a little goes a long way). Rub between your fingertips to warm and soften.
Step 3: Massage Gently
Apply to your face in upward, circular motions. Focus on dry areas – cheeks, forehead, neck. Avoid the immediate eye area (coconut oil can cause milia – tiny white bumps – if it migrates into eyes).
Step 4: Leave Overnight
Let the cream absorb while you sleep. You may feel slightly greasy – that’s normal. Use an old pillowcase if you’re worried about stains (though coconut oil washes out).
Step 5: Rinse in the Morning (Optional)
In the morning, wash your face with your regular cleanser. Some people prefer to just splash with water. Do what feels right for your skin.
Frequency: Use nightly for best results. If you have oily skin, start with every other night.
What This Cream Actually Does (Realistic Expectations)
Let’s be completely honest. This is not a magic potion. Here’s what you can reasonably expect with consistent use.
✅ What It DOES Do
Benefit How It Works
Deep hydration Coconut oil and aloe vera deliver and lock in moisture
Softer skin texture Honey gently exfoliates; hydration plumps the surface
Natural glow Well‑hydrated skin reflects light better
Reduced dryness & flaking The occlusive barrier prevents water loss
Mild soothing Aloe calms minor irritation and redness
Affordable self‑care No expensive products needed
❌ What It DOES NOT Do
Claim Reality
Erase deep wrinkles No topical cream can erase established wrinkles
Create new collagen Collagen is produced inside your body, not absorbed from a cream
Replace sunscreen This cream offers no UV protection
Cure acne Coconut oil may worsen acne for some people
Work overnight Results take weeks of consistent use
Replace medical treatments For severe skin conditions, see a dermatologist
The bottom line: This cream supports your skin’s health. It doesn’t reverse aging. And that’s okay – because healthy, hydrated skin always looks better than dry, irritated skin, regardless of age.
What REALLY Boosts Collagen (If Anti‑Aging Is Your Goal)
Let’s talk about collagen, because the skincare industry has done a brilliant job of convincing people that rubbing collagen on your face will make you look younger. It will not. Collagen molecules are too large to penetrate the skin. When you buy a “collagen cream,” you’re moisturizing – not adding collagen.
Collagen is produced inside your body, by your own cells. If you want to support your body’s natural collagen production, focus on these evidence‑backed strategies:
☀️ Daily Sunscreen (The #1 Most Important!)
UV radiation breaks down existing collagen and prevents new collagen formation. Up to 90% of visible skin aging comes from sun exposure. Wear broad‑spectrum SPF 30+ every single day – rain or shine.
🥗 Eat a Collagen‑Supporting Diet
Your body needs specific nutrients to make collagen:
· Vitamin C: Citrus, bell peppers, strawberries, broccoli
· Protein (amino acids): Meat, fish, eggs, beans, tofu
· Copper: Nuts, seeds, shellfish
· Zinc: Meat, shellfish, legumes
💧 Stay Hydrated
Water doesn’t “plump” collagen directly, but dehydration makes skin look dull and emphasizes fine lines. Drink water throughout the day.
😴 Get Quality Sleep
During deep sleep, your body repairs damaged cells – including skin cells. Chronic sleep deprivation accelerates visible aging.
🚫 Stop Smoking
Tobacco smoke dramatically reduces collagen production and damages existing collagen. It’s one of the fastest ways to age your skin.
🥩 Consider Bone Broth or Collagen Supplements (Maybe)
Oral collagen supplements (hydrolyzed collagen) have some evidence for improving skin elasticity and hydration after 8–12 weeks. But they’re expensive, and the effect is modest. Food sources are just as good.
The honest take: No cream – homemade or expensive – can replace these internal and lifestyle factors. Use the night cream for hydration and enjoyment. Use sunscreen and good nutrition for real anti‑aging.
Important Safety Tips & Who Should Be Careful
- Always Do a Patch Test
Before applying to your face, test a small amount on your inner arm or behind your ear. Wait 24 hours. If you see redness, itching, or bumps, do not use this cream.
- Avoid If You Have Acne‑Prone or Oily Skin
Coconut oil is highly comedogenic (clogging). It can cause blackheads, whiteheads, and cystic acne in susceptible people. If you’re acne‑prone, skip this recipe or substitute jojoba oil (see Variations below).
- Be Cautious with Allergies
· Coconut allergy: Rare but possible. Avoid entirely.
· Bee products allergy: Honey is a bee product. Do not use if allergic.
· Aloe sensitivity: Uncommon, but some people experience contact dermatitis.
- Keep Away from Eyes
Coconut oil in eyes causes blurry vision and stinging. Apply carefully.
- Not for Infants or Young Children
Honey can contain botulism spores (rare, but not worth the risk for babies under 1 year). Adult skin is fine.
- Consult a Dermatologist If…
You have a diagnosed skin condition (eczema, rosacea, psoriasis, severe acne) before adding new products – even natural ones.
Variations – Customize for Your Skin Type
For Acne‑Prone or Oily Skin
Replace coconut oil with 1 tablespoon jojoba oil or grapeseed oil. Both are non‑comedogenic (won’t clog pores) and still provide excellent hydration.
For Extra Dry or Mature Skin
Add 2–3 drops of rosehip seed oil or argan oil to the mixture. These oils are rich in essential fatty acids and vitamin A (natural retinoids).
For Soothing Sensitive Skin
Increase aloe vera gel to 1½ teaspoons and reduce coconut oil to 2 teaspoons. Aloe is calming for redness.
For a Lighter, Less Greasy Texture
Add 1 tablespoon of distilled water and blend vigorously. The water will temporarily emulsify, creating a lighter lotion – but it will separate quickly. Stir before each use.
Scented Version (If You Like Fragrance)
Add 1–2 drops of lavender essential oil or tea tree oil (for acne). Always dilute in the coconut oil first. Do not use citrus essential oils (photosensitizing).
Storage & Shelf Life
Condition Shelf Life Notes
Room temperature (cool, dark) 5–7 days Discard if it smells off or changes color
Refrigerator 2–3 weeks Hardens; scoop out with a clean spoon and warm in hands
Freezer 3 months Portion into ice cube trays; thaw one cube at a time
Signs your cream has gone bad:
· Sour or rancid smell (coconut oil should smell like coconut)
· Mold growth (fuzzy spots – discard immediately)
· Separation that won’t remix (normal separation is fine; bad separation has off odor)
Pro tip: Always use a clean spoon or clean fingers to scoop out the cream. Dipping dirty fingers introduces bacteria and shortens shelf life.
Frequently Asked Questions (FAQs)
Q: Can I use this cream under makeup?
No. The oil content will break down foundation and cause slipping. Use this only at night.
Q: Will this cream stain my pillowcase?
Coconut oil can leave light greasy marks. Use an old pillowcase or place a clean towel over your pillow. The oil washes out in hot water with detergent.
Q: Can I use this on my hands or body?
Absolutely. It makes an excellent hand cream or cuticle treatment. Just double the batch.
Q: How long until I see results?
With nightly use, you may notice softer, less dry skin within 3–5 days. For a noticeable glow and smoother texture, give it 2–4 weeks. Results are subtle and cumulative – not dramatic.
Q: Is raw honey better than regular honey?
Raw honey contains more enzymes and pollen, which may offer additional antibacterial benefits. However, it’s also more likely to crystallize and can feel grainier. Regular pasteurized honey works perfectly well for hydration.
Q: Can I add essential oils for acne (like tea tree)?
Yes, but use extreme caution. Essential oils are potent and can cause chemical burns if undiluted. Add 1 drop of tea tree oil to the full batch (2 tablespoons of cream). Test on a small area first.
Q: Why did my cream separate into a watery layer on top?
This is normal. Without an emulsifier (like beeswax or commercial emulsifiers), oil and water-based ingredients (honey, aloe) will separate. Just stir before each use.
Q: Can I use this if I have eczema?
Many people with eczema find coconut oil soothing. However, some find it irritating. Patch test first. For eczema, pure aloe vera or colloidal oatmeal might be better options.
Q: Is this safe during pregnancy?
Generally yes – coconut oil, honey, aloe, and vitamin E are considered safe for topical use during pregnancy. However, avoid essential oils (except lavender in very low dilution) and always consult your OB/GYN if unsure.
Troubleshooting – What Went Wrong?
Problem Likely Cause Fix Next Time
Cream is grainy Coconut oil not fully softened or re‑solidified Warm the jar in your hands; stir vigorously
Too greasy Used too much or coconut oil too heavy for your skin Use a smaller amount; switch to jojoba oil
Stings or burns Allergic reaction or honey/aloe quality issue Stop use immediately; patch test each ingredient separately
Broke me out Coconut oil clogged pores Discontinue; try non‑comedogenic oil like jojoba
Smells strange after a few days Bacteria growth (contaminated) Discard; use clean utensils; store in fridge
Too thick to spread Cold coconut oil Warm a pea‑sized amount between your fingers before applying
Realistic Results – What to Expect
After one night: Your skin will feel softer and more hydrated in the morning. That’s it.
After one week: Dry patches may diminish. Skin may look slightly more plump and dewy.
After one month (with nightly use): You’ll likely notice a smoother texture, reduced flakiness, and a natural, healthy glow. Fine lines caused by dehydration may appear less noticeable – but deep wrinkles will look the same.
That’s the real benefit. Not “10 years younger overnight.” Not “collagen restored.” Just healthier, happier, better‑moisturized skin. And for most people, that’s more than enough.
Final Thoughts – Simple, Honest, Affordable Skincare
The Simple Homemade Night Cream won’t change your life. It won’t turn back the clock. It won’t replace sunscreen or a good diet or a dermatologist’s advice.
But it will hydrate your skin. It will soften rough patches. It will give you a natural, healthy glow – the kind that comes from well‑cared‑for skin, not from a filter. And it will do all of that for pennies a night, with ingredients you probably already have in your kitchen.
The skincare industry profits from your insecurity. It wants you to believe that you need expensive, complicated routines to be beautiful. You don’t. Sometimes the simplest answer is the best one: clean your face, moisturize with real ingredients, protect yourself from the sun, and get enough sleep.
Everything else is just marketing.
So mix up a small batch. Patch test. Apply it tonight. And wake up to skin that feels a little softer – not transformed, just cared for.
Now it’s your turn! Have you tried making your own night cream? What ingredients work best for your skin? Drop a comment below – I’d love to hear your homemade skincare stories.
And if you found this guide helpful, share it with a friend who’s tired of overpriced “miracle” creams. Pin it for later, and subscribe to our newsletter for more honest, no‑hype natural beauty tips.
Stay hydrated, stay realistic, and love the skin you’re in. 🥥🍯🌿✨
Liked this recipe? Check out our other DIY skincare guides: Simple Oatmeal Face Mask for Sensitive Skin, DIY Sugar Lip Scrub, and How to Make a Green Tea Toner.
More Recipes You Might Like
-
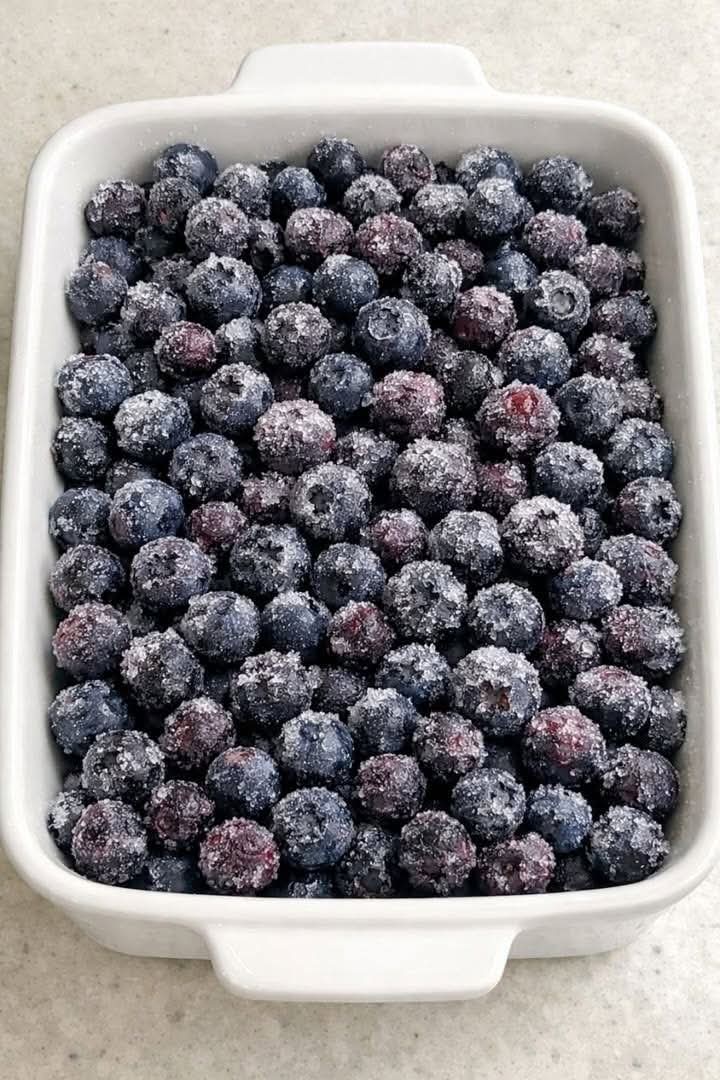
3 Ingredient Blueberry Dump Casserole: The Unbelievably Easy Dessert That Disappears Fast
You don’t need a dozen ingredients, a stand mixer, or complicated steps to create a dessert that will have your husband (and everyone else) going back for thirds. Just dump frozen raw blueberries straight into a casserole dish with three simple ingredients, bake, and watch magic happen. This Blueberry Dump Casserole is a cross between…
-

Canadian Cheese Soup: The Velvety, Bacon‑Infused Comfort Classic
When the temperature drops and you crave something deeply satisfying, nothing hits like a bowl of Canadian Cheese Soup. This is not a thin, boxed cheese soup — it’s a rich, lager‑laced, sharp‑cheddar chowder with smoky bacon and a velvety smooth texture that warms you from the inside out. Made famous by the Le Cellier…
-
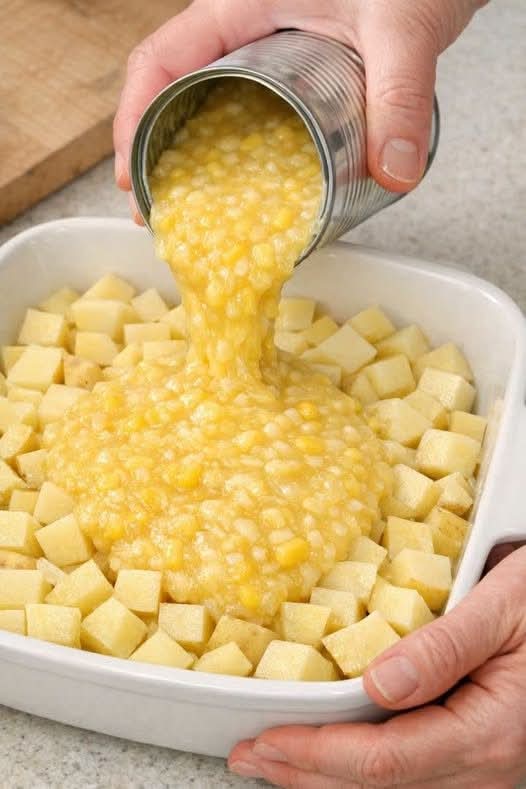
Creamy Corn Potato Casserole: The Side Dish That Disappears Every Time
Some side dishes are forgettable. This one is not. Creamy Corn Potato Casserole is the kind of recipe that earns a permanent spot in your holiday and weeknight rotation. With just a handful of humble ingredients – diced Yukon Gold potatoes, cream‑style corn, and plenty of sharp cheddar – you get a bubbling, golden, spoonable…