
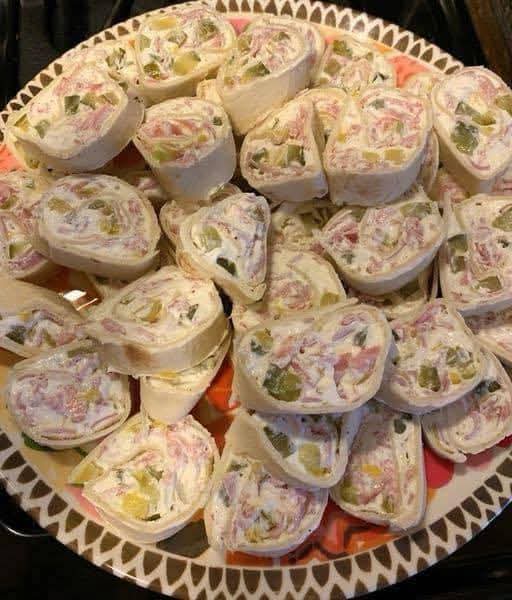
Discover the legendary Mexican chicken pinwheels my Nana made every year! Creamy, zesty, and impossible to resist, this homemade appetizer is the ultimate crowd-pleaser. Easy to make and impossible to find in stores!
Let me introduce you to the recipe that has been a cherished tradition in my family for decades—and now I’m passing it on to you.
Every year, without fail, my Nana would stand in her kitchen rolling up these beautiful pinwheels. The scent of cream cheese, zesty salsa, and tender chicken would fill the house, and we kids would hover around the counter, sneaking bites before they even made it to the platter. She’d swat our hands away with a smile, saying, “Wait until they’re chilled!” But we never could. They were that good.
These Mexican chicken pinwheels are more than an appetizer—they’re a memory, a tradition, and a taste of home. And the best part? I’ve never seen anything like them sold in stores. You simply have to make them yourself.
Now, I’m carrying on Nana’s tradition, and I’m so excited to share her recipe with you. Creamy, tangy, with just the right kick of spice, these pinwheels are perfect for parties, game days, holidays, or any time you want to serve something that will disappear in minutes. They’re easy to make ahead, endlessly customizable, and always a hit.
In this guide, I’ll walk you through everything you need to know to make these irresistible Mexican chicken pinwheels—just like Nana did. Plus, I’ll share tips, variations, and answers to all your questions. Get ready to start your own tradition.
Why You’ll Love These Mexican Chicken Pinwheels
A True Family Tradition
This recipe comes straight from my Nana’s kitchen, and it’s been a staple at every gathering for as long as I can remember. Now you can make it yours.
No Cooking Required
Use leftover or rotisserie chicken, and the rest is just mixing and rolling. Perfect for warm days or when you want to avoid turning on the oven.
Make-Ahead Magic
These pinwheels need to chill before slicing, so you can prepare them a day ahead—ideal for stress-free entertaining.
Crowd-Pleasing Flavor
The combination of cream cheese, salsa, chicken, and a hint of spice is universally loved. Kids and adults alike go back for seconds.
Endlessly Customizable
Make them spicier, add black beans, use different tortillas—the possibilities are endless.
Impossible to Find in Stores
You won’t find these beauties in a freezer aisle or deli counter. They’re a special homemade treat that shows you care.
Ingredients
Ingredient Amount Notes
Large flour tortillas 4–6 (10‑inch) Or 8–10 smaller ones
Cream cheese 16 oz (2 blocks) Full‑fat, softened
Cooked chicken 2 cups Shredded (rotisserie chicken works great)
Salsa ½ cup Your favorite brand; drain any excess liquid
Cheddar cheese 1 cup Shredded
Green onions ½ cup Thinly sliced
Pickled jalapeños ¼ cup Chopped (optional, for heat)
Garlic powder ½ teaspoon
Cumin ½ teaspoon Optional
Salt and pepper To taste
Optional Add-Ins
· ½ cup black beans (rinsed and drained)
· ¼ cup corn kernels (canned or frozen, thawed)
· ¼ cup chopped fresh cilantro
· ½ cup diced bell pepper
Step‑by‑Step Instructions
Step 1: Soften the Cream Cheese
Take the cream cheese out of the refrigerator at least 30 minutes before starting. It should be soft enough to mix easily.
Step 2: Mix the Filling
In a large bowl, combine the softened cream cheese, shredded chicken, salsa, shredded cheddar, green onions, jalapeños (if using), garlic powder, cumin, salt, and pepper. Mix thoroughly until everything is well incorporated. The mixture should be thick and spreadable.
Step 3: Warm the Tortillas (Optional)
To prevent cracking, warm the tortillas slightly. You can microwave them for 10–15 seconds or heat them in a dry skillet for a few seconds per side.
Step 4: Spread the Filling
Lay a tortilla flat on a clean surface. Spread about ½ cup of the filling evenly over the tortilla, leaving a 1‑inch border around the edges.
Step 5: Roll Tightly
Starting from one edge, roll the tortilla tightly into a log. Press gently to keep the roll compact. Repeat with remaining tortillas and filling.
Step 6: Wrap and Chill
Wrap each log tightly in plastic wrap. Refrigerate for at least 2 hours, or overnight. Chilling is essential—it firms up the filling and makes slicing clean and easy.
Step 7: Slice and Serve
Remove the logs from the refrigerator. Unwrap and slice into ½‑inch thick rounds. Arrange on a platter. Serve cold or at room temperature.
Pro Tips for the Perfect Pinwheels
- Use Full‑Fat Cream Cheese
Low‑fat or non‑fat cream cheese can make the filling runny and harder to slice. Full‑fat gives the best texture and flavor.
- Drain the Salsa
If your salsa is watery, drain it before mixing. Excess liquid can make the filling too soft and cause the pinwheels to get soggy.
- Shred Chicken Finely
Small, uniform chicken pieces distribute evenly and make rolling easier. A rotisserie chicken is perfect—just remove the skin and shred.
- Don’t Overfill
Leave a border around the edges to prevent the filling from squeezing out during rolling.
- Chill Thoroughly
Chilling is non‑negotiable. The logs need at least 2 hours to set; overnight is even better. Warm filling will squish out when sliced.
- Use a Sharp Knife
For clean, even slices, use a sharp serrated knife and wipe it clean between cuts.
- Secure with Toothpicks (if needed)
If your pinwheels tend to unroll, insert a toothpick through the center of each slice after cutting. Remove before serving.
Delicious Variations
- Spicy Jalapeño Pinwheels
Double the jalapeños or add a dash of cayenne pepper. Serve with extra pickled jalapeños on the side.
- Southwestern Style
Add black beans, corn, and diced bell peppers to the filling. Top with a dollop of sour cream before serving.
- Creamy Avocado Version
Fold in ½ cup mashed avocado just before rolling (add at the last minute to prevent browning). Serve immediately.
- Bacon Ranch Chicken Pinwheels
Add ½ cup crumbled bacon and 1 tablespoon ranch seasoning mix. Omit salsa and use extra cream cheese.
- Low‑Carb / Keto
Use low‑carb tortillas (about 4g net carbs each). Fill as directed. Serve with guacamole for dipping.
- Smoked Paprika & Chipotle
Add 1 teaspoon smoked paprika and ½ teaspoon chipotle powder for a smoky, slightly spicy flavor.
- Vegetarian Version
Replace chicken with extra black beans, corn, and diced bell peppers. Add a little nutritional yeast for a cheesy flavor.
- Mini Pinwheels
Use smaller tortillas (8‑inch) and roll as directed. Slice into thinner rounds for bite‑sized appetizers.
Serving Suggestions
· As an appetizer: Arrange on a platter with a bowl of salsa, guacamole, or sour cream for dipping.
· For a party: Make a double batch and serve alongside other Mexican favorites like nachos and quesadillas.
· Lunchbox friendly: Pack a few pinwheels for a satisfying, portable meal.
· With a salad: Serve on a bed of mixed greens with a lime vinaigrette for a light lunch.
Storage and Make‑Ahead Tips
Refrigerator Storage
Store sliced pinwheels in an airtight container in the refrigerator for up to 3 days. Place parchment paper between layers to prevent sticking.
Freezer Instructions
Wrap uncut logs tightly in plastic wrap and foil. Freeze for up to 2 months. Thaw in the refrigerator overnight, then slice and serve. Note that the texture may soften slightly.
Make‑Ahead Timeline
· Up to 2 days ahead: Roll the logs, wrap, and refrigerate. Slice just before serving.
· Up to 2 months ahead: Freeze logs; thaw and slice when needed.
Frequently Asked Questions (FAQs)
Q: Can I use corn tortillas?
A: Corn tortillas are smaller and more prone to cracking. For best results, use flour tortillas. If using corn, warm them well and work carefully.
Q: Why are my pinwheels falling apart?
A: They may not have chilled long enough, or the filling was too wet. Ensure cream cheese is firm and logs are fully set before slicing.
Q: Can I use canned chicken?
A: Yes, but drain it well and flake it before mixing. Fresh or rotisserie chicken gives better texture.
Q: How can I make them less spicy?
A: Omit jalapeños and use a mild salsa. You can also reduce or skip the chili powder.
Q: What’s the best way to warm tortillas?
A: Microwave for 10–15 seconds between damp paper towels, or heat in a dry skillet for a few seconds per side. Warm tortillas are more pliable.
Q: Can I make these gluten‑free?
A: Yes. Use gluten‑free flour tortillas (many brands offer them). Ensure all other ingredients are gluten‑free.
Q: How far ahead can I make these for a party?
A: You can roll the logs up to 2 days in advance and slice just before serving. This is actually ideal because the flavors meld.
Nutritional Information
Per pinwheel (based on 8 pinwheels per large tortilla, 4 tortillas, using full‑fat ingredients)
Nutrient Amount
Calories ~120–150
Protein 6–8g
Fat 8–10g
Carbohydrates 6–8g
Fiber 1–2g
Sugar 1–2g
Sodium 200–300mg
Values are estimates and will vary with specific ingredients and portion sizes.
Conclusion
Mexican chicken pinwheels are more than just an appetizer—they’re a piece of family history, a labor of love, and a taste of home. My Nana made them every year for us kids, and now I’m thrilled to share her recipe with you. The creamy filling, zesty flavor, and beautiful pinwheel shape make them a standout at any gathering. Best of all, they’re easy to make ahead, so you can focus on enjoying your guests.
I hope this recipe becomes a tradition in your home, just as it has in mine. Whether you’re making them for a holiday party, a game day spread, or just because, these pinwheels will bring smiles and requests for the recipe.
Now it’s your turn! What’s your favorite family appetizer tradition? Share your stories in the comments below.
And if you’re looking for more crowd‑pleasing appetizers, check out our guides for Spinach Artichoke Dip, Buffalo Chicken Rolls, and Easy Queso Fundido.
Happy rolling! 🌯✨
Did you make these Mexican chicken pinwheels? We’d love to see your creations! Leave a comment below and share your photos. Don’t forget to pin this recipe for your next celebration.
More Recipes You Might Like
-
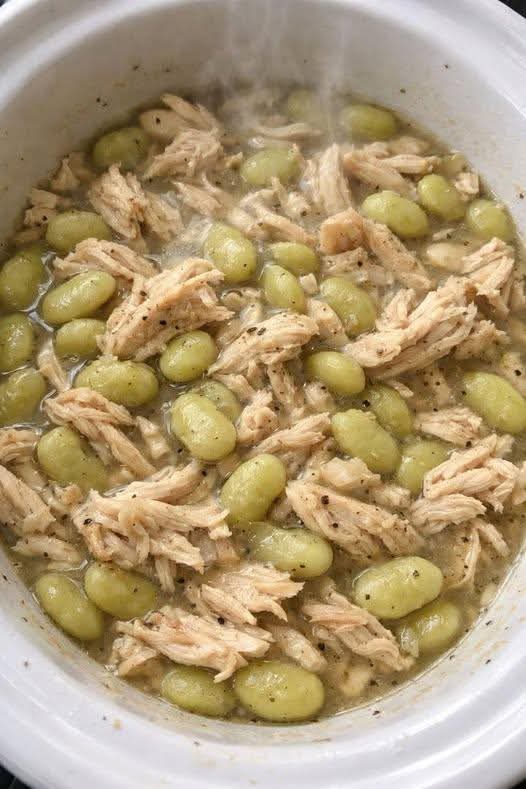
Slow Cooker Chicken and Lima Beans: A Hearty, Protein‑Packed Comfort Classic
There are meals that fill your kitchen with an aroma so inviting that everyone wanders in before dinner is even ready. This slow cooker chicken and lima beans is exactly that. Tender, juicy chicken thighs or breasts simmer for hours with creamy lima beans, aromatic vegetables, and a savory broth that thickens into a silky,…
-

Pour Whole Milk Over Raw White Rice: The Slow Cooker Nostalgic Treat That Disappears Fast
There are certain desserts that taste like a hug from your grandmother – warm, creamy, gently sweet, and made with love. Slow cooker creamy rice pudding is exactly that. You simply pour whole milk over raw white rice, add a few humble ingredients, and let the slow cooker work its magic. Hours later, you are…
-
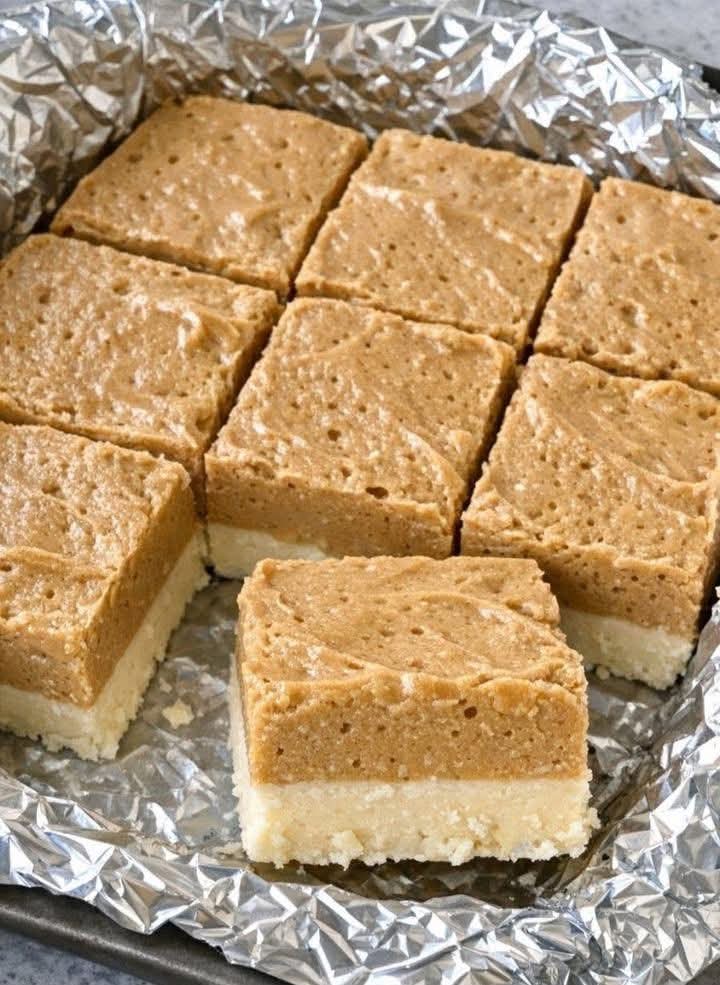
Slow Cooker 3 Ingredient Whipped Coffee Fudge: The Creamy, Caffeinated Two‑Layer Treat You Will Make on Repeat
Imagine a fudge so creamy it melts on your tongue, with a rich coffee kick that wakes up your taste buds. Now imagine making that fudge in your slow cooker with just three ingredients. This Slow Cooker Whipped Coffee Fudge is a two‑layer marvel – a velvety white chocolate base swirled with a fluffy, whipped…