

Discover the secrets to the perfect Chicken Pot Pie! Tender chicken, colorful vegetables, and a rich, creamy sauce all baked under a flaky, golden crust. This classic comfort food recipe is easier than you think and guaranteed to warm the soul.
There are certain dishes that define the very essence of comfort food. They are the meals we crave on cold, rainy evenings, the ones that remind us of home and family, and the recipes passed down through generations. For countless families, Chicken Pot Pie holds that cherished place at the dinner table.
Imagine a steaming, golden-brown crust, perfectly flaky and buttery. The moment you cut into it, a fragrant cloud of steam escapes, revealing a luscious, creamy filling packed with tender chicken, sweet peas, crisp carrots, and earthy potatoes. It’s a complete meal in a dish, a hug in a bowl, and a timeless classic for good reason .
While store-bought versions offer convenience, nothing compares to the magic of a homemade chicken pot pie . You control the quality of the ingredients, the seasoning, and the love that goes into every bite. And contrary to what you might think, creating this masterpiece from scratch is absolutely achievable, even on a busy weeknight.
In this comprehensive guide, we’ll walk you through everything you need to know to create the ultimate chicken pot pie. We’ll share our favorite recipe for a rich, savory filling and a beautifully golden crust. We’ll also provide pro tips for success, delicious variations to make it your own, and answers to all your burning questions. Get ready to bake the most memorable comfort food of your life.
Why You’ll Love This Chicken Pot Pie
This recipe has earned its reputation as a family favorite for many reasons. Here’s why it deserves a spot in your regular rotation:
The Ultimate Comfort Food
Few dishes are as satisfying and soothing as a chicken pot pie. The combination of warm, creamy filling and flaky pastry is pure culinary therapy, perfect for lifting spirits on a gray day or bringing the family together around the table.
A Complete Meal in One Dish
Packed with protein from the chicken and a medley of vegetables, this pot pie is a balanced and hearty meal all on its own. You don’t need a million sides—just a simple salad if you like, and dinner is served.
Easier Than You Think
While it has a few steps, this recipe is straightforward and forgiving. We break it down into simple stages, and we even offer shortcuts, like using a rotisserie chicken or store-bought crust, to make it even easier .
Endlessly Customizable
This recipe is a perfect canvas for your creativity. You can swap out vegetables, add herbs, change the protein, or even make it in individual portions. We’ll give you plenty of ideas to make it your own.
Crowd-Pleasing Favorite
From kids to grandparents, everyone loves a good chicken pot pie. It’s a guaranteed hit for family dinners, holiday gatherings, and potlucks. Make a big one, and watch it disappear.
Ingredients for the Perfect Chicken Pot Pie
We’ve broken the ingredients down into the filling and the crust. For a truly exceptional pie, using high-quality, fresh ingredients makes all the difference .
For the Rich and Creamy Filling:
· For the Protein:
· 1 ½ lbs boneless, skinless chicken breasts or thighs (about 2-3 breasts), cooked and shredded or diced . Rotisserie chicken is a fantastic time-saver here—you’ll need about 3-4 cups of shredded meat .
· For the Aromatics:
· 4 tablespoons unsalted butter
· 1 medium yellow onion, chopped
· 2 medium carrots, peeled and diced (about 1 cup)
· 2 celery stalks, diced (about 1 cup)
· 2-3 cloves garlic, minced
· For the Savory Sauce:
· ⅓ cup all-purpose flour
· 2 cups low-sodium chicken broth
· 1 cup whole milk or heavy cream (for extra richness)
· 1 teaspoon salt (plus more to taste)
· ½ teaspoon black pepper
· 1 teaspoon dried thyme (or 1 tablespoon fresh)
· ½ teaspoon poultry seasoning (optional, but recommended)
· For the Vegetables:
· 1 cup frozen peas (no need to thaw)
· 1 cup frozen corn kernels (optional)
· 1 cup diced potatoes (Yukon Gold or red skinned work well), par-cooked until just tender
For the Flaky, Golden Crust:
· 1 package (14.1 oz) refrigerated pie crusts (2 crusts), softened as directed on box . This is the ultimate shortcut that delivers consistently great results. For a more rustic feel, you can also use 1 sheet of frozen puff pastry, thawed .
· 1 large egg, beaten (for egg wash)
Step-by-Step Instructions
Follow these steps, and you’ll be rewarded with a picture-perfect chicken pot pie.
Part 1: Prepare the Filling (Stovetop)
Cook the Chicken (If using raw): If you’re not using rotisserie chicken, start here. Season the chicken breasts with salt and pepper. In a large skillet or Dutch oven, heat a tablespoon of oil over medium-high heat. Cook the chicken for 5-7 minutes per side until golden and cooked through. Remove from the pan, let it rest, and then shred or dice into bite-sized pieces. Set aside .
Sauté the Aromatics: In the same large skillet or Dutch oven, melt the 4 tablespoons of butter over medium heat. Add the chopped onion, carrots, and celery. Cook, stirring occasionally, for 8-10 minutes, until the vegetables have softened. This is the flavor base of your pie .
Bloom the Garlic: Add the minced garlic and cook for another minute until fragrant.
Make the Roux: Sprinkle the flour over the cooked vegetables. Stir constantly and cook for 1-2 minutes. This cooks the raw flour taste out and forms a roux, which will thicken your sauce .
Whisk in the Liquids: Slowly pour in the chicken broth while whisking continuously to prevent lumps from forming. Once the broth is fully incorporated, whisk in the milk or cream. Continue to stir until the mixture is smooth .
Simmer and Thicken: Bring the sauce to a gentle simmer. It will start to thicken after a few minutes. Reduce the heat to low and stir in the salt, pepper, thyme, and poultry seasoning. Let it cook for 2-3 minutes until it reaches a gravy-like consistency.
Combine the Filling: Remove the pan from the heat. Gently stir in the cooked chicken, frozen peas, frozen corn (if using), and the par-cooked potatoes. Taste the filling and adjust seasoning with more salt and pepper if needed. Set aside while you prepare your pie dish and crust .
Part 2: Assemble the Pie
Preheat the Oven: Preheat your oven to 400°F (200°C) .
Prepare the Pie Dish: Place one of the refrigerated pie crusts into a 9-inch pie dish. Gently press it down so it fits snugly against the bottom and sides. Do not stretch the dough, as it will shrink during baking.
Add the Filling: Pour the prepared chicken and vegetable filling into the crust-lined dish. Spread it out evenly.
Top with the Second Crust: Place the second pie crust over the filling. Press the edges of the top and bottom crusts together to seal. You can crimp the edges with a fork or your fingers for a decorative finish.
Create Vents: With a sharp knife, cut 4-5 slits in the top crust. These vents are essential for allowing steam to escape during baking, which prevents the filling from making the crust soggy and helps it cook properly .
Apply Egg Wash: In a small bowl, beat the egg with a tablespoon of water. Gently brush this mixture over the top crust. This will give your pie that beautiful, glossy, golden-brown finish .
Part 3: Bake to Perfection
Bake: Place the pie on a baking sheet (to catch any potential drips) and bake in the preheated oven for 30-40 minutes . The pie is done when the crust is deep golden brown and the filling is bubbly and hot. You should be able to see the filling bubbling up through the vents.
Cool Before Serving: This is a crucial step! Remove the pie from the oven and let it rest for at least 10-15 minutes before slicing . This allows the filling to set, so it doesn’t run all over the plate when you serve it. It will also be piping hot straight from the oven, so a rest period makes it safer to eat.
Pro Tips for the Best Chicken Pot Pie
Want to take your pie from great to legendary? Keep these expert tips in mind:
Don’t Skip the Egg Wash: That simple step of brushing the crust with beaten egg is what gives your pie a professional, glossy, golden sheen. It’s a small detail that makes a big visual impact.
Par-Cook Dense Vegetables: Hard vegetables like carrots and potatoes need a head start. Sautéing them with the onions or boiling the potatoes briefly ensures they are perfectly tender by the time the crust is baked, preventing crunchy bites in your finished pie.
Avoid a Soggy Bottom: To prevent the dreaded soggy bottom, you can pre-bake (blind bake) the bottom crust for about 10 minutes before adding the filling . However, if you follow this recipe and ensure your filling isn’t overly wet, it usually isn’t necessary. Baking the pie on the lowest oven rack also helps the bottom crust cook through and become crisp.
Use a Thermometer: For a more accurate test of doneness, the internal temperature of the filling should reach 165°F (74°C) .
Let It Rest: We said it before, but it’s worth repeating. Letting the pie rest after baking is not optional—it’s essential for clean slices and a perfect texture.
Delicious Variations to Try
This classic recipe is a wonderful base for experimentation. Here are some popular and delicious variations:
- Skillet Chicken Pot Pie
For an even easier version with less cleanup, make it in a single skillet! Prepare the filling in a 12-inch ovenproof skillet. Instead of a double crust, top the filling with a single sheet of puff pastry or even cut the pastry into squares and arrange them over the top. Bake as directed .
- Crescent Roll Chicken Pot Pie
This is perhaps the easiest shortcut of all. Mix your filling (use rotisserie chicken and a can of cream of chicken soup for speed) and pour it into a baking dish. Unroll a can of crescent roll dough and place it over the filling, stretching to cover. Bake until the rolls are golden and the filling is bubbly .
- Individual Pot Pies
Everything is more fun in its own little dish! Divide the filling among 4-6 ramekins or oven-safe bowls. Cut circles of pie crust or puff pastry slightly larger than the ramekins, place them on top, and crimp the edges. Cut vents and bake for 20-25 minutes, until golden and bubbly. They’re perfect for parties or portion control .
- Chicken and Biscuit Pot Pie
For a rustic, homestyle twist, skip the top crust and replace it with fluffy buttermilk biscuits. Prepare your filling and pour it into a baking dish. Top with spoonfuls of raw biscuit dough and bake until the biscuits are golden brown and cooked through.
- Dairy-Free Chicken Pot Pie
This classic can easily be made dairy-free. Use a high-quality plant-based butter and unsweetened oat or soy milk in the filling. For the crust, ensure your store-bought pie crust is vegan-friendly, or use a puff pastry that’s made without butter .
Frequently Asked Questions (FAQs)
Q: Can I use a different type of meat?
A: Absolutely! This recipe works wonderfully with leftover turkey (especially after Thanksgiving!), or even diced ham. You can also make it entirely vegetarian by omitting the chicken and using a hearty mix of mushrooms, more potatoes, and other vegetables like green beans .
Q: Can I make this pot pie ahead of time?
A: Yes! You have two great options. 1) Assemble the entire pie (but do not bake it), cover it tightly, and refrigerate for up to 24 hours. You may need to add 10-15 minutes to the baking time. 2) Bake the pie completely, let it cool, and then refrigerate. Reheat individual slices in the oven or microwave.
Q: Can I freeze chicken pot pie?
A: Freezing is a great option. You can freeze an unbaked, assembled pie for up to 3 months. Wrap it very well in plastic wrap and then foil. Bake from frozen, adding about 20-30 minutes to the bake time and covering the crust with foil if it browns too quickly. Baked pot pie can also be frozen, but the crust may not be quite as flaky upon reheating.
Q: How do I store and reheat leftovers?
A: Store leftover pot pie, covered, in the refrigerator for 3-4 days. To reheat, place a slice in a 350°F oven for 10-15 minutes to re-crisp the crust. The microwave is quicker, but the crust will be soft, not flaky.
Q: Why is my pot pie filling runny?
A: A runny filling usually means the sauce wasn’t thick enough before baking, or the pie needed more time to bake and set. Make sure you let your sauce simmer and thicken on the stovetop before adding it to the crust. Also, letting the finished pie rest for at least 10-15 minutes is crucial, as the filling continues to thicken as it cools slightly .
Q: My crust is browning too quickly. What should I do?
A: If the edges or top of your crust are getting too dark before the filling is done, simply tent the whole pie loosely with a sheet of aluminum foil. This will shield the crust from direct heat while the inside finishes baking .
Nutritional Information
Please note that the following is an estimate and will vary based on specific ingredients and portion sizes (based on 8 servings).
Nutrient Amount per Serving
Calories ~450-550
Total Fat 25-30g
Saturated Fat 12-15g
Cholesterol 95mg
Sodium 700-800mg
Total Carbohydrates 35-40g
Dietary Fiber 4-5g
Sugar 5-7g
Protein 20-25g
Source: Estimates based on nutritional information from similar recipes .
Conclusion
The classic Chicken Pot Pie is more than just a recipe; it’s a tradition, a memory-maker, and the pinnacle of comfort food. With its flaky, golden crust and its heartwarming, creamy filling, it has the power to turn an ordinary dinner into a special occasion. This recipe gives you all the tools and secrets you need to create that magic in your own kitchen.
We encourage you to try this recipe and experience the joy of pulling a beautiful, homemade pot pie out of your oven. Don’t be afraid to make it your own with the variations we’ve provided. The smell alone will have your family gathering in the kitchen, eager for a taste.
When you do make it, we’d love to hear how it turned out! Leave a comment below and share your experience. And if you’re looking for more comforting classics, be sure to check out our recipes for Hearty Beef Stew, Creamy Mashed Potatoes, and Classic Apple Pie.
Happy baking! 🥧✨
Did you make this Chicken Pot Pie? We’d love to see your golden, bubbly creation! Leave a comment below and let us know which variation you tried. Don’t forget to pin this recipe for your next cozy night in!
More Recipes You Might Like
-
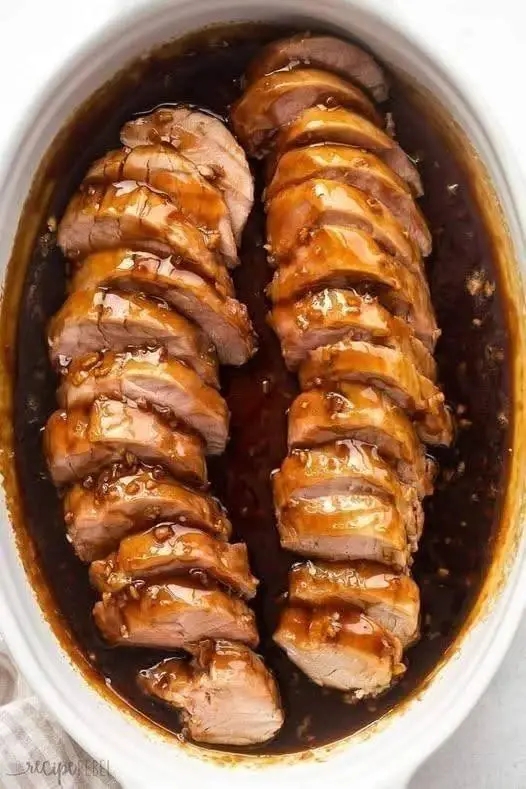
Honey Garlic Pork Tenderloin – A Sticky, Savory Oven‑Baked Masterpiece
There are dinners that are merely fuel, and then there are dinners that make you pause mid‑bite, close your eyes, and let out a satisfied sigh. Honey Garlic Pork Tenderloin is emphatically the latter. Imagine a perfectly seared, oven‑roasted pork tenderloin – impossibly juicy, tender, and succulent – enveloped in a glossy, sticky, sweet‑savory glaze…
-
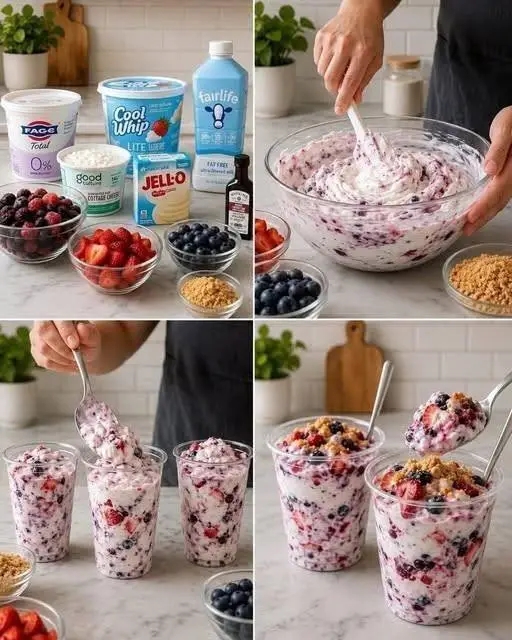
Low Carb Berry Cheesecake Fluff Cups – A Creamy, Fruity, No-Bake Dessert That Feels Like a Guilty Pleasure
There are desserts that require hours of baking, precise measurements, and a dozen specialty ingredients – and then there are desserts that come together in a blender, chill in the fridge, and taste like a cloud of cheesecake heaven. Low-Carb Berry Cheesecake Fluff Cups are emphatically the latter. Imagine a creamy, tangy, velvety mousse that…
-
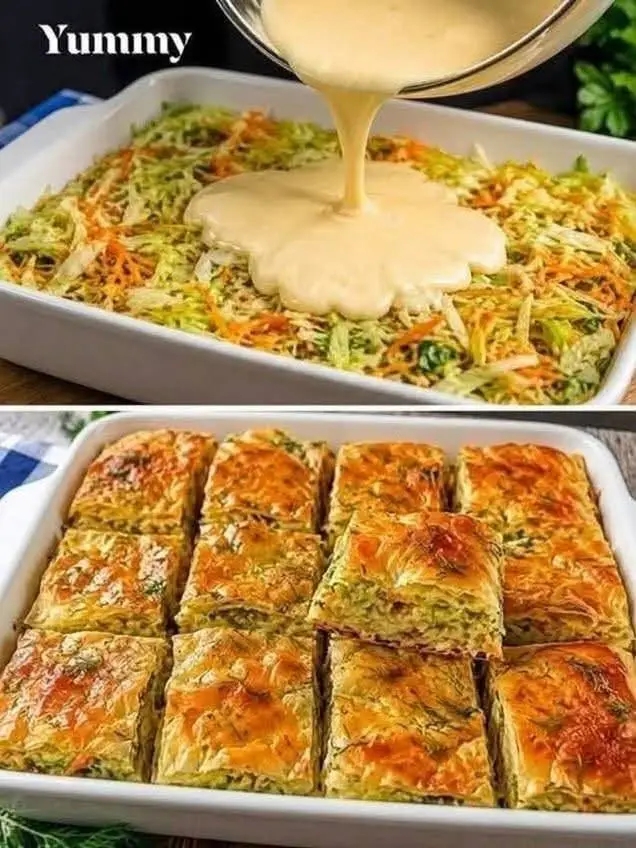
Cheesy Zucchini Carrot Bake – A Golden, Creamy Vegetable Casserole That Steals the Show
There are side dishes that are merely an afterthought, and then there are side dishes that become the main event – the dish everyone reaches for, the one that disappears before the entrée even hits the table. Cheesy Zucchini Carrot Bake is emphatically the latter. Imagine tender, garden‑fresh zucchini and sweet carrots, enveloped in a…