
There are some recipes that become family legends. They’re the ones your mom pulls out for special occasions, the ones your siblings request for their birthdays, the ones that disappear so fast you have to hide a few just to guarantee yourself a taste. Mom’s Famous Cream Puffs are exactly that kind of recipe.
I can still picture my mom in the kitchen on a Saturday morning, standing at the stove with a wooden spoon in one hand and a determined look on her face. She’d be stirring that glossy dough, the same way her mother taught her, and the same way I’d learn years later. The kitchen would fill with the smell of butter and vanilla, and we kids would hover nearby, waiting for those golden puffs to emerge from the oven.
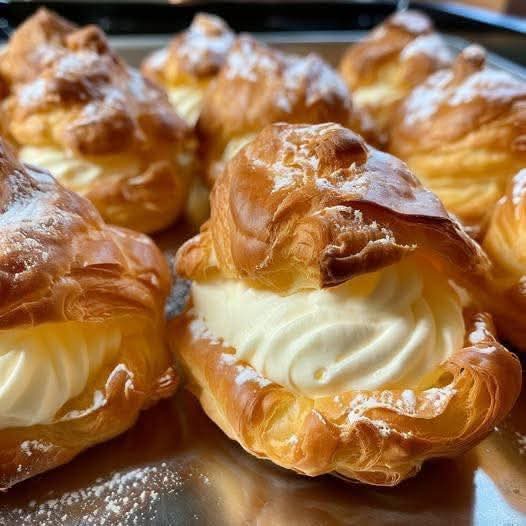
The best part was always the filling. Mom would whip up a batch of her silky vanilla custard, and we’d watch as she carefully sliced each puff and filled it to overflowing. A dusting of powdered sugar, sometimes a drizzle of chocolate, and then—the frenzy. Those cream puffs never lasted more than a few hours in our house.
Years later, when I asked Mom for the recipe, she laughed. “It’s just pâte à choux,” she said, “but your grandmother called it ‘fancy puff dough,’ and that’s what I call it too.” She wrote it out for me on an index card, her handwriting slightly wobbly, with notes in the margins: “Don’t open the oven!” and “The eggs are the magic.”
Today, I’m sharing Mom’s Famous Cream Puffs with you—the recipe that’s been passed down through three generations, the one that still makes family gatherings feel special.
Why These Cream Puffs Are Famous
Perfectly light and airy. The shells puff up beautifully, with a crisp exterior and a tender, hollow interior just waiting to be filled.
That silky vanilla custard. Mom’s filling is the stuff of legend—creamy, rich, and perfectly sweetened.
Surprisingly simple. Despite their fancy reputation, cream puffs are actually quite easy to make with the right technique.
Family tradition. These have been made for every birthday, holiday, and special occasion for as long as anyone can remember.
Customizable. Fill them with custard, whipped cream, or ice cream. Top them with powdered sugar, chocolate, or caramel.
Impressive but approachable. They look like they came from a French patisserie, but you made them yourself.
Better than any bakery version. Homemade, made with love, always wins.
The Complete Ingredient Breakdown
For the Cream Puff Shells (Pâte à Choux):
1 stick (½ cup) unsalted butter
Butter adds richness, flavor, and helps create that tender, crisp shell. Use good quality butter—it makes a difference.
1 cup water
Water creates the steam that puffs the pastry. The high moisture content is essential for that dramatic rise.
¼ teaspoon salt
Balances the richness and enhances flavor.
1 teaspoon granulated sugar
A tiny bit of sugar adds a hint of sweetness and helps with browning.
1 cup all-purpose flour
All-purpose flour gives the perfect structure. Measure accurately—too much or too little affects the outcome.
4 large eggs, room temperature
Eggs are the magic. They provide structure, richness, and help create that beautiful golden color. Room temperature eggs incorporate more smoothly.
1 teaspoon vanilla extract
Adds warmth and depth to the shells.
For the Vanilla Custard Filling (Crème Pâtissière):
2 cups whole milk
Whole milk gives the richest, creamiest custard.
½ cup granulated sugar
4 large egg yolks
¼ cup cornstarch
Cornstarch is the thickener that creates a smooth, stable custard.
¼ teaspoon salt
2 teaspoons vanilla extract (or 1 vanilla bean, split and scraped)
2 tablespoons unsalted butter
For the Topping:
Powdered sugar for dusting
Chocolate glaze (optional): ½ cup semi-sweet chocolate chips melted with 2 tablespoons heavy cream
Step-by-Step Instructions: Mom’s Famous Cream Puff Shells
Step 1: Preheat and Prep
Preheat your oven to 425°F (220°C). Line a baking sheet with parchment paper.
Step 2: Cook the Dough Base
In a medium saucepan, combine the butter, water, salt, and sugar. Heat over medium heat until the butter is melted and the mixture comes to a rolling boil.
Remove from heat immediately and add the flour all at once. Stir vigorously with a wooden spoon until the mixture comes together and forms a smooth ball. It will pull away from the sides of the pan.
Step 3: Dry the Dough
Return the pan to low heat and cook, stirring constantly, for 1-2 minutes. This dries out the dough slightly, which helps the pastries puff properly. You’ll see a thin film form on the bottom of the pan. This step is crucial—don’t skip it.
Step 4: Cool Slightly
Transfer the dough to a mixing bowl and let it cool for 5-10 minutes. It should be warm but not hot—you don’t want it to cook the eggs when you add them.
Step 5: Add the Eggs
Add the eggs one at a time, beating vigorously after each addition until the dough is smooth and glossy. The dough will look separated at first, but keep beating—it will come together.
After adding all the eggs, the dough should be smooth, shiny, and fall slowly from a spoon in a thick ribbon. It should hold its shape when piped.
Beat in the vanilla extract.
Step 6: Pipe the Puffs
Transfer the dough to a piping bag fitted with a large round tip (or use a zip-top bag with a corner snipped off).
Pipe 1½-inch rounds onto the prepared baking sheet, spacing them about 2 inches apart. They’ll expand during baking.
If you have any points or peaks, wet your finger and gently smooth them down. This prevents burning.
Step 7: Bake
Bake at 425°F for 10 minutes, then reduce the temperature to 350°F (175°C) and bake for another 15-20 minutes, until the puffs are golden brown and feel light and hollow.
Important: Do not open the oven during the first 20 minutes of baking. The sudden temperature change can cause the puffs to collapse. Mom’s note in the margin says this in all caps: “DO NOT OPEN THE OVEN!”
Step 8: Cool
Remove from the oven and poke a small hole in the side of each puff with a knife tip to release steam. This prevents sogginess.
Transfer to a wire rack to cool completely.
Step-by-Step Instructions: Mom’s Silky Vanilla Custard
Step 1: Heat the Milk
In a medium saucepan, heat the milk over medium heat until it’s hot and steaming, with small bubbles around the edges. Do not let it boil.
Step 2: Whisk the Egg Yolks
While the milk heats, in a separate bowl, whisk the egg yolks with the sugar until pale and thick, about 2-3 minutes.
Add the cornstarch and salt and whisk until smooth and well combined.
Step 3: Temper the Eggs
Slowly pour about ½ cup of the hot milk into the egg mixture, whisking constantly. This tempers the eggs and prevents them from scrambling.
Pour the egg mixture back into the saucepan with the remaining milk, whisking constantly.
Step 4: Cook the Custard
Cook over medium heat, whisking constantly, until the mixture thickens and comes to a boil. This will take about 3-5 minutes. The custard should be thick and smooth.
Continue whisking for 1 minute after it boils to ensure the cornstarch is fully cooked.
Step 5: Add Butter and Vanilla
Remove from heat and stir in the butter and vanilla until smooth.
Step 6: Chill
Pour the custard into a shallow dish, press plastic wrap directly onto the surface to prevent a skin from forming, and refrigerate until completely cold, at least 2 hours or overnight.
Assembling Mom’s Famous Cream Puffs
Step 1: Prepare the Filling
Whisk the chilled custard until smooth. Transfer to a piping bag fitted with a small tip.
Step 2: Fill the Puffs
Using the hole you poked earlier (or cutting the puffs in half), pipe the custard into each puff until it feels heavy and full.
Step 3: Finish
Dust generously with powdered sugar. If you’re feeling fancy, drizzle with chocolate glaze.
Step 4: Serve
Serve immediately, or refrigerate until ready to serve. These are best enjoyed within a few hours of filling.
Mom’s Secret Tips (From the Margins of Her Recipe Card)
“Room temperature eggs are non-negotiable.” Cold eggs can cause the dough to seize. Leave them out for at least an hour before starting.
“Trust the dough, not the clock.” When adding eggs, the dough will look separated and ugly. Keep beating—it will come together into a smooth, glossy ball.
“Don’t peek!” Mom underlined this three times. Opening the oven door lets cold air rush in and can cause your beautiful puffs to collapse.
“The poke test.” After baking, poke a small hole in each puff to release steam. This prevents them from becoming soggy as they cool.
“Fill just before serving.” Filled cream puffs are best eaten within a few hours. The shells can soften over time. But Mom also notes: “Leftovers (if there are any) are still delicious the next day.”
Troubleshooting Common Issues
My Puffs Didn’t Rise
Several possible causes:
· Oven wasn’t hot enough
· Dough wasn’t dried enough on the stove
· Eggs were added too quickly or not incorporated properly
· Opened the oven too soon
My Puffs Are Dense and Heavy
Not enough steam was created, or the dough was too wet. Next time, make sure the dough is properly dried and the eggs are at room temperature.
They Collapsed After Baking
The shells may be underbaked. They need to be fully crisp and dry before coming out of the oven. The poke hole also helps release steam.
My Custard Is Lumpy
The eggs scrambled. Next time, temper more slowly and whisk constantly. If it’s already lumpy, you can strain it through a fine-mesh sieve.
My Custard Didn’t Thicken
Not cooked long enough, or not enough cornstarch. Return to heat and cook, whisking constantly, until thickened.
The Puffs Are Soggy
They weren’t fully dried in the oven, or you filled them too far ahead. Poke holes immediately after baking to release steam, and fill close to serving time.
Delicious Variations
Once you’ve mastered Mom’s classic, try these variations.
Chocolate Cream Puffs
Add 2 tablespoons cocoa powder to the flour when making the choux pastry. For the filling, make chocolate pastry cream by adding 4 ounces melted chocolate to the custard.
Profiteroles
Fill with vanilla ice cream instead of custard and top with warm chocolate sauce. Mom made these for special occasions.
Éclairs
Pipe the dough into long strips instead of rounds. Fill with custard and top with chocolate glaze.
Lemon Cream Puffs
Add 2 tablespoons lemon zest and 2 tablespoons lemon juice to the custard. The bright citrus is wonderful.
Coconut Cream Puffs
Add ½ cup toasted coconut to the custard. Top with more toasted coconut.
Coffee Cream Puffs
Add 1 tablespoon instant espresso powder to the milk when making the custard. The coffee flavor is divine.
Mini Cream Puffs for Parties
Pipe small 1-inch puffs and fill with a variety of custards. Perfect for entertaining.
Savory Cream Puffs (Gougères)
Omit the sugar and add 1 cup grated Gruyère cheese to the dough. Fill with chicken salad or serve as an appetizer.
What to Serve With Mom’s Cream Puffs
Coffee or espresso: The perfect pairing. The bitterness balances the sweetness.
Fresh berries: Raspberries or strawberries add brightness and color.
Chocolate sauce: Drizzle over the top for extra indulgence.
Caramel sauce: Another delicious option.
Whipped cream: Because you can never have too much cream.
On their own: These beauties need nothing—they’re perfect solo.
Storage and Make-Ahead Tips
Unfilled shells: Store in an airtight container at room temperature for up to 3 days. Recrisp in a 300°F oven for 5 minutes before filling.
Filled puffs: Best enjoyed within a few hours of filling. The shells will soften over time.
Custard: Store in an airtight container in the refrigerator for up to 3 days. Whisk before using.
Freezer (unfilled shells): Freeze in a single layer in a freezer bag for up to 3 months. Thaw at room temperature and recrisp in the oven.
Freezer (custard): Custard does not freeze well—the texture becomes grainy upon thawing.
Make-ahead for parties: Bake shells up to 3 days ahead and store at room temperature. Make custard up to 2 days ahead. Fill just before serving.
Why Mom’s Recipe Is the Best
There’s something special about a recipe that’s been passed down through generations. It’s not just the ingredients or the techniques—it’s the memories baked into every batch. The way Mom would let us lick the spoon. The way she’d save the best-looking puff for Dad. The way the kitchen smelled like butter and vanilla and love.
Mom’s cream puffs are more than a dessert. They’re a tradition. They’re the taste of birthdays and holidays and ordinary Saturdays made special. They’re the recipe I’ll pass down to my own kids someday, with the same notes in the margins: “Don’t open the oven!” and “The eggs are the magic.”
This recipe has become a treasure in our family for good reason. It’s reliable, delicious, and always brings people together.
And now it can be that for you too.
So preheat that oven. Get that butter melting. Crack those eggs. And get ready to make the cream puffs that will become legendary in your own family.
Mom would be so happy to know her recipe is still being made, still being shared, still bringing people together.
Have you made these cream puffs? What fillings did you try? I’d love to hear about your experience in the comments below!
More Recipes You Might Like
-
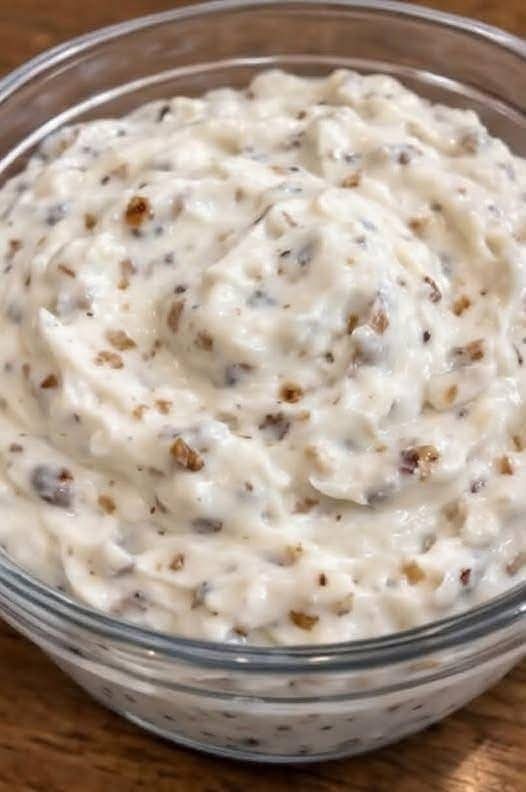
3 Ingredient French Onion Dip: The Easiest, Creamiest, Most Addictive Party Dip You’ll Ever Make
There are certain recipes that are almost too simple to be true—the kind that require just a handful of ingredients, come together in minutes, and yet taste so ridiculously good that everyone begs for the recipe. This 3-Ingredient French Onion Dip is exactly that. Creamy, tangy, and packed with the deep, savory-sweet flavor of caramelized…
-
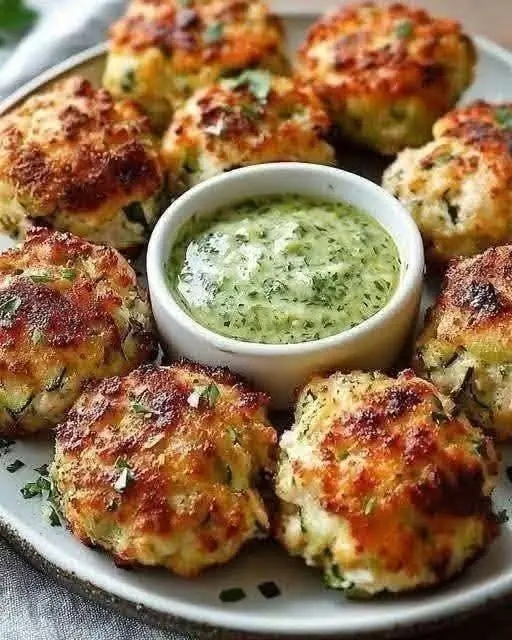
Cheesy Zucchini Chicken Bites: The Golden, Juicy, Low-Carb Snack That’s Perfect with Dip
When you need a snack, an appetizer, or even a light dinner that delivers big on flavor while keeping things wholesome and low in carbs, these Cheesy Zucchini Chicken Bites are exactly the answer. They’re golden, crisp on the outside, irresistibly juicy on the inside, and loaded with tender shredded chicken, mild zucchini, and a…
-
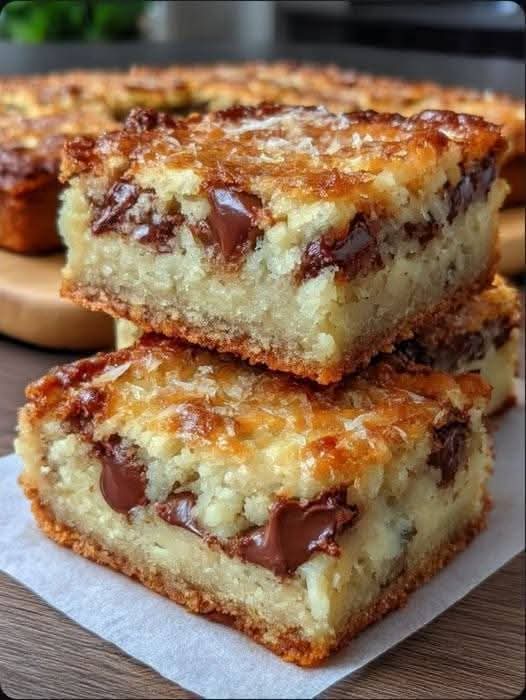
Congo Bars: The Chewy, Chocolatey, Church-Cookbook Classic That Never Goes Out of Style
Congo Bars were common in church cookbooks and grandmas’ kitchens for decades, and they taste every bit as good today! These thick, chewy, buttery blondie-style bars are loaded with chocolate chips and often studded with crunchy walnuts or pecans, and sometimes a whisper of coconut. They’re the quintessential back-of-the-box recipe that became a sensation in…