
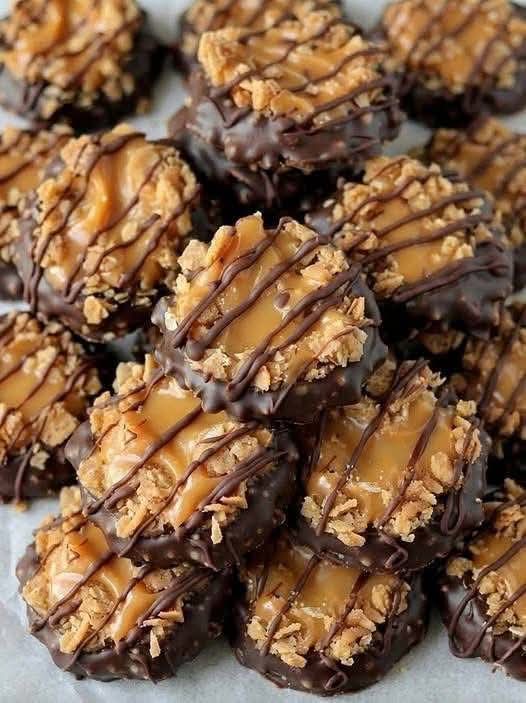
There are certain cookies that have achieved legendary status. Girl Scout Samoa cookies are one of them. That irresistible combination of a crisp cookie base, chewy caramel, toasted coconut, and rich chocolate coating has been winning hearts for generations. The only problem? They’re only available for a few months each year, and the cravings don’t exactly follow that schedule.
Enter these Simple No-Bake Samoa Cookies.
I developed this recipe during one of those off-season Samoa cravings that hit with the force of a freight train. I needed that coconut-caramel-chocolate magic, and I needed it immediately. I didn’t want to turn on the oven, didn’t want to roll and cut and bake, and definitely didn’t want to wait hours for cookies to cool. I wanted something fast, simple, and satisfying.
The result was even better than I hoped. These no-bake cookies capture everything we love about Samoas—the chewy coconut texture, the sweet caramel flavor, the rich chocolate coating—in a simple, no-oven-required format that comes together in minutes. They’re perfect for satisfying those cravings anytime, anywhere.
And the best part? You can make them with ingredients you probably already have in your pantry.
Today, I’m sharing this recipe with you, along with everything I’ve learned about making them perfect every single time.
Why You’ll Love These No-Bake Samoa Cookies
No baking required. Perfect for hot summer days when you don’t want to turn on the oven. Perfect for when you need cookies in a hurry.
Taste like the real thing. The combination of coconut, caramel, and chocolate is pure Samoa magic.
Incredibly easy. No complicated techniques, no fancy equipment. Mix, shape, dip, and enjoy.
Quick. From start to finish, you’re looking at about 20 minutes of active time, plus setting time.
Year-round availability. No waiting for Girl Scout cookie season. Make these whenever the craving strikes.
Customizable. Adjust the sweetness, use different chocolate, add nuts—make them your own.
Perfect for sharing. Bring them to parties and watch people’s faces light up when they taste them.
Great for baking with kids. No hot ovens, no complicated steps. Kids love helping with these.
Freezer-friendly. Make a double batch and stash some for later emergencies.
The Complete Ingredient Breakdown
For the Cookie Base:
3 cups sweetened shredded coconut
Coconut is the heart of these cookies. Sweetened coconut provides the right texture and sweetness. Toast it first for extra depth of flavor.
Why toast the coconut? Toasting brings out the natural oils and adds a nutty, deeper flavor that makes these cookies taste more complex and authentic. Don’t skip this step.
1 cup graham cracker crumbs
Graham cracker crumbs provide structure and that classic cookie base flavor. You can buy pre-made crumbs or crush your own graham crackers in a food processor or zip-top bag with a rolling pin.
Alternative: Vanilla wafer crumbs or even crushed shortbread cookies work beautifully.
1 cup chopped pecans or almonds (optional)
Nuts add crunch and richness. Toasted pecans are my favorite—they have that buttery flavor that pairs perfectly with coconut and caramel. Toasting enhances their flavor.
For the Caramel Binding:
1 can (14 ounces) sweetened condensed milk
This is the magic ingredient that holds everything together and creates that sweet, caramel-like flavor. It also adds richness and moisture.
1 teaspoon vanilla extract
Enhances all the flavors and adds warmth.
¼ teaspoon salt
Balances the sweetness and makes everything taste more like itself.
For the Chocolate Coating:
2 cups semi-sweet or dark chocolate chips
Semi-sweet is classic, but dark chocolate is also wonderful. Use good-quality chocolate for the best result.
1 tablespoon coconut oil or vegetable shortening
This helps thin the chocolate for easier dipping and creates a smoother, shinier finish. It also helps the chocolate set with a nice snap.
Optional Garnish:
Extra toasted coconut for sprinkling
Flaky sea salt for that sweet-salty combo
Drizzle of white chocolate for contrast
Step-by-Step Instructions
Step 1: Toast the Coconut
Spread the shredded coconut evenly on a baking sheet. Toast in a 325°F oven for 5-8 minutes, stirring halfway through, until golden brown and fragrant. Watch carefully—coconut can go from toasted to burned very quickly.
Alternatively, you can toast it in a dry skillet over medium heat, stirring constantly, for 3-5 minutes.
Let the toasted coconut cool completely.
Step 2: Combine the Base Ingredients
In a large bowl, combine:
· Toasted coconut
· Graham cracker crumbs
· Chopped nuts (if using)
· Sweetened condensed milk
· Vanilla extract
· Salt
Stir until everything is well combined and the mixture holds together when pressed. It should be sticky and cohesive.
Step 3: Shape the Cookies
Line a baking sheet with parchment paper or wax paper.
Using a cookie scoop or a tablespoon, portion the mixture and shape into mounds or traditional Samoa ring shapes. For authentic Samoa look, form them into small rings with a hole in the center, like mini donuts. For simpler shaping, just make small mounds.
Place them on the prepared baking sheet.
Step 4: Chill
Refrigerate the shaped cookies for at least 30 minutes, or until firm. This helps them hold their shape during dipping.
Step 5: Melt the Chocolate
In a microwave-safe bowl, combine the chocolate chips and coconut oil. Microwave in 30-second intervals, stirring between each, until completely smooth. Alternatively, melt using a double boiler on the stovetop.
Step 6: Dip the Cookies
Using a fork or dipping tool, dip each chilled cookie into the melted chocolate, turning to coat completely. Let excess chocolate drip off, then return to the parchment-lined baking sheet.
If you want that authentic Samoa look, dip only the bottoms and drizzle chocolate over the tops.
Step 7: Garnish
While the chocolate is still wet, sprinkle with extra toasted coconut or flaky sea salt if desired.
Step 8: Set
Let the cookies sit at room temperature until the chocolate is completely set, about 30-60 minutes. For faster setting, return to the refrigerator.
Step 9: Enjoy
Once set, these cookies are ready to enjoy. Store in an airtight container.
The Science Behind Perfect No-Bake Samoa Cookies
Toasted coconut is essential: Toasting brings out the natural oils in coconut, creating a deeper, nuttier flavor that’s crucial for authentic Samoa taste. Untoasted coconut will result in a flat, one-dimensional cookie.
Sweetened condensed milk as binder: The sugar and proteins in sweetened condensed milk create a sticky, cohesive mixture that holds together without baking. As it sets, it firms up just enough to create that perfect chewy texture.
Chilling before dipping: Cold cookies hold their shape better when dipped in warm chocolate. Room temperature cookies might soften and fall apart.
Coconut oil in chocolate: Adding a small amount of coconut oil thins the chocolate for easier dipping and creates a smoother, shinier finish. It also helps the chocolate set with a professional-looking snap.
Troubleshooting Common Issues
My Cookies Won’t Hold Together
The mixture may be too dry. Add a little more sweetened condensed milk, 1 tablespoon at a time, until it holds together when pressed.
My Cookies Are Too Sticky
They may need more dry ingredients. Add a tablespoon more graham cracker crumbs or coconut until the consistency improves.
The Chocolate Is Too Thick for Dipping
Add more coconut oil, ½ teaspoon at a time, until it reaches dipping consistency. The chocolate should be fluid enough to coat but not so thin that it runs off.
My Chocolate Bloomed (White Streaks)
This is called “fat bloom” and happens when chocolate is stored at fluctuating temperatures. The cookies are still perfectly safe and delicious—they just don’t look as pretty.
The Cookies Fell Apart During Dipping
They weren’t chilled long enough or the mixture was too soft. Return the undipped cookies to the refrigerator for longer chilling, or add more dry ingredients to firm up the mixture.
My Coconut Burned During Toasting
Coconut goes from perfectly toasted to burned very quickly. Next time, watch carefully and stir frequently. You can also toast at a lower temperature (300°F) for a few extra minutes.
Delicious Variations
Once you’ve mastered the classic, try these variations.
Samoa Cookie Bars
Press the mixture into a parchment-lined 8×8 pan instead of shaping individual cookies. Chill, then cut into bars. Dip or drizzle with chocolate.
Dark Chocolate Samoa Cookies
Use dark chocolate chips (60-70% cacao) for a less sweet, more sophisticated version.
White Chocolate Samoa Cookies
Use white chocolate for dipping and drizzle with dark chocolate. A beautiful and delicious twist.
Samoa Truffles
Roll the mixture into balls, chill, then dip completely in chocolate for a truffle-like treat.
Samoa Clusters
Skip the shaping step. Drop spoonfuls of the mixture onto the baking sheet, chill, then dip or drizzle.
Nut-Free Samoa Cookies
Omit the nuts and add an extra ¼ cup coconut or graham cracker crumbs.
Gluten-Free Samoa Cookies
Use certified gluten-free graham crackers or substitute with crushed gluten-free vanilla wafers.
Vegan Samoa Cookies
Use sweetened condensed coconut milk (available in many stores) and vegan chocolate. Ensure your graham crackers are vegan.
Samoa Energy Bites
Skip the chocolate coating and roll the mixture into bite-sized energy balls. Store in the refrigerator for a quick, healthy snack.
What to Serve With No-Bake Samoa Cookies
Coffee or espresso: The bitterness of coffee balances the sweetness perfectly.
Cold glass of milk: The classic cookie companion.
Vanilla ice cream: Crumble these over ice cream for an incredible sundae.
Hot chocolate: Double the chocolate, double the cozy.
On their own: These cookies need nothing—they’re perfect solo.
As a gift: Packaged in a pretty tin or box, these make wonderful homemade gifts.
Storage and Make-Ahead Tips
Room temperature: Store in an airtight container at room temperature for up to 1 week. Layer with wax paper between layers to prevent sticking.
Refrigerator: Store in the refrigerator for up to 2 weeks. The chocolate may bloom slightly, but they’ll still taste delicious.
Freezer: These cookies freeze beautifully. Place in a single layer in a freezer container, separating layers with wax paper. Freeze for up to 3 months. Thaw at room temperature.
Make-ahead for parties: Make these up to a week ahead and store in the refrigerator. They’re ready whenever you need them.
Transporting: Pack carefully in a sturdy container with paper between layers. These cookies are sturdy but can be damaged if tossed around.
The Girl Scout Cookie Legacy
Girl Scout cookies have been a beloved tradition since 1917, when the Mistletoe Troop in Muskogee, Oklahoma, baked and sold cookies in their high school cafeteria as a service project. The tradition grew, and by the 1930s, Girl Scouts were selling commercially baked cookies nationwide.
Samoas (also known as Caramel deLites in some regions) were introduced in the 1970s and quickly became one of the most popular varieties. Their combination of coconut, caramel, and chocolate tapped into something universal—a flavor profile that people simply can’t resist.
These no-bake cookies honor that legacy while making the flavor accessible year-round. They’re a tribute to all the Girl Scouts who’ve sold cookies, all the customers who’ve bought them, and all of us who’ve wished we could have them more than once a year.
Why This Recipe Deserves a Permanent Place in Your Kitchen
These Simple No-Bake Samoa Cookies represent everything I want in a dessert recipe. They’re easy enough for a beginner to master on the first try. They’re quick enough for when cravings strike suddenly. They’re delicious enough to satisfy even the most intense Samoa longing. And they’re versatile enough to adapt to whatever ingredients you have.
I’ve made these cookies for Girl Scout cookie off-seasons when the craving was too strong to ignore. I’ve made them for parties where they disappeared alongside the store-bought treats. I’ve made them for no reason at all except that I wanted something sweet and coconutty.
Every single time, they deliver. Every single time, people can’t believe they’re no-bake. Every single time, I’m reminded why this recipe is a keeper.
The combination of toasty coconut, sweet caramel, and rich chocolate is simply unbeatable. It’s comfort food, nostalgia food, celebration food all rolled into one.
This recipe has become a staple in my kitchen for good reason. It’s reliable, versatile, and always welcome.
And now it can be that for you too.
So toast that coconut. Open that condensed milk. Melt that chocolate. And get ready to make the most irresistible no-bake cookies you’ve ever tasted.
Your Samoa cravings will never go unsatisfied again.
Have you made these No-Bake Samoa Cookies? What variations did you try? I’d love to hear about your experience in the comments below!
More Recipes You Might Like
-
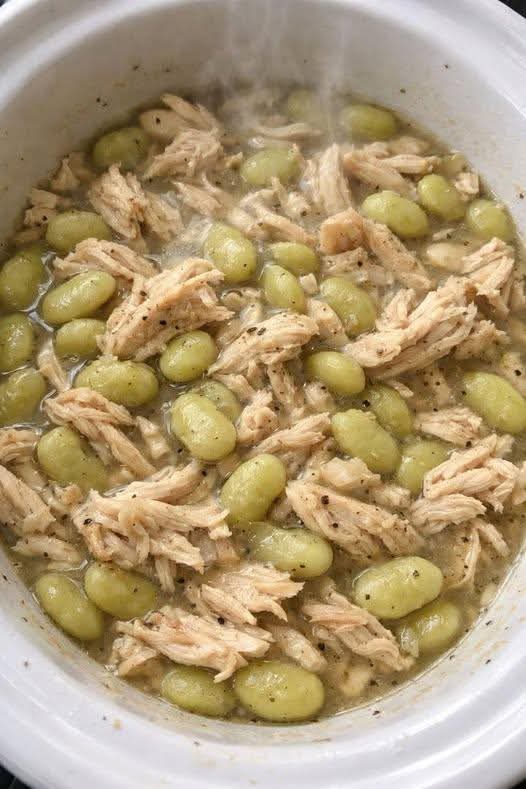
Slow Cooker Chicken and Lima Beans: A Hearty, Protein‑Packed Comfort Classic
There are meals that fill your kitchen with an aroma so inviting that everyone wanders in before dinner is even ready. This slow cooker chicken and lima beans is exactly that. Tender, juicy chicken thighs or breasts simmer for hours with creamy lima beans, aromatic vegetables, and a savory broth that thickens into a silky,…
-

Pour Whole Milk Over Raw White Rice: The Slow Cooker Nostalgic Treat That Disappears Fast
There are certain desserts that taste like a hug from your grandmother – warm, creamy, gently sweet, and made with love. Slow cooker creamy rice pudding is exactly that. You simply pour whole milk over raw white rice, add a few humble ingredients, and let the slow cooker work its magic. Hours later, you are…
-
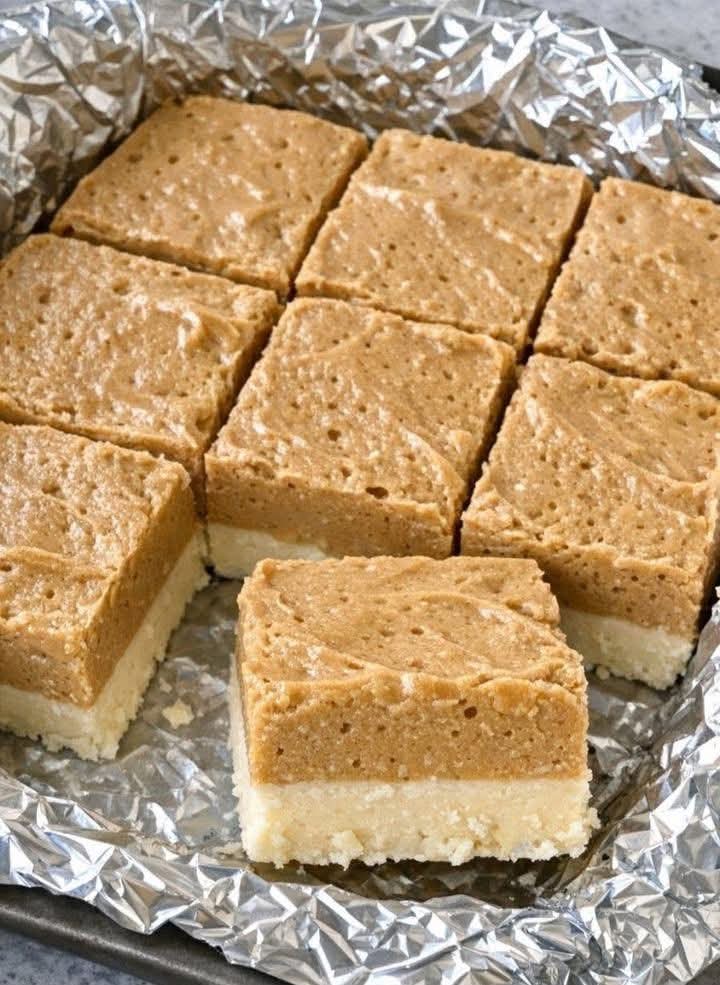
Slow Cooker 3 Ingredient Whipped Coffee Fudge: The Creamy, Caffeinated Two‑Layer Treat You Will Make on Repeat
Imagine a fudge so creamy it melts on your tongue, with a rich coffee kick that wakes up your taste buds. Now imagine making that fudge in your slow cooker with just three ingredients. This Slow Cooker Whipped Coffee Fudge is a two‑layer marvel – a velvety white chocolate base swirled with a fluffy, whipped…