
There are desserts that require precision, patience, and pastry skills. And then there are desserts like this one.
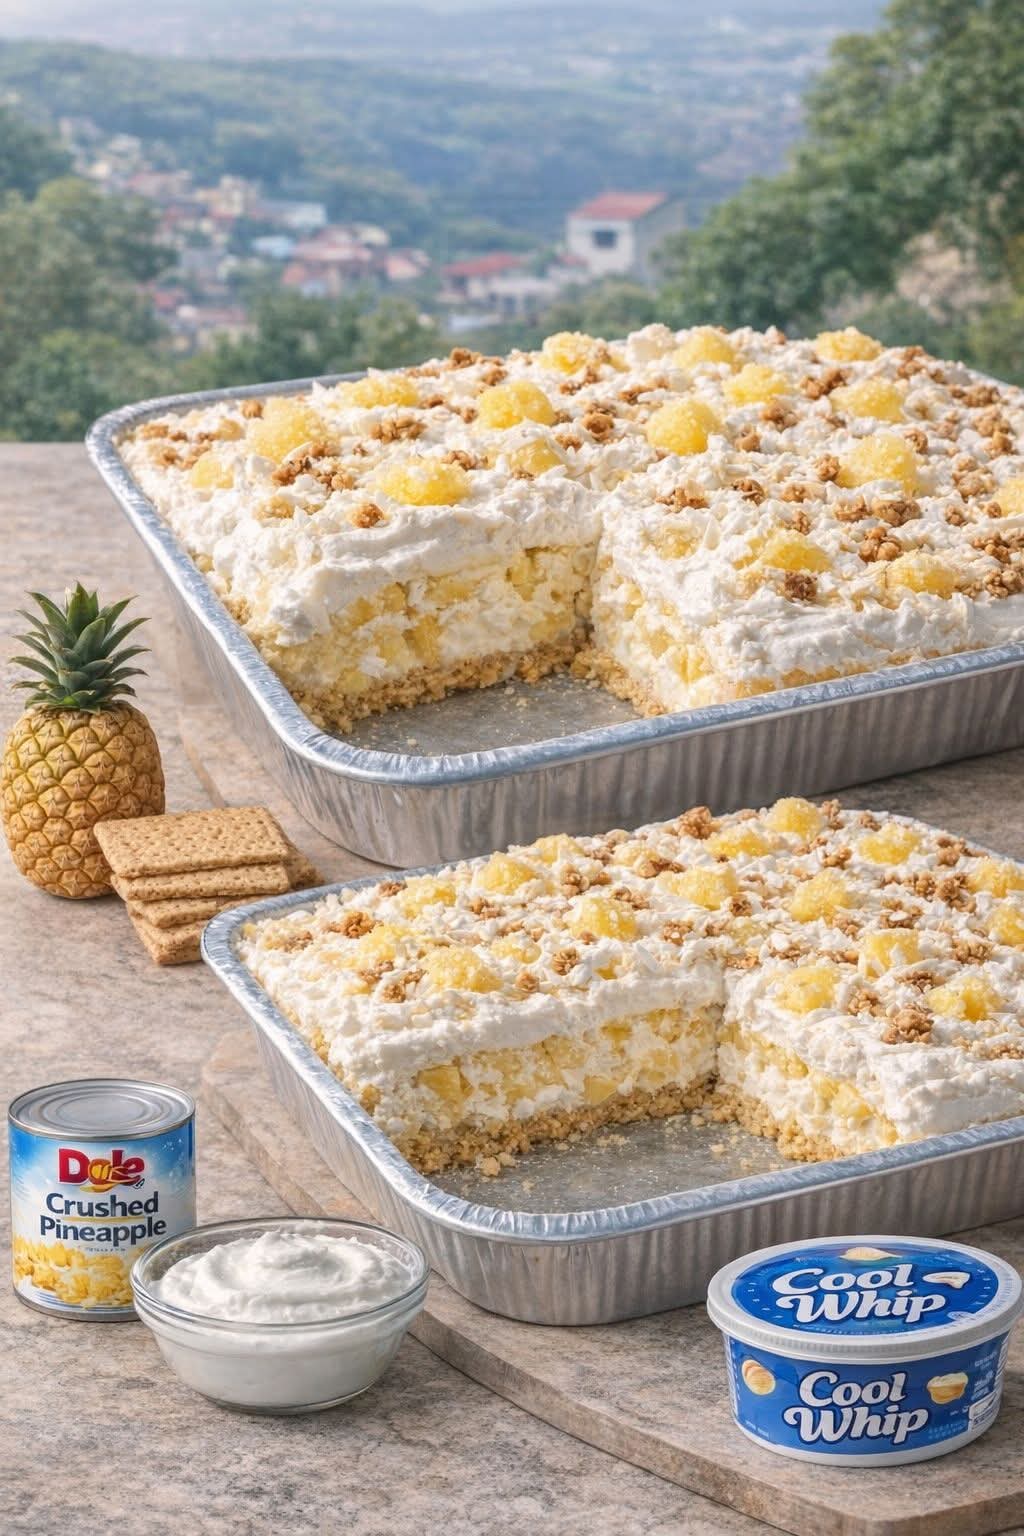
This Pineapple Vanilla Icebox Dessert is the kind of recipe that gets passed around on handwritten cards, shared at potlucks, and requested for every family gathering. It’s the dessert that appears at summer barbecues and holiday dinners alike, because it’s somehow perfect for any occasion. It’s the one that people hover around, hoping for seconds before it’s gone.
I first encountered this dessert at a church potluck years ago. It sat on a table surrounded by more elaborate cakes and pies, looking deceptively simple—just layers of golden graham crackers, creamy filling, and what looked like custard. I almost passed it by. But something made me take a square, and that first bite stopped me in my tracks.
The contrast of textures was perfect. The graham crackers had softened into cake-like tenderness while still providing structure. The filling was creamy, vanilla-scented, and absolutely luscious. And the pineapple—those bright, sweet-tart bursts of tropical flavor—elevated the whole thing into something truly special.
I tracked down the baker, got the recipe, and have been making it ever since. It’s become my signature no-bake dessert, the one I’m asked to bring to gatherings, the one that disappears fastest on any dessert table.
Today, I’m sharing this recipe with you, along with every tip and trick I’ve learned for making it perfect.
Why You’ll Fall in Love With This Pineapple Vanilla Icebox Dessert
No baking required. Perfect for hot summer days when you don’t want to turn on the oven. Perfect for when you need a dessert but don’t have time for complicated baking.
Simple ingredients. Graham crackers, instant pudding, crushed pineapple, whipped topping. That’s it. Things you can find in any grocery store.
Make-ahead friendly. This dessert actually needs time in the refrigerator, making it perfect for entertaining. Make it the day before and forget about it until serving time.
Crowd-pleasing. Kids love it. Adults love it. People who don’t usually go for dessert love it. It disappears every single time.
Beautiful presentation. Those golden layers, the creamy filling, the pineapple throughout—it’s a stunning dessert with minimal effort.
Endlessly adaptable. Once you master the basic recipe, you can create endless variations with different fruits, puddings, and crust options.
Budget-friendly. Simple ingredients, minimal cost, maximum impact.
The Complete Ingredient Breakdown
For the Layers:
1 box graham crackers
Graham crackers form the “cake” layers of this dessert. As they sit in the refrigerator, they absorb moisture from the filling and soften into a tender, cake-like texture while still providing structure.
Which kind? Regular honey graham crackers work perfectly. Cinnamon graham crackers add a lovely warm note. Chocolate graham crackers create a different but delicious version.
How many? One standard box (about 13-14 ounces) is usually enough for a 9×13-inch dish, but have extra on hand in case of breakage.
For the Filling:
2 packages (3.4 ounces each) instant vanilla pudding mix
Instant pudding is the secret to the creamy, luscious filling. It sets up quickly and provides the perfect texture. Do not use cook-and-serve pudding—it won’t work the same way.
Why vanilla? Vanilla is classic and lets the pineapple shine. But feel free to experiment with other flavors—banana, coconut, or cheesecake pudding would all be wonderful.
3 cups cold milk
The liquid for the pudding. Whole milk gives the richest, creamiest result. 2% works well. Skim will work but be less rich. For dairy-free, use unsweetened almond, oat, or coconut milk—just know the texture may be slightly softer.
1 can (20 ounces) crushed pineapple, well drained
Pineapple adds brightness, sweetness, and tropical flavor. Crushed pineapple distributes evenly throughout the filling. If you can only find pineapple chunks or tidbits, pulse them in a food processor until crushed.
Draining is crucial: You must drain the pineapple extremely well. Excess liquid will make the filling runny and prevent it from setting properly. Drain in a colander, then press with a spoon to remove as much liquid as possible. For extra insurance, let it sit in the colander for 10-15 minutes.
1 container (8 ounces) frozen whipped topping, thawed
Whipped topping lightens the pudding mixture, creating a mousse-like texture. It also adds sweetness and volume. Cool Whip is the classic, but any frozen whipped topping works.
For homemade version: You can substitute 2 cups lightly sweetened whipped cream (1 cup heavy cream whipped with 2 tablespoons powdered sugar and ½ teaspoon vanilla). The texture will be even more luxurious.
Step-by-Step Instructions
Step 1: Prepare Your Pan
Select a 9×13-inch baking dish. You don’t need to grease it—the layers will release easily.
Step 2: Drain the Pineapple Thoroughly
Open the can of crushed pineapple and pour into a fine-mesh strainer or colander set over a bowl. Let drain for at least 10-15 minutes, pressing occasionally with a spoon to extract as much liquid as possible. You want the pineapple as dry as you can get it.
Reserve the pineapple juice for another use (smoothies, cocktails, or just drinking—it’s delicious).
Step 3: Make the Pudding
In a large bowl, combine the two packages of instant vanilla pudding mix with 3 cups cold milk.
Whisk vigorously for about 2 minutes until the pudding begins to thicken. It will be quite thick—this is correct.
Let the pudding sit for 5 minutes to fully set up.
Step 4: Fold in Whipped Topping and Pineapple
Add the thawed whipped topping to the pudding mixture. Gently fold together until completely combined and no white streaks remain. Be gentle—you want to keep the mixture light and airy.
Add the well-drained crushed pineapple. Fold gently until evenly distributed throughout.
Step 5: Layer the Dessert
This is where the magic happens.
First layer: Arrange a single layer of graham crackers in the bottom of your 9×13-inch dish. Break crackers as needed to fit—you want complete coverage without large gaps.
Second layer: Spread half of the pineapple pudding mixture evenly over the graham crackers.
Third layer: Add another layer of graham crackers, again covering completely.
Fourth layer: Spread the remaining pineapple pudding mixture over the second cracker layer.
Fifth layer: For the top, you have options:
· Another layer of graham crackers (for a classic icebox cake look)
· Crushed graham crackers sprinkled over the top
· Leave the pudding exposed and garnish with pineapple chunks or maraschino cherries
I prefer the third option—another layer of graham crackers gives the dessert structure and creates beautiful layers when you cut into it.
Step 6: Refrigerate
Cover the dish with plastic wrap or aluminum foil and refrigerate for at least 4 hours, but preferably overnight.
This chilling time is essential. The graham crackers need time to soften and absorb moisture from the filling, transforming into tender, cake-like layers. The filling needs time to set completely.
Step 7: Serve
When ready to serve, cut into squares. Use a sharp knife and wipe it clean between cuts for neat edges.
Serve cold, straight from the refrigerator. Garnish with additional whipped topping, pineapple chunks, maraschino cherries, or a sprinkle of crushed graham crackers if desired.
Watch it disappear.
The Science Behind the Magic
Why graham crackers soften: The moisture from the pudding migrates into the crackers, softening them while they retain their structure. This creates the perfect “cake” texture without any baking.
Why instant pudding works: Instant pudding contains thickeners that set up without cooking. When combined with milk, it creates a stable gel that holds its shape.
Why draining pineapple matters: Pineapple contains enzymes that can break down proteins. While modern canned pineapple is usually processed to neutralize these enzymes, excess liquid will still thin out the pudding and prevent proper setting.
Why chilling is essential: Time allows the moisture to distribute evenly, the flavors to meld, and the texture to become cohesive. Rushing this step results in a less satisfying dessert.
Troubleshooting Common Issues
My Dessert Is Runny and Won’t Set
Several possible causes:
· Pineapple wasn’t drained well enough
· Pudding didn’t have enough time to set before adding other ingredients
· You used reduced-fat milk (lower fat content can affect pudding set)
· You used cook-and-serve pudding instead of instant
Next time, drain pineapple more thoroughly and ensure pudding is fully set before proceeding.
My Graham Crackers Are Still Crunchy
The dessert hasn’t chilled long enough. Give it more time—at least 4 hours, preferably overnight. If it’s been long enough and they’re still crunchy, your layers may be too thick or your filling may not be moist enough.
My Layers Slide Apart When Served
This can happen if the dessert was cut too soon or if the layers weren’t pressed gently during assembly. Next time, press each cracker layer down gently before adding the next layer. Also ensure adequate chilling time.
The Top Crackers Are Hard
If the top layer of crackers isn’t covered by filling, they may stay crunchy. Either cover them with a thin layer of filling or crushed crackers, or accept that the top will have some crunch (some people love this contrast).
My Dessert Tastes Too Sweet
You can reduce sweetness by using sugar-free pudding mix and sugar-free whipped topping. The pineapple adds natural sweetness, so this works well.
The Pineapple Sinks to the Bottom
This is normal to some degree. To minimize, make sure pineapple is very well drained and fold it in gently. Adding it last and folding minimally helps keep it suspended.
Delicious Variations
Once you’ve mastered the basic recipe, try these variations.
Tropical Dream Version
Add ½ cup sweetened shredded coconut to the filling along with the pineapple. Garnish with toasted coconut on top.
Banana Pudding Version
Use banana cream pudding instead of vanilla. Add sliced bananas between layers (dip in lemon juice first to prevent browning).
Coconut Cream Version
Use coconut cream pudding. Add ½ cup toasted coconut to the filling and garnish with more toasted coconut.
Lemon Pineapple Version
Use lemon pudding instead of vanilla. The lemon-pineapple combination is bright and refreshing.
Strawberry Shortcake Version
Use cheesecake or vanilla pudding. Add 1 cup chopped fresh strawberries to the filling. Top with additional strawberries.
Chocolate Lover’s Version
Use chocolate pudding and chocolate graham crackers. Add miniature chocolate chips to the filling.
Key Lime Version
Use lime or key lime pudding. Add lime zest to the filling. The lime-pineapple combination is incredible.
Peach Melba Version
Replace pineapple with well-drained canned peaches (chopped) and add ½ cup raspberries.
Mango Version
Replace pineapple with well-drained canned or fresh mango puree or chopped mango.
Adults Only Version
Add 2 tablespoons rum or coconut rum to the milk before making pudding. Reduce milk by 2 tablespoons to compensate.
How to Serve This Dessert
Classic: Cut into squares and serve with a dollop of additional whipped topping and a maraschino cherry on top.
With fresh fruit: Serve alongside fresh berries or additional pineapple chunks.
With caramel or chocolate sauce: Drizzle over individual servings for extra indulgence.
As parfaits: Instead of making one large dessert, layer in individual glasses or mason jars for beautiful single-serving desserts.
With toasted coconut: Sprinkle toasted coconut over the top just before serving.
For holidays: Garnish with appropriate colors—red and green cherries for Christmas, pastel sprinkles for Easter.
Storage and Make-Ahead Tips
Refrigerator: Cover and store in the refrigerator for up to 5 days. The texture actually improves for the first day or two as the crackers continue to soften.
Freezer: This dessert freezes surprisingly well. Cover tightly and freeze for up to 3 months. Thaw overnight in the refrigerator before serving. Texture will be slightly softer but still delicious.
Make-ahead for parties: This is the perfect make-ahead dessert. Make it 1-2 days ahead and keep refrigerated. It’ll be at peak perfection when you’re ready to serve.
Transporting: Assemble in a disposable 9×13-inch pan with a lid for easy transport. Keep refrigerated until serving time.
The Story Behind Icebox Desserts
Icebox desserts have a rich history in American cooking. Before modern refrigeration was common, “iceboxes” were insulated cabinets that held blocks of ice to keep food cold. Desserts that could be assembled and chilled without baking became popular in the early 20th century.
The first icebox cakes were simple—layers of cookies or crackers with whipped cream or pudding, left to soften overnight. They were economical, easy, and didn’t require turning on the oven—a significant advantage in the days before air conditioning.
This Pineapple Vanilla Icebox Dessert is a direct descendant of those early creations. It honors the tradition while adding tropical flair that feels fresh and modern. When you make it, you’re participating in a century-old American culinary tradition.
Why This Dessert Deserves a Permanent Place in Your Recipe Collection
This Pineapple Vanilla Icebox Dessert represents everything I want in a recipe. It’s simple enough for a beginner to master on the first try. It’s impressive enough for holiday tables and dinner parties. It uses ingredients you can find anywhere. And it’s genuinely, consistently, undeniably delicious.
I’ve made this dessert for summer barbecues and winter gatherings. I’ve made it for family dinners and potlucks with friends. Every single time, it’s the first thing to disappear. Every single time, someone asks for the recipe.
There’s something magical about watching people take that first bite. The way their eyes widen slightly. The way they look down at the dessert, then back up, as if to say, “This is incredible—how did you make this?” And the best part is telling them how simple it is.
That’s the mark of a keeper. A recipe that delivers consistently, that pleases reliably, that becomes a requested favorite.
This dessert is that recipe for me. And now it can be that for you too.
So open that can of pineapple. Make that pudding. Layer those crackers. And get ready to discover your new favorite no-bake dessert.
Your refrigerator is about to hold something magical.
Have you made this Pineapple Vanilla Icebox Dessert? What variations did you try? I’d love to hear about your experience in the comments below!
More Recipes You Might Like
-
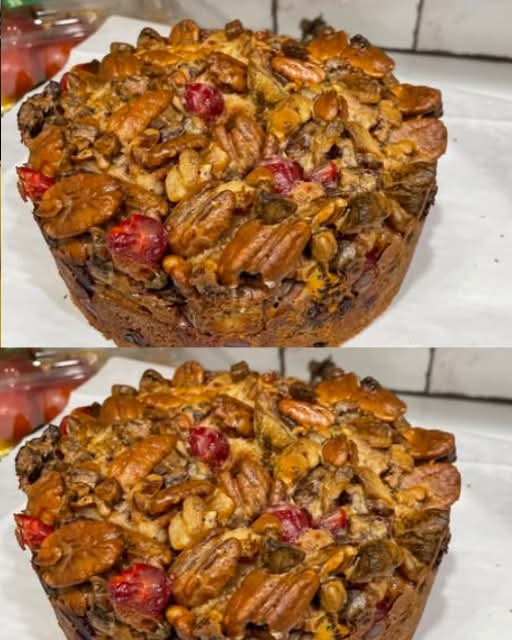
Mama Sue’s Favorite Fruitcake: Loaded with Pecans, Apricots, Dates & Cherries (No Citron, No Mixed Peel)
There are fruitcakes that get re‑gifted, and then there is this fruitcake – the one that disappears from the holiday table before the turkey even gets carved. This is not the dense, overly sweet, neon‑colored fruitcake that people love to mock. This is a southern heirloom recipe from my husband’s cousin, passed down through generations,…
-
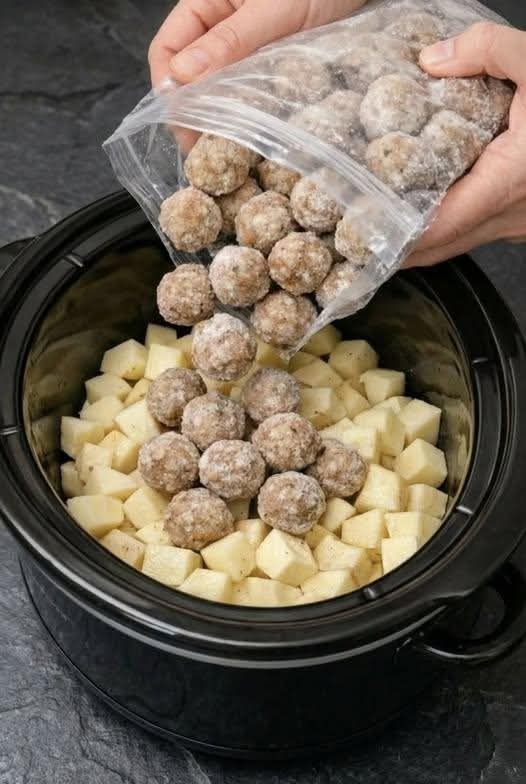
Dump Frozen Meatballs Over Raw Cubed Potatoes: The 5‑Ingredient Slow Cooker Meal That Disappears Fast
Some nights you need dinner to be effortless – no browning, no chopping, no standing over the stove. This is that meal. You simply dump frozen meatballs over raw cubed potatoes, add three more ingredients, cover, and let the slow cooker work its magic. Hours later, you are greeted with tender, flavorful meatballs, perfectly cooked…
-
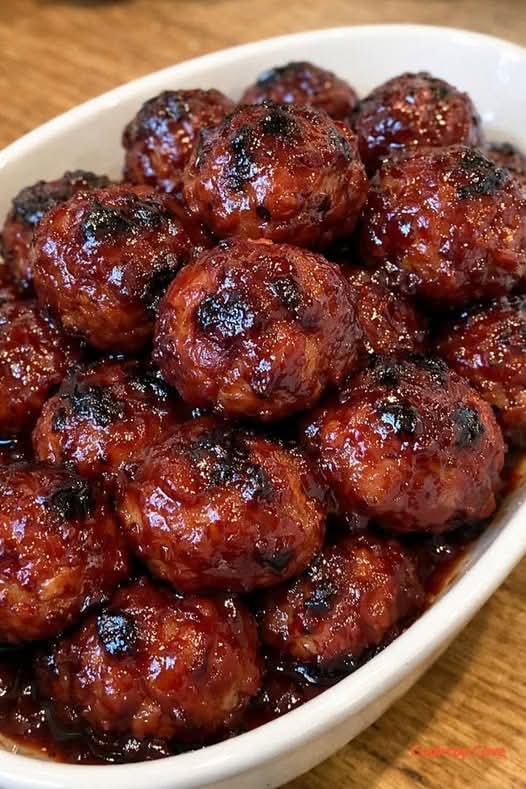
Sweet And Sticky BBQ Meatballs: The Appetizer That Disappears First
There are appetizers, and then there are Sweet & Sticky BBQ Meatballs – the little bites of juicy, tender, caramelized perfection that vanish before you can refill the platter. Whether you are hosting game day, bringing a dish to a potluck, or simply looking for an easy dinner over rice or mashed potatoes, these meatballs…