
The Viral Sensation That’s Easier Than You Think
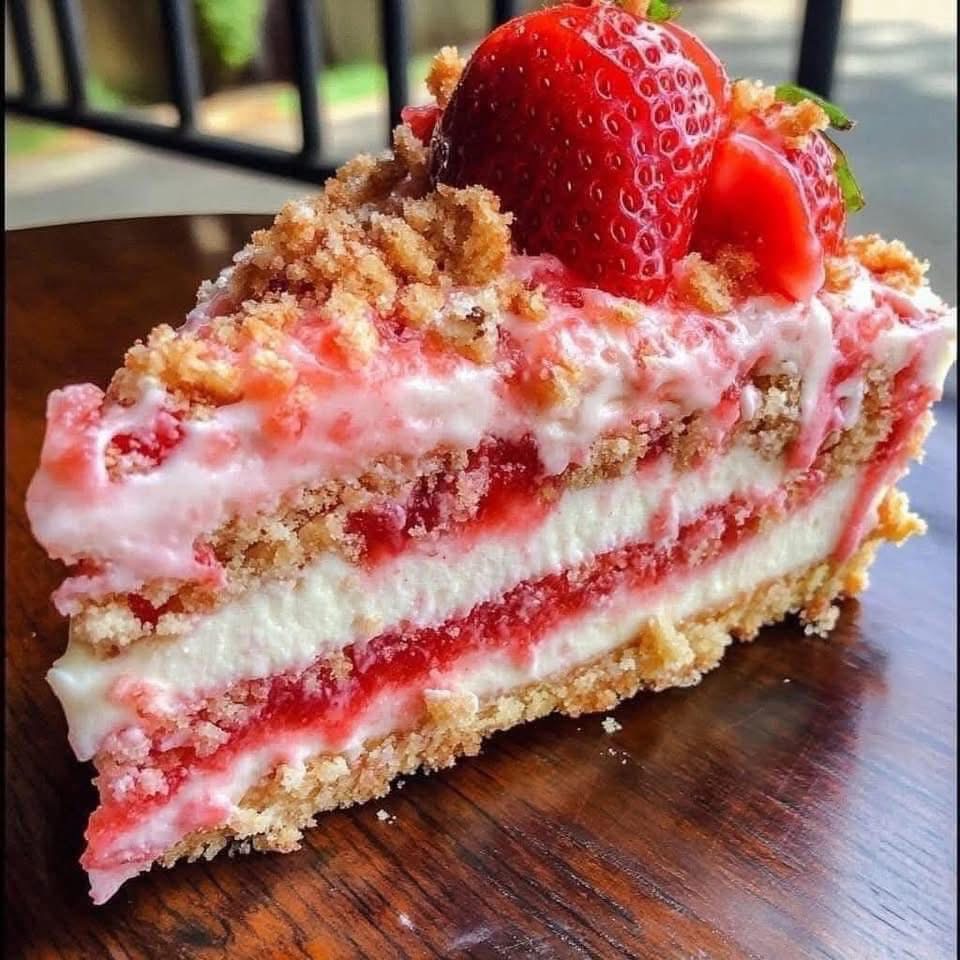
Imagine a dessert that combines the creamy dreaminess of New York cheesecake with the nostalgic crunch of strawberry shortcake ice cream bars—all without ever turning on your oven. Welcome to the Berrylicious Strawberry Crunch Cheesecake, the internet’s favorite no-bake dessert that’s taking over potlucks, birthday parties, and summer gatherings everywhere. This stunning dessert isn’t just delicious—it’s a textural masterpiece with its creamy filling, buttery crust, and that iconic crunchy topping that makes every bite unforgettable.
If you’re looking for an easy cheesecake recipe that delivers maximum wow factor with minimum effort, you’ve found your perfect match. This dessert solves the biggest baking anxieties: no water baths, no cracking, no complicated techniques. Just simple layers of flavor and texture that come together in a masterpiece that looks like it came from a professional bakery. Whether you’re a baking beginner or a seasoned pro, this viral dessert recipe will become your go-to for every celebration.
In this comprehensive guide, we’ll walk through every step to ensure perfect results, share pro tips for the creamiest texture, explore creative flavor variations, and provide a complete troubleshooting guide. Get ready to make the dessert that will have everyone asking for the recipe!
Why This Cheesecake Is Everywhere: The Magic Behind the Viral Trend
The Strawberry Crunch Cheesecake phenomenon isn’t just about taste—it’s about nostalgia meets innovation. That irresistible topping instantly transports people back to childhood summers with strawberry shortcake ice cream bars, while the no-bake cheesecake filling offers modern convenience and elegance. It’s the perfect crowd-pleasing dessert for several reasons:
Texture Heaven in Every Layer:
The Foundation: A buttery, crisp crust made from Golden Oreos or vanilla wafers that provides the perfect base
The Star: A luxuriously creamy, pink strawberry cheesecake filling that melts in your mouth
The Showstopper: That signature strawberry crunch topping—sandy, sweet, and utterly addictive
The Practical Perks:
· No-bake convenience means perfect results every time, no oven anxiety
· Make-ahead marvel that actually tastes better after chilling overnight
· Beginner-friendly with professional-looking results
· Customizable for different diets and flavor preferences
Social Media Gold:
The visual appeal of those pink layers and golden crunch topping makes this dessert incredibly Instagram-worthy. No wonder it’s been shared millions of times across Pinterest, TikTok, and food blogs!
The Complete Recipe: Berrylicious Strawberry Crunch Cheesecake
Equipment You’ll Need:
· 9-inch springform pan (essential for clean removal)
· Food processor or zip-top bag and rolling pin
· Stand mixer or hand mixer
· Rubber spatula
· Measuring cups and spoons
Ingredients:
For the Crust:
· 2 cups Golden Oreo crumbs (about 24 cookies, cream filling included)
· 5 tablespoons unsalted butter, melted
· 1 tablespoon granulated sugar (optional, for extra sweetness)
For the Strawberry Cheesecake Filling:
· 24 ounces (3 packages) full-fat cream cheese, softened to room temperature
· 1 cup granulated sugar
· 1 cup fresh strawberry puree (about 1 ½ cups whole strawberries, hulled)
· 1 tablespoon fresh lemon juice
· 1 teaspoon vanilla extract
· ¼ teaspoon salt
· 2 cups heavy whipping cream, cold
· 1 packet (¼ ounce) unflavored gelatin powder
· ¼ cup cold water
· Pink food coloring (optional, for vibrant color)
For the Strawberry Crunch Topping:
· 1 cup Golden Oreo crumbs
· ½ cup freeze-dried strawberry powder (or 1 packet strawberry Jell-O powder)
· 4 tablespoons unsalted butter, melted
· 2 tablespoons granulated sugar
For Garnish (Optional but Gorgeous):
· Fresh strawberries, sliced
· Whipped cream
· Mint leaves
Step-by-Step Instructions: Your Path to Perfection
Prep Time: 30 minutes | Chill Time: 6+ hours (overnight best) | Total Time: 6.5 hours | Servings: 12-14
Step 1: Prepare the Pan and Crust
Line the bottom of your 9-inch springform pan with parchment paper for easy removal. Lightly grease the sides.
In a food processor, pulse Golden Oreos into fine crumbs. Alternatively, place cookies in a zip-top bag and crush with a rolling pin.
Transfer crumbs to a bowl and mix with melted butter until it resembles wet sand.
Press firmly and evenly into the bottom of your prepared pan. Use the bottom of a glass or measuring cup to compact it well.
Freeze for 15 minutes while you prepare the filling.
Step 2: Create the Strawberry Puree
Wash, hull, and roughly chop fresh strawberries.
Blend in a food processor or blender until completely smooth.
Strain through a fine-mesh sieve to remove seeds if desired (recommended for silky texture).
Set aside 1 cup of puree for the filling. Reserve any extra for garnish.
Step 3: Bloom the Gelatin (The Secret to Perfect Slice)
In a small bowl, sprinkle gelatin over ¼ cup cold water.
Let sit for 5 minutes until it becomes spongy.
Microwave for 15-20 seconds until completely liquid, but not boiling. Alternatively, heat gently over a double boiler.
Set aside to cool slightly.
Step 4: Make the Cheesecake Filling
In a stand mixer with paddle attachment, beat softened cream cheese on medium speed for 2-3 minutes until completely smooth and creamy. Scrape down bowl frequently.
Add sugar and beat another 2 minutes until fully incorporated and no graininess remains.
With mixer on low, add strawberry puree, lemon juice, vanilla, and salt. Mix until just combined.
In a separate bowl (or clean stand mixer bowl), whip the heavy cream to stiff peaks.
Gently fold the whipped cream into the cream cheese mixture in three additions until no white streaks remain.
Stream in the liquid gelatin while gently folding to incorporate evenly.
Add pink food coloring if desired, starting with just a drop or two.
Step 5: Assemble the Cheesecake
Remove crust from freezer.
Pour filling over crust and smooth the top with an offset spatula.
Tap the pan gently on the counter to remove air bubbles.
Cover with plastic wrap and refrigerate for at least 6 hours, preferably overnight.
Step 6: Prepare the Crunch Topping
In a medium bowl, combine Golden Oreo crumbs, strawberry powder (or Jell-O powder), and sugar.
Pour melted butter over mixture and stir until all crumbs are moistened.
Spread on a baking sheet and bake at 350°F for 8-10 minutes until fragrant and slightly darkened.
Cool completely before using. Store in an airtight container if making ahead.
Step 7: Final Assembly and Serving
Carefully run a thin knife around the edge of the cheesecake before releasing the springform pan.
Transfer cheesecake to a serving plate.
Just before serving, press the crunch topping onto the sides and top of the cheesecake. For clean sides, you can create a “crumb coat” by gently pressing crumbs against the sides with your hands.
Garnish with fresh strawberry slices, whipped cream rosettes, and mint leaves if desired.
Use a sharp knife dipped in hot water and wiped dry between cuts for perfect slices.
Pro Chef Secrets for Next-Level Results
The Cream Cheese Commandments:
· Room temperature is non-negotiable. Cold cream cheese will result in lumps. To quickly soften: remove wrappers and microwave at 50% power for 15-second intervals until pliable but not melted.
· Scrape your bowl often. Cream cheese loves to hide un-mixed pockets at the bottom of the bowl.
· Full-fat cream cheese only. Reduced-fat varieties contain more water and won’t set properly.
The Gelatin Guarantee:
· Don’t skip blooming! Sprinkling gelatin over cold water prevents clumping.
· Never boil gelatin after melting—it loses its setting power.
· If you’re vegetarian, substitute with agar-agar (use 2 teaspoons dissolved in ¼ cup boiling water).
Whipped Cream Wisdom:
· Ensure your bowl and beaters are completely clean and cold for maximum volume.
· Use heavy whipping cream with at least 36% milk fat.
· Stop whipping when you have stiff peaks—over-whipping leads to butter.
The Crunch Topping Masterclass:
· Bake your crunch topping! This intensifies flavor and ensures it stays crunchy against the moist filling.
· For extra strawberry punch, add a tablespoon of strawberry Jell-O powder to the Oreo crumbs.
· Make a double batch—it’s that good, and you’ll want extra for sprinkling on individual slices.
7 Sensational Variations to Try
Once you’ve mastered the classic, explore these viral recipe twists:
Mixed Berry Bliss: Use a combination of strawberry, raspberry, and blueberry purees.
Chocolate-Dipped Strawberry: Add ½ cup melted white chocolate to the filling and drizzle with chocolate ganache.
Lemon-Strawberry Swirl: Add lemon zest to the filling and swirl with lemon curd before chilling.
Tropical Twist: Substitute strawberry with mango puree and use crushed vanilla cookies with coconut in the topping.
Cookies and Cream: Use regular Oreos in the crust and add crushed Oreos to the filling.
Adult Version: Add 2 tablespoons of strawberry liqueur to the filling.
Mini Cheesecakes: Use a muffin tin with liners for individual servings—perfect for parties!
Dietary Adaptations Made Easy
Gluten-Free: Use gluten-free vanilla cookies for both crust and topping.
Dairy-Free: Substitute with vegan cream cheese, coconut cream for whipping, and vegan butter.
Sugar-Free: Use sugar-free cookies, sugar-free Jell-O powder, and your favorite sugar substitute in the filling.
Nut-Free: This recipe is naturally nut-free, but always check cookie labels.
Troubleshooting: Your Questions Answered
Q: My filling won’t set. What went wrong?
A: This is usually caused by: 1) Under-whipped cream, 2) Not enough chilling time (overnight is best), 3) Gelatin not properly bloomed or melted, or 4) Using low-fat cream cheese. Solution: Ensure proper technique and be patient with chilling.
Q: The crust is too hard to cut.
A: You may have over-compacted it or used too much butter. Next time, press just until it holds together. For now, use a sharp, hot knife.
Q: Can I use frozen strawberries?
A: Yes! Thaw completely and drain excess liquid well. The puree may be slightly less vibrant but will taste great.
Q: How long does it keep?
A: Covered tightly in the refrigerator, it lasts 4-5 days. Add the crunch topping just before serving to maintain texture.
Q: Can I freeze this cheesecake?
A: Absolutely! Wrap tightly in plastic wrap and foil. Freeze for up to 2 months. Thaw overnight in the refrigerator. The texture may be slightly less creamy but still delicious.
Presentation Perfection: How to Make Your Cheesecake Instagram-Ready
The Slice: Clean, hot knife between each cut
The Plate: Drizzle with strawberry sauce or melted white chocolate
The Garnish: Fresh berries, edible flowers, or gold leaf for special occasions
The Setting: Natural light photography works best for capturing that beautiful pink hue
Why This Recipe Deserves a Spot in Your Regular Rotation
The Berrylicious Strawberry Crunch Cheesecake isn’t just another dessert—it’s a celebration in a pan. It represents everything we love about modern baking: approachable techniques, stunning visuals, and flavors that trigger happy memories while creating new ones. It’s the dessert that bridges generations—kids love the crunchy topping, adults appreciate the sophisticated creamy filling, and everyone comes back for seconds.
This recipe proves that you don’t need professional training or fancy equipment to create something extraordinary. What you need is quality ingredients, a little patience during chilling time, and the courage to press those crunchy crumbs into the sides of your masterpiece. The result is pure magic: a dessert that tastes even better than it looks (and it looks incredible).
Whether you’re making it for a special occasion or just because it’s Tuesday, this cheesecake brings joy to the process and the eating. It’s the kind of dessert that makes people feel loved and celebrated—and isn’t that what great cooking is all about?
Now it’s your turn! Have you made a strawberry crunch cheesecake before? What variations are you excited to try? Share your experiences, tips, and photos in the comments below! Don’t forget to pin this recipe to your dessert boards and tag us in your beautiful creations. Happy baking—or rather, happy no-baking!
-
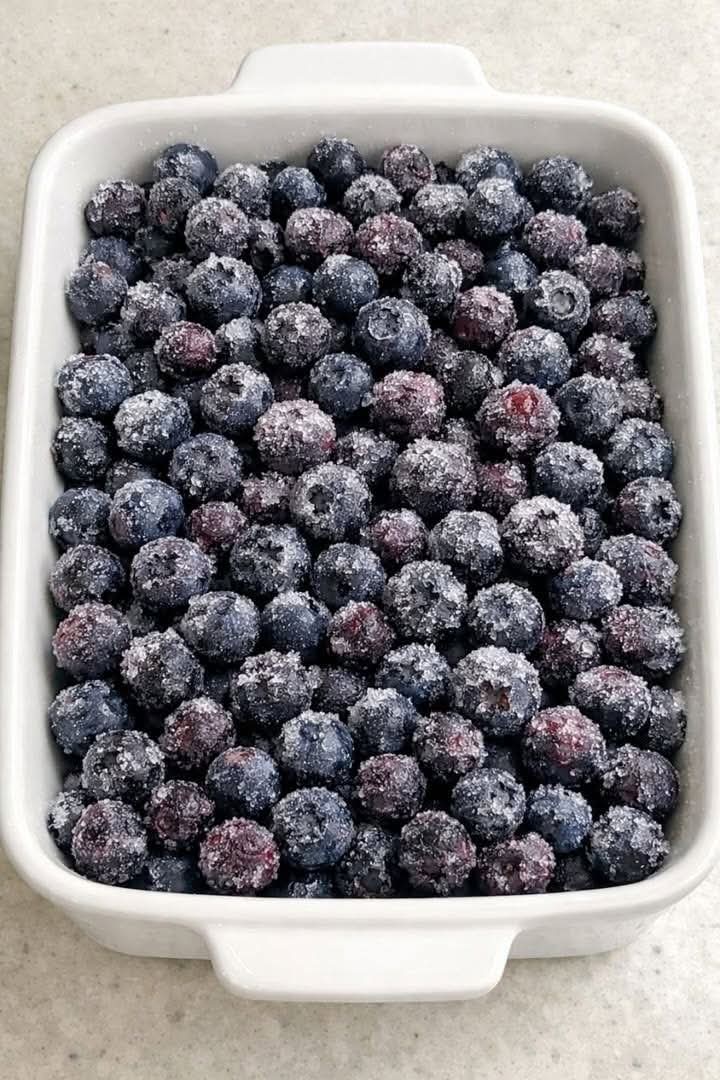
3 Ingredient Blueberry Dump Casserole: The Unbelievably Easy Dessert That Disappears Fast
You don’t need a dozen ingredients, a stand mixer, or complicated steps to create a dessert that will have your husband (and everyone else) going back for thirds. Just dump frozen raw blueberries straight into a casserole dish with three simple ingredients, bake, and watch magic happen. This Blueberry Dump Casserole is a cross between…
-
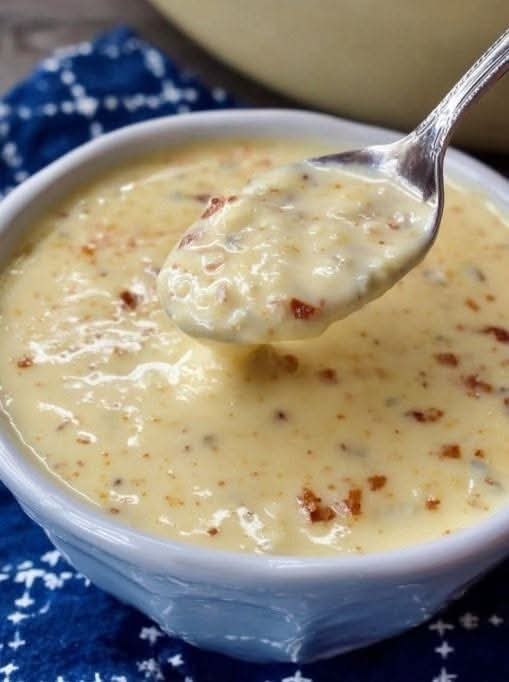
Canadian Cheese Soup: The Velvety, Bacon‑Infused Comfort Classic
When the temperature drops and you crave something deeply satisfying, nothing hits like a bowl of Canadian Cheese Soup. This is not a thin, boxed cheese soup — it’s a rich, lager‑laced, sharp‑cheddar chowder with smoky bacon and a velvety smooth texture that warms you from the inside out. Made famous by the Le Cellier…
-
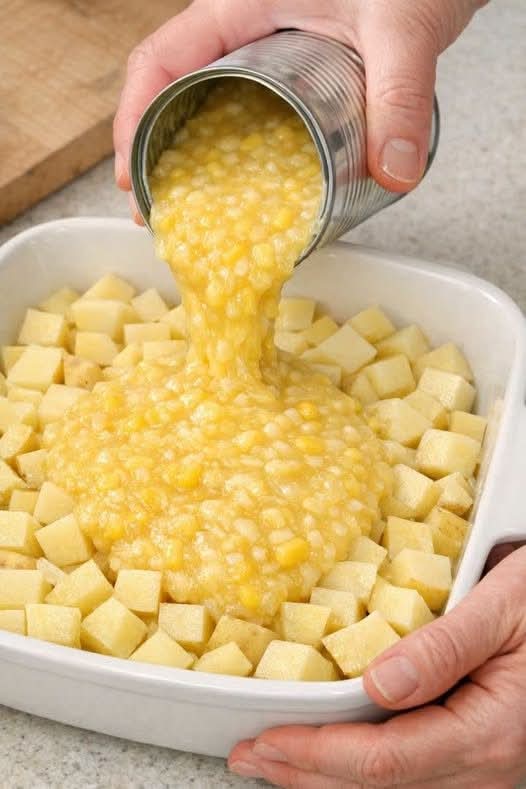
Creamy Corn Potato Casserole: The Side Dish That Disappears Every Time
Some side dishes are forgettable. This one is not. Creamy Corn Potato Casserole is the kind of recipe that earns a permanent spot in your holiday and weeknight rotation. With just a handful of humble ingredients – diced Yukon Gold potatoes, cream‑style corn, and plenty of sharp cheddar – you get a bubbling, golden, spoonable…