
There are some desserts that require patience. Desserts that demand precision, multiple bowls, careful temperature control, and the kind of attention that keeps you in the kitchen for hours. And then there are desserts like this one.
This 5-Minute Chocolate Mousse is the opposite of complicated. It’s the dessert you make when you need something impressive in a hurry. It’s the dessert you make when you don’t want to wash a dozen dishes. It’s the dessert you make when cravings strike and you want satisfaction now.
The method couldn’t be simpler: toss everything in the blender, press the button, and watch as ordinary ingredients transform into silky, luxurious chocolate mousse right before your eyes. No separating eggs. No folding. No double boilers. No fuss.
I discovered this technique on a busy weeknight when I desperately wanted something chocolatey but had zero energy for production. I had ripe bananas on the counter, cocoa powder in the pantry, and a vague memory of someone mentioning blended desserts. I threw everything in, crossed my fingers, and hit blend.
What came out was nothing short of miraculous. Silky, creamy, intensely chocolatey, and somehow incredibly good for me. I’ve been making it ever since, tweaking and perfecting until I landed on this foolproof version.
Today, I’m sharing the recipe and everything I’ve learned about making the perfect blender chocolate mousse. Whether you’re a seasoned cook or someone who barely enters the kitchen, this dessert is for you.
Why This Blender Mousse Will Become Your Go-To Dessert
It takes five minutes. Literally. From gathering ingredients to spoon in mouth, you’re looking at about five minutes total.
One appliance, zero mess. Everything goes in the blender. That’s it. No multiple bowls, no whisking, no folding, no dirtying every dish in your kitchen.
No eggs, no cooking. Traditional mousse requires carefully cooked egg yolks and whipped egg whites. This version is completely egg-free and no-cook, making it safer and simpler.
Incredibly creamy texture. The blender creates an emulsion that’s silky smooth, with a texture that rivals traditional mousse.
Customizable. Once you master the basic recipe, you can create endless variations—different flavors, add-ins, toppings.
Actually good for you. Depending on your base ingredient, this mousse can be packed with protein, fiber, and healthy fats. It’s dessert you can feel good about.
Vegan and dairy-free options. Easily adaptable to fit almost any dietary need.
Kids love it. It’s a fantastic way to get kids involved in the kitchen—they can help add ingredients and press the blender button.
The Basic Formula: Understanding the Method
Before we dive into specific recipes, let’s understand what makes this work. Every blender mousse follows the same basic formula:
Base ingredient + Flavoring + Liquid + Sweetener
The base provides body and creaminess. The flavoring provides the taste. The liquid helps everything blend. The sweetener balances and enhances.
The magic happens in the blender, where high-speed spinning creates an emulsion—tiny fat droplets suspended in liquid, creating that luxurious, creamy texture without any actual cream.
Recipe 1: Silky Avocado Chocolate Mousse
This is the classic blender mousse that started it all. Yes, avocado is the base. And no, you can’t taste it. The avocado provides incredible creaminess and healthy fats while remaining completely neutral in flavor.
Ingredients
For the mousse:
· 2 ripe avocados, peeled and pitted
· ½ cup unsweetened cocoa powder
· ½ cup maple syrup or honey (adjust to taste)
· ¼ cup unsweetened almond milk (or any milk)
· 1 teaspoon vanilla extract
· ¼ teaspoon salt
Optional add-ins:
· 1 tablespoon instant espresso powder (deepens chocolate flavor)
· 1 teaspoon orange zest
· ½ teaspoon cinnamon
· Pinch of cayenne for heat
Instructions
Step 1: Prep the avocados. Make sure your avocados are perfectly ripe—soft but not mushy, without brown spots. Scoop the flesh into your blender.
Step 2: Add remaining ingredients. Add cocoa powder, maple syrup, almond milk, vanilla, and salt. If using any optional add-ins, add them now.
Step 3: Blend. Start on low speed and gradually increase to high. Blend for 1-2 minutes, stopping to scrape down the sides as needed, until completely smooth and creamy. The mixture should be thick, silky, and uniform in color.
Step 4: Taste and adjust. Taste your mousse and adjust sweetness or chocolate intensity as desired. Add more sweetener if needed, more cocoa for deeper chocolate flavor, or a splash more milk if too thick.
Step 5: Chill (optional but recommended). For the best texture, transfer to serving dishes and refrigerate for at least 30 minutes. This allows the flavors to meld and the texture to firm up slightly. However, it’s also delicious immediately.
Step 6: Serve. Garnish with fresh berries, whipped coconut cream, chocolate shavings, or a sprinkle of sea salt.
Why This Recipe Works
Avocados are the perfect base—their high fat content creates incredible creaminess, while their mild flavor disappears completely behind the chocolate and sweetener. The result is a mousse that’s indistinguishable from traditional versions but packed with healthy fats, fiber, and nutrients.
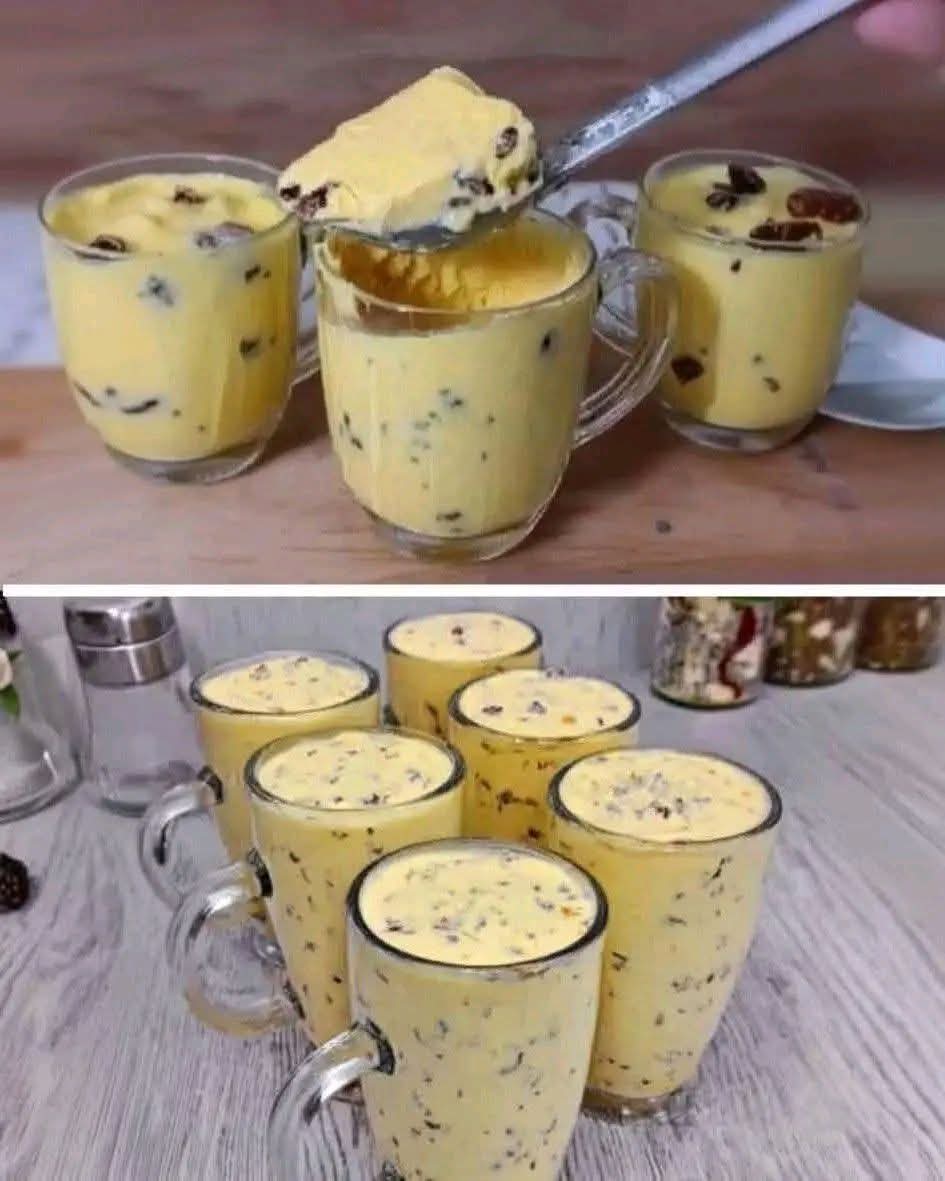
Recipe 2: Banana “Nice” Cream Mousse
This version uses frozen bananas as the base, creating a mousse that’s more like a soft-serve texture. It’s incredibly simple and naturally sweet.
Ingredients
· 3 ripe bananas, peeled and frozen (see tips below)
· ¼ cup unsweetened cocoa powder
· 2 tablespoons maple syrup or honey (optional, depending on banana sweetness)
· ¼ cup unsweetened almond milk (or any milk)
· 1 teaspoon vanilla extract
· Pinch of salt
Instructions
Step 1: Freeze the bananas. Peel ripe bananas (the riper, the sweeter), slice into chunks, and freeze on a parchment-lined tray for at least 4 hours or overnight. Once frozen, transfer to a freezer bag for storage.
Step 2: Combine in blender. Place frozen banana chunks, cocoa powder, maple syrup (if using), almond milk, vanilla, and salt in your blender.
Step 3: Blend. Start on low speed and gradually increase. You’ll need to stop and scrape down the sides frequently. The mixture will go through phases—first chunky, then grainy, then suddenly smooth and creamy. This takes about 2-3 minutes.
Step 4: Serve immediately. This version is best served right away, with a texture like soft-serve ice cream. You can also transfer to a container and freeze for 1-2 hours for a firmer, scoopable texture.
Step 5: Garnish and enjoy. Top with fresh fruit, nuts, coconut flakes, or a drizzle of peanut butter.
Banana Tips
· The riper the bananas, the sweeter your mousse will be. Spotty, overripe bananas are perfect.
· Slice bananas before freezing—whole frozen bananas are too hard for most blenders.
· For extra creamy texture, add 2 tablespoons of nut butter or coconut cream.
Recipe 3: Silken Tofu Chocolate Mousse
This version uses silken tofu as the base, creating a high-protein, low-fat mousse that’s incredibly light and creamy.
Ingredients
· 1 package (12-16 ounces) silken tofu, drained
· ½ cup semi-sweet chocolate chips, melted (see instructions)
· ¼ cup maple syrup or honey
· 1 teaspoon vanilla extract
· Pinch of salt
Instructions
Step 1: Melt the chocolate. Place chocolate chips in a microwave-safe bowl. Microwave in 30-second intervals, stirring between each, until completely smooth. Let cool slightly.
Step 2: Combine ingredients. Drain the silken tofu and pat it dry with paper towels. Place in blender with melted chocolate, maple syrup, vanilla, and salt.
Step 3: Blend. Start on low and increase to high, blending for 1-2 minutes until completely smooth and creamy. Scrape down sides as needed.
Step 4: Chill. Transfer to serving dishes and refrigerate for at least 2 hours. This mousse needs time to set up—it will be runny when first blended but firms up beautifully as it chills.
Step 5: Serve. Garnish with fresh raspberries, mint leaves, or a dusting of cocoa powder.
Why Tofu Works
Silken tofu has a smooth, custard-like texture that blends into pure silkiness. It’s high in protein, low in fat, and completely neutral in flavor, making it the perfect canvas for chocolate. The melted chocolate provides richness and helps the mousse set as it chills.
Recipe 4: Coconut Cream Dream Mousse
This dairy-free version uses coconut cream for an incredibly rich, tropical-flavored mousse.
Ingredients
· 1 can (13.5 ounces) full-fat coconut cream (or the solid part of coconut milk)
· ¼ cup unsweetened cocoa powder
· ¼ cup maple syrup or honey
· 1 teaspoon vanilla extract
· Pinch of salt
Instructions
Step 1: Chill the coconut cream. Refrigerate the can of coconut cream overnight. This allows the cream to separate and solidify.
Step 2: Scoop the cream. Open the can without shaking. Scoop out the solid coconut cream into your blender, leaving the watery liquid behind (save it for smoothies!).
Step 3: Add remaining ingredients. Add cocoa powder, maple syrup, vanilla, and salt.
Step 4: Blend. Blend until completely smooth and creamy, about 1-2 minutes. Scrape down sides as needed.
Step 5: Chill. Transfer to serving dishes and refrigerate for at least 1 hour to firm up.
Step 6: Serve. Garnish with toasted coconut flakes, chocolate shavings, or fresh berries.
Coconut Cream Tips
· Look for coconut cream specifically, or use full-fat coconut milk and scoop only the solid cream.
· Don’t shake the can before opening—you want the cream separated.
· The leftover coconut water is great in smoothies or tropical drinks.
Recipe 5: Greek Yogurt Protein Mousse
This version is packed with protein, making it perfect for post-workout dessert or a healthy snack.
Ingredients
· 1 cup plain Greek yogurt (full-fat for creamiest texture)
· ¼ cup unsweetened cocoa powder
· 3-4 tablespoons honey or maple syrup
· 1 teaspoon vanilla extract
· Pinch of salt
· 2-3 tablespoons milk (as needed for consistency)
Instructions
Step 1: Combine ingredients. Place Greek yogurt, cocoa powder, honey, vanilla, and salt in your blender.
Step 2: Blend. Blend until smooth and creamy. If the mixture is too thick to blend easily, add milk 1 tablespoon at a time until it reaches the right consistency.
Step 3: Taste and adjust. Add more sweetener if needed.
Step 4: Serve immediately or chill. This mousse is delicious right away but also benefits from 30 minutes in the refrigerator.
Step 5: Garnish. Top with fresh berries, granola, or a drizzle of honey.
Yogurt Tips
· Full-fat Greek yogurt gives the creamiest result. Low-fat works but will be less rich.
· For extra protein, add a scoop of your favorite protein powder (chocolate or vanilla work best).
· This version is lighter than traditional mousse but still incredibly satisfying.
Recipe 6: Quick Chocolate Peanut Butter Mousse
Peanut butter and chocolate are a match made in heaven. This version combines them into a mousse that tastes like a Reese’s cup in dessert form.
Ingredients
· 2 ripe avocados (or 1 cup silken tofu)
· ½ cup unsweetened cocoa powder
· ½ cup creamy peanut butter
· ½ cup maple syrup or honey
· ¼ cup almond milk (or any milk)
· 1 teaspoon vanilla extract
· ¼ teaspoon salt
Instructions
Step 1: Combine all ingredients in your blender.
Step 2: Blend until completely smooth and creamy, about 2 minutes. Scrape down sides as needed.
Step 3: Taste and adjust. Add more sweetener or peanut butter to taste.
Step 4: Chill for at least 30 minutes for best texture.
Step 5: Serve garnished with chopped peanuts, a drizzle of melted chocolate, or a sprinkle of sea salt.
Recipe 7: Mint Chocolate Chip Mousse
A refreshing twist on classic chocolate mousse.
Ingredients
· Base of your choice (avocado, tofu, or banana work well)
· ½ cup unsweetened cocoa powder
· ½ cup sweetener of choice
· ¼ cup milk of choice
· 1 teaspoon peppermint extract (not mint—peppermint is key)
· ¼ cup mini chocolate chips
Instructions
Step 1: Prepare your base mousse using any of the recipes above, but add peppermint extract along with the other ingredients.
Step 2: Blend until smooth.
Step 3: Fold in chocolate chips by hand after blending. This keeps them intact rather than blended into the mousse.
Step 4: Chill and serve garnished with a sprig of fresh mint.
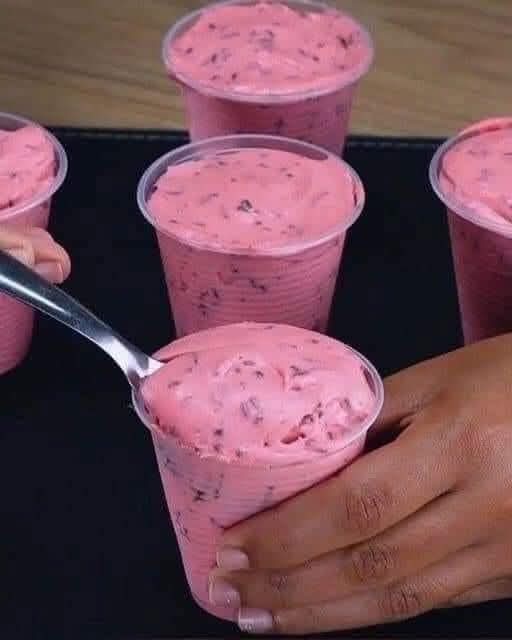
Recipe 8: Raspberry Swirl Chocolate Mousse
This elegant version features ribbons of tart raspberry throughout rich chocolate mousse.
Ingredients
For the mousse:
· Your choice of base mousse recipe
For the raspberry swirl:
· 1 cup fresh or frozen raspberries
· 2 tablespoons maple syrup or honey
· 1 teaspoon lemon juice
Instructions
Step 1: Make the raspberry swirl. Combine raspberries, maple syrup, and lemon juice in a small saucepan. Cook over medium heat for 5-7 minutes until broken down and slightly thickened. Press through a fine-mesh strainer to remove seeds. Cool completely.
Step 2: Make your mousse according to your chosen recipe.
Step 3: Layer and swirl. Spoon half the mousse into serving dishes. Dollop half the raspberry sauce over it. Add remaining mousse, then remaining sauce. Use a knife to gently swirl the sauce into the mousse.
Step 4: Chill for at least 1 hour before serving.
Troubleshooting Common Issues
My Mousse Is Too Thick
Add liquid 1 tablespoon at a time (milk, water, or even coffee for chocolate versions) and blend again until it reaches desired consistency.
My Mousse Is Too Thin
For avocado or banana versions, add more of the base ingredient. For tofu versions, chilling will firm it up significantly. You can also add 1-2 tablespoons of melted coconut oil and chill to help it set.
My Mousse Has Lumps
Blend longer and scrape down the sides thoroughly. If lumps persist, your base ingredient may not be fully ripe (avocado) or properly thawed (banana).
I Can Taste the Avocado
Use riper avocados and add more cocoa powder, sweetener, and vanilla. A tablespoon of instant espresso powder also helps mask any remaining avocado flavor.
My Mousse Is Bitter
Add more sweetener. Different cocoa powders have different bitterness levels—if yours is very bitter, you may need extra sweetener to balance.
The Texture Isn’t Creamy Enough
Make sure you’re blending long enough—full 2 minutes. Also, check that your base ingredient is properly ripe (avocado) or fully thawed (banana).
Toppings and Garnishes
Take your mousse to the next level with these toppings:
Fresh fruit: Raspberries, strawberries, blueberries, or banana slices
Whipped cream: Dairy or coconut-based
Chocolate shavings: Use a vegetable peeler on a chocolate bar
Cocoa powder: A light dusting
Sea salt: Flaky salt like Maldon enhances chocolate flavor
Nuts: Toasted almonds, hazelnuts, pecans, or peanuts
Coconut: Toasted shredded coconut
Granola: For crunch and texture
Mint leaves: Fresh and pretty
Caramel or chocolate sauce: Drizzle over the top
Espresso powder: A light sprinkle for mocha flavor
Make-Ahead and Storage Tips
Refrigerator: Most mousses keep well in the refrigerator for 3-5 days in an airtight container. Avocado-based mousses may darken slightly on top—stir before serving or press plastic wrap directly onto the surface.
Freezer: Banana-based mousse freezes well for up to 2 months. Thaw slightly before serving for a soft-serve texture. Other mousses can be frozen but may lose some creaminess upon thawing.
Make-ahead for parties: All these mousses are excellent make-ahead desserts. Prepare them 1-2 days ahead and keep refrigerated. Add toppings just before serving.
Single servings: Portion into small jars or ramekins for individual desserts. They look beautiful and are ready to grab and serve.
Dietary Adaptations
Vegan: Use maple syrup as sweetener and choose avocado, banana, coconut, or tofu base. Ensure chocolate is dairy-free.
Keto-friendly: Use avocado base with keto-friendly sweetener like erythritol or stevia. Use unsweetened cocoa powder and full-fat coconut milk.
Low-fat: Silken tofu base is naturally low in fat. Use cocoa powder and reduce or omit added fats.
High-protein: Greek yogurt or silken tofu base with added protein powder.
Nut-free: Avoid peanut butter version and use coconut, banana, or tofu base.
Sugar-free: Use sugar-free sweeteners and ensure chocolate is unsweetened or sugar-free.
The Blender You Need
Any blender will work, but the results vary:
High-speed blender (Vitamix, Blendtec): Produces the absolute smoothest, creamiest texture in seconds. Worth the investment if you make these often.
Regular countertop blender: Works perfectly well. You may need to blend longer and scrape down sides more frequently.
Immersion blender with container: Can work if you have a tall container, but results may be slightly less smooth.
Food processor: Works for thicker mousses but may not get quite as smooth as a blender.
Why These Blender Mousses Deserve a Place in Your Life
These blender mousses have become my secret weapon for so many situations. When unexpected guests arrive and I need dessert fast, I reach for avocados and cocoa powder. When I’m craving something sweet late at night but don’t want anything heavy, I blend up a banana version. When I want to impress at dinner parties, I make the raspberry swirl version in individual glasses.
They’ve saved me countless times. They’ve impressed people who had no idea that healthy ingredients could taste so decadent. They’ve become the recipe I share with friends who think they can’t cook or bake.
The beauty of these mousses is their versatility. Once you understand the basic formula, you can create endless variations. Chocolate peanut butter, mint chip, raspberry swirl, mocha, orange chocolate—the possibilities are limited only by your imagination.
And the best part? Five minutes. That’s all it takes. Five minutes from craving to satisfaction. Five minutes from “I want something sweet” to spoon in mouth.
That’s the kind of recipe worth keeping.
So grab your blender. Pick your base. Add your flavors. Press that button and watch the magic happen.
Your five-minute dessert is waiting.
Have you tried making blender mousse? What’s your favorite variation? I’d love to hear about your creations in the comments below!
More Recipes You Might Like
-
Diabetic Strawberry Dessert: Sugar-Free, Low-Calorie, and Only 3 Ingredients!
Discover the ultimate guilt-free treat! This diabetic-friendly strawberry applesauce bread requires just 3 ingredients, has no added sugar, and is incredibly low in calories. Perfect for a healthy dessert or snack! Let me tell you about the dessert that changed how I think about healthy eating. I have a massive sweet tooth. Always have. But…
-
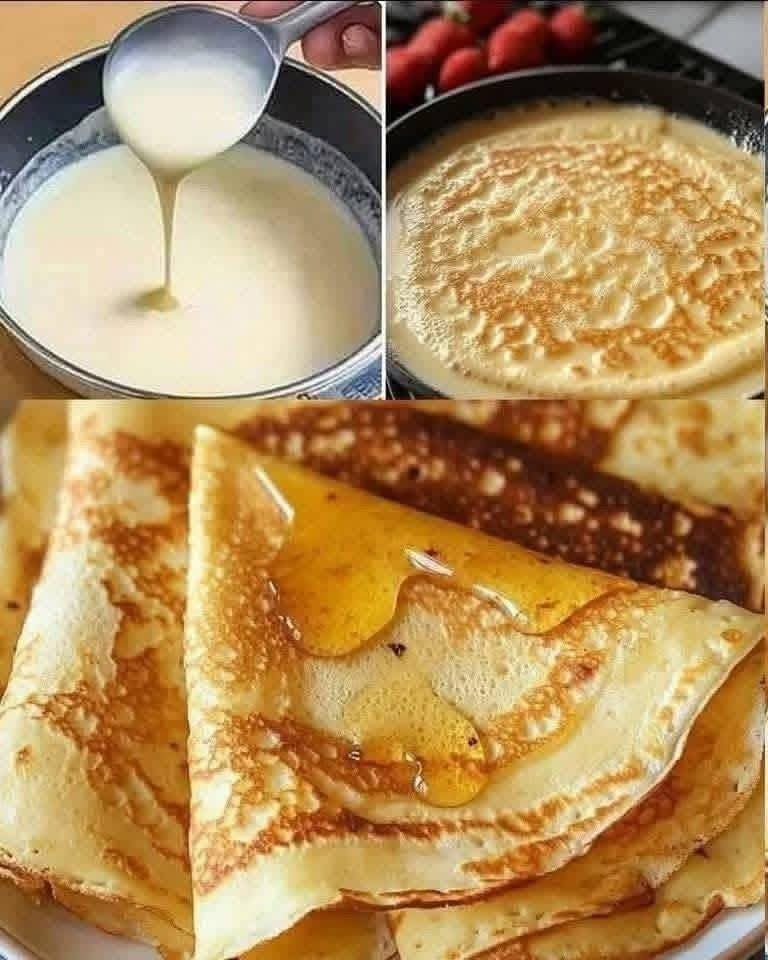
Classic French Crepes with Honey: A Taste of Paris at Home
Discover the secret to authentic Classic French Crepes with Honey! These paper-thin, buttery crepes are incredibly easy to make and absolutely divine drizzled with golden honey. Perfect for breakfast, dessert, or anytime! Close your eyes and imagine yourself sitting at a tiny sidewalk café in Paris. The Eiffel Tower looms in the distance, the scent…
-
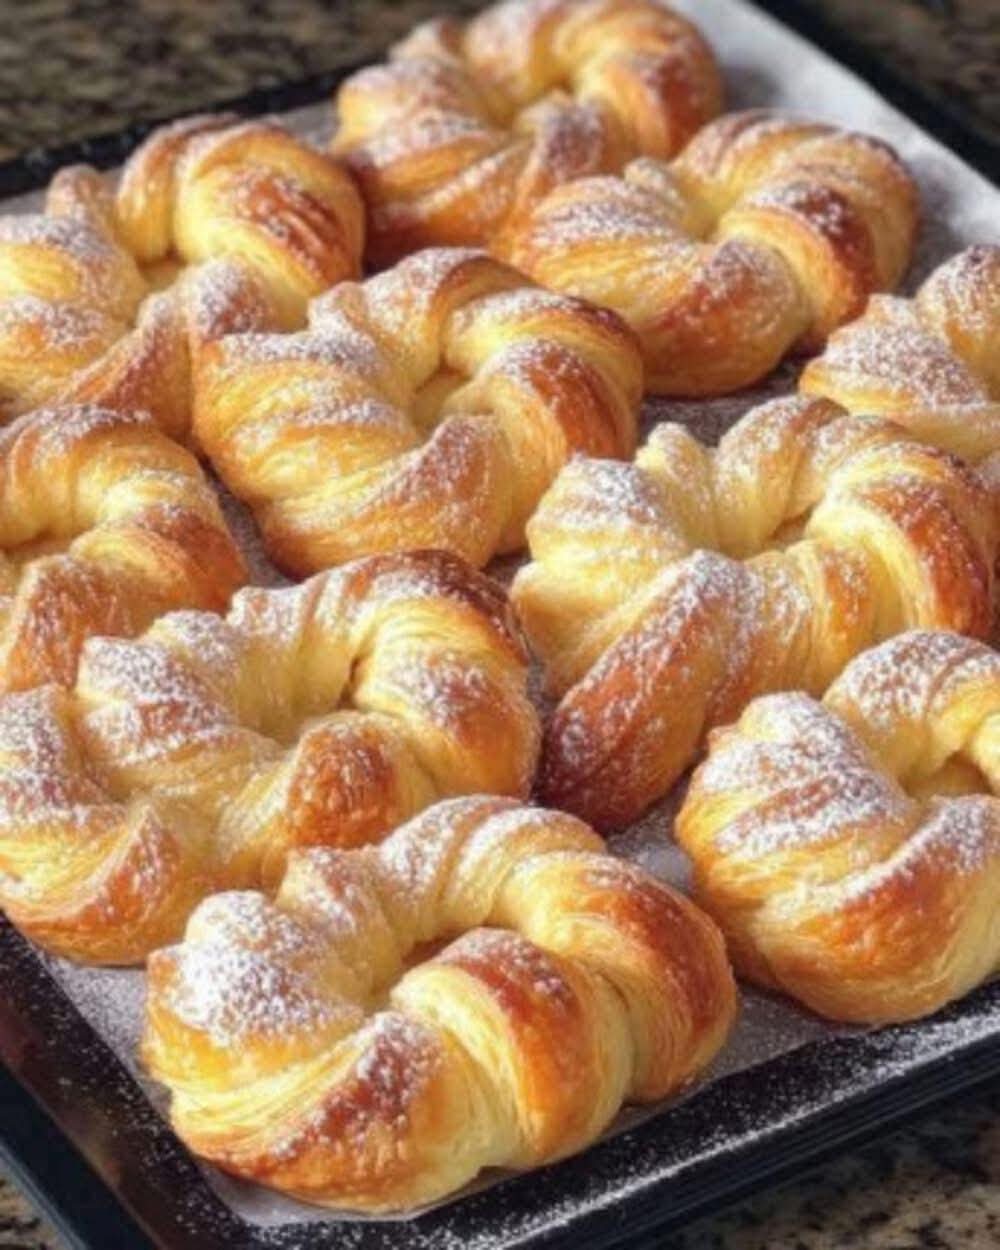
Puff Pastry Cinnamon Sugar Twists: 20-Minute Magic from the Freezer
Discover the magic of Puff Pastry Cinnamon Sugar Twists! With just a few simple ingredients, you can create golden, flaky, buttery pastries that taste like they came from a fancy bakery. Ready in under 20 minutes! Let me tell you about the dessert that makes people think I spent hours in the kitchen when I…