

Imagine this: tender, smoky grilled chicken wrapped in a warm flour tortilla with a creamy, spicy chipotle ranch sauce, all bundled with perfectly cooked cilantro-lime rice, black beans, sweet corn, and melted cheese. It’s not just a burrito—it’s a portable flavor explosion that solves the eternal question of what’s for dinner. This Chipotle Ranch Grilled Chicken Burrito recipe is more than a meal; it’s a game-changer for your weekly routine, your lunchbox, and your taste buds.
In this definitive guide, we’re diving deep into how to create the ultimate grilled chicken burrito at home—one that rivals your favorite fast-casual spot but is made with love (and knowledge of every ingredient inside). We’ll cover the secrets to juicy, flavorful chicken, the art of the perfect burrito assembly, and genius meal prep strategies that will make your week deliciously effortless. Get ready to fire up the grill and roll up something amazing.
Why This Chipotle Ranch Grilled Chicken Burrito Recipe Dominates
Let’s be honest: a dry, bland burrito is a sad experience. This recipe is engineered for maximum satisfaction. Here’s why it works:
· The Flavor Trinity: It hits all the right notes—smoky, spicy, creamy, tangy, and fresh—in every single bite.
· Meal Prep Perfection: These burritos freeze and reheat beautifully, making them the holy grail of easy lunch ideas and quick family dinners.
· Fully Customizable: It’s a flawless blueprint. Swap proteins, add veggies, adjust the heat—it’s your burrito kingdom.
· Crowd-Pleasing Power: From hungry teens to discerning adults, this is a universally loved meal that feels indulgent but is balanced and satisfying.
The Secret Weapon: Homemade Chipotle Ranch Sauce
Chipotle Ranch Grilled Chicken Burritos Recipe
This recipe makes 6 large, hearty burritos, ideal for dinner tonight and lunches for the week.
Ingredients Breakdown: Building Your Flavor Foundation
For the Chipotle Ranch Sauce & Marinade:
· 1 cup mayonnaise (full-fat for best texture)
· 1/2 cup sour cream
· 1/2 cup buttermilk
· 2-3 chipotle peppers in adobo sauce, minced (adjust for heat)
· 2 tablespoons adobo sauce (from the can)
· 1 tablespoon fresh lime juice
· 1 small packet (or 2 tbsp) ranch seasoning mix (or 1 tsp each: dried dill, parsley, onion powder, garlic powder, salt, pepper)
· 2 cloves garlic, minced
· 1/4 cup fresh cilantro, chopped
For the Grilled Chicken:
· 1.5 lbs boneless, skinless chicken breasts or thighs
· 1/2 cup of the prepared Chipotle Ranch Sauce (for marinating)
· 1 tablespoon olive oil
· 1 teaspoon chili powder
· 1 teaspoon cumin
· Salt and black pepper
For the Burrito Assembly:
· 6 large burrito-size flour tortillas (10-12 inch)
· 2 cups cooked cilantro-lime rice (white or brown)
· 1 (15 oz) can black beans, rinsed and drained
· 1 cup corn kernels (fresh, frozen/thawed, or roasted)
· 1 1/2 cups shredded cheese (Monterey Jack, cheddar, or a Mexican blend)
· 1 cup diced tomatoes or pico de gallo
· 1 avocado, sliced or mashed (optional, but recommended)
· Fresh lettuce or shredded cabbage
· The remaining Chipotle Ranch Sauce
Step-by-Step Cooking Instructions
Step 1: Make the Magic Sauce
In a medium bowl, combine all Chipotle Ranch Sauce ingredients: mayonnaise, sour cream, buttermilk, minced chipotles, adobo sauce, lime juice, ranch seasoning, garlic, and cilantro.
Whisk until completely smooth and emulsified. Taste and adjust: Want more smoke? Add adobo. More tang? More lime. More kick? Another chipotle.
Set aside. This sauce can be made up to 3 days in advance; flavors improve over time.
Step 2: Marinate & Grill the Chicken to Juicy Perfection
Place chicken in a shallow dish or zip-top bag. Add 1/2 cup of the Chipotle Ranch Sauce, olive oil, chili powder, cumin, salt, and pepper. Massage to coat thoroughly. Marinate for at least 30 minutes at room temperature, or ideally 2-4 hours in the refrigerator.
Preheat your grill or grill pan to medium-high heat (about 400-450°F). Clean and oil the grates.
Remove chicken from marinade, letting excess drip off. Grill for 6-8 minutes per side, or until internal temperature reaches 165°F. Cooking time depends on thickness.
Transfer chicken to a cutting board and let it rest for 5-10 minutes. This is non-negotiable for juicy meat! Then, slice or shred into bite-sized pieces.
Step 3: Prepare Your Burrito Station (Mise en Place)
The key to a tight, well-rolled burrito is organization. Have all your fillings warmed and laid out assembly-line style.
Warm your tortillas: This is the most critical step to prevent tearing. Heat a dry skillet over medium heat for 20-30 seconds per side, OR wrap them in a damp paper towel and microwave for 30-45 seconds. They should be pliable and warm.
Warm your beans and corn: Gently heat the black beans and corn in a saucepan or microwave until just warm. This makes the burrito more cohesive.
Have everything ready: Shredded cheese, diced tomatoes, rice, sliced avocado, lettuce, the grilled chicken, and the remaining sauce should all be within easy reach.
Step 4: The Art of the Perfect Burrito Roll
Lay a warm tortilla flat on a clean surface. Spread a generous 1.5-2 tablespoon stripe of Chipotle Ranch Sauce down the center, leaving a 2-inch border at the top and bottom.
Layer your fillings in the center third of the tortilla, in this order:
· Base Layer: 1/3 cup cilantro-lime rice. This creates a bed that absorbs moisture.
· Protein: A generous portion of grilled chicken.
· Beans & Corn: A scoop each of black beans and corn.
· Cheese: A handful of shredded cheese (it will melt from the warmth of other ingredients).
· Fresh Elements: Tomatoes, avocado, and lettuce.
The Fold: Imagine the tortilla as a clock. Fold the 3 o’clock and 9 o’clock sides (left and right) inward over the filling, snugly.
The Roll: Starting from the 6 o’clock side (bottom), use your fingers to tuck the edge over the filling, pulling back tightly to create a compact cylinder. Continue rolling firmly upward (toward 12 o’clock) until the burrito is fully sealed. The weight of the burrito should keep the seam side down.
Step 5: The Golden-Brown Finish (Optional but Highly Recommended)
For a next-level experience, give your burrito a final crispy sear.
Heat a clean skillet or panini press over medium heat. Place the seam-side-down burrito in the skillet. Cook for 2-3 minutes per side, or until the tortilla is golden brown and crispy with visible grill marks. This locks in the fillings and adds incredible texture.
Pro Tips for Burrito Mastery
· Don’t Overfill: This is the #1 mistake. Overstuffed burritos are impossible to roll and will burst. Show restraint for a perfect roll.
· Rice is Your Friend: The rice acts as a moisture barrier, preventing the tortilla from getting soggy from wet ingredients like salsa or sauce.
· Press as You Roll: Use your hands to compact the fillings as you roll for a firm, tight burrito that holds its shape.
· Warm Fillings = Melted Cheese: Using warm rice, beans, and chicken helps the cheese melt slightly, binding everything together.
Meal Prep & Storage: Your Future Self Will Thank You
This is where the recipe shines. Making a double batch is one of the best meal prep ideas you can adopt.
To Freeze for Later:
Assemble burritos but skip the fresh lettuce and avocado (add these after reheating).
Wrap each cooled burrito tightly in parchment paper, then in aluminum foil. Place in a labeled freezer bag.
Freeze for up to 3 months.
To Reheat from Frozen:
· Oven (Best for Crispness): Remove foil. Place parchment-wrapped burrito on a baking sheet. Bake at 375°F for 45-55 minutes, until heated through.
· Microwave (Fastest): Remove all wrapping. Place on a microwave-safe plate. Heat on high for 3-4 minutes, flipping halfway. Finish in a hot skillet for 1-2 minutes per side to crisp the tortilla.
Refrigerator Storage: Wrap assembled burritos tightly and store in the fridge for up to 3 days. Reheat in a skillet or air fryer for best texture.
Customization Ideas: Make It Your Own
This recipe is a canvas. Here are popular burrito variations:
· Protein Swap: Use grilled steak (carne asada), shrimp, carnitas, or roasted cauliflower for a vegetarian option.
· Grain Swap: Substitute rice with cilantro-lime quinoa, cauliflower rice, or sautéed peppers and onions (fajita-style).
· Sauce Variations: Try a creamy avocado cilantro sauce, a classic tomato salsa verde, or a spicy habanero mango salsa.
· Add-Ins: Sautéed bell peppers & onions, jalapeños, pickled red onions, or a spoonful of guacamole.
FAQs: Your Burrito Questions, Answered
Can I make this in an air fryer?
Absolutely! Air fryer burritos are fantastic. Reheat at 370°F for 8-12 minutes from refrigerated, or cook frozen burritos (remove foil, use parchment) for 15-20 minutes, flipping halfway.
What are the best tortillas for burritos?
Look for extra-large, “burrito-size” flour tortillas (10-12 inches). Brands that are slightly thicker hold up better to heavy, saucy fillings. Carb-balance or whole wheat varieties work great too.
How do I prevent a soggy burrito?
Ensure ingredients like beans and corn are well-drained.
Layer rice against the tortilla.
Don’t add overly wet salsas inside; use them as a dip instead.
Let the grilled chicken rest before slicing to retain juices.
Give it the final pan sear to seal the deal.
What sides go well with chipotle ranch chicken burritos?
· A simple side salad with a lime vinaigrette.
· Tortilla chips with salsa and guacamole.
· Mexican street corn (elote) or a black bean salad.
· A light, chilled gazpacho.
The Final Roll-Up
This Chipotle Ranch Grilled Chicken Burrito is more than a recipe—it’s a tool for a easier, more flavorful week. It’s the satisfaction of a restaurant-quality meal made in your own kitchen, the joy of a packed lunch you actually look forward to, and the secret to a stress-free dinner that delights the whole family.
So, fire up that grill, whip up that smoky, creamy sauce, and roll with confidence. Your journey to burrito bliss starts now.
Hungry for more? Share your burrito creations with us online! Tag your photos—we love seeing your custom variations and perfect rolls.
-
Oven Baked 4 Ingredient Amish Beef and Bell Pepper Bake – The Hearty, No-Fuss Dinner You’ll Make on Repeat
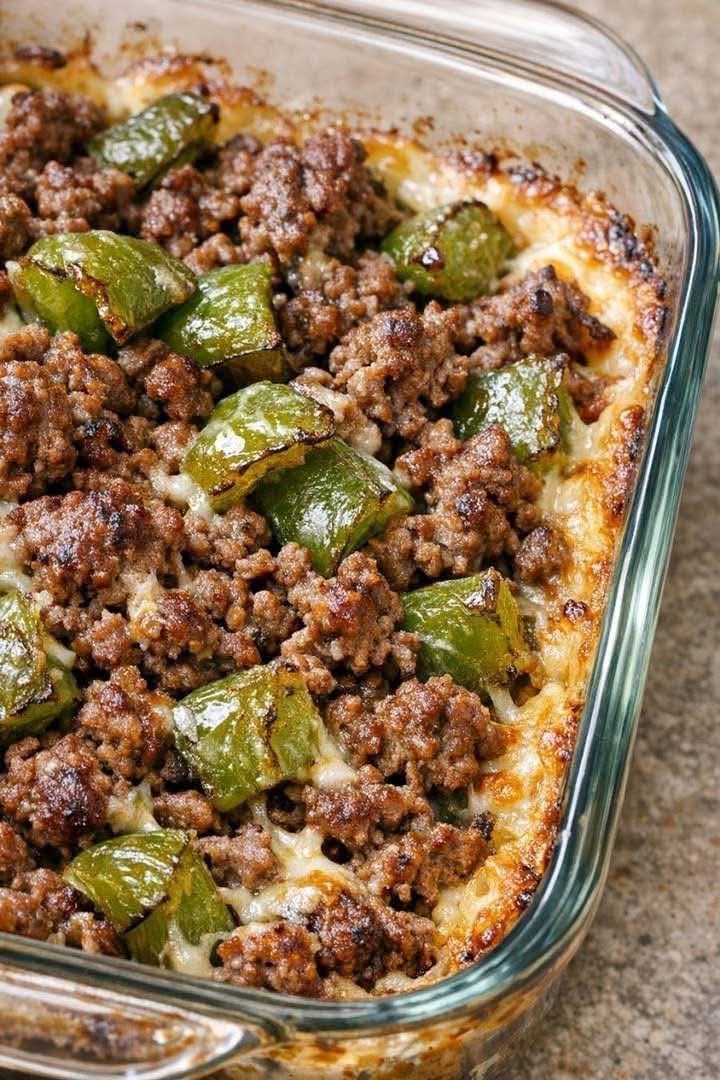
This Amish beef and bell pepper bake uses just 4 ingredients – ground beef, bell peppers, cream of mushroom soup, and onion soup mix. A simple, hearty, oven-baked casserole that tastes like home. Let’s be honest: the best recipes are often the simplest. No fancy techniques, no long ingredient lists, no hours of prep. Just…
-
Layered Sweet Potato Gratin – Creamy, Cheesy, and Absolutely Irresistible
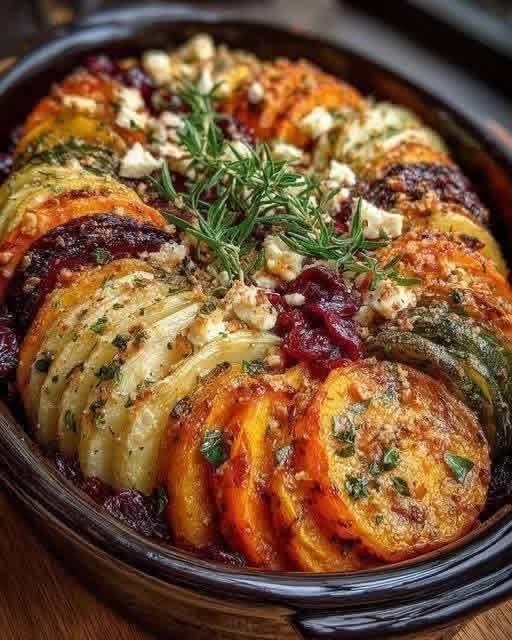
This layered sweet potato gratin is a show‑stopping side dish. Thinly sliced sweet potatoes baked in a creamy garlic sauce with Parmesan and thyme. Perfect for holidays, weeknights, or anytime you crave comfort food. Let’s be honest: sweet potatoes are already amazing. They’re naturally sweet, creamy, and packed with vitamins. But when you layer them…
-
Vegetable Cheese Fritters – Crispy, Cheesy, and Irresistible (Ready in 20 Minutes)
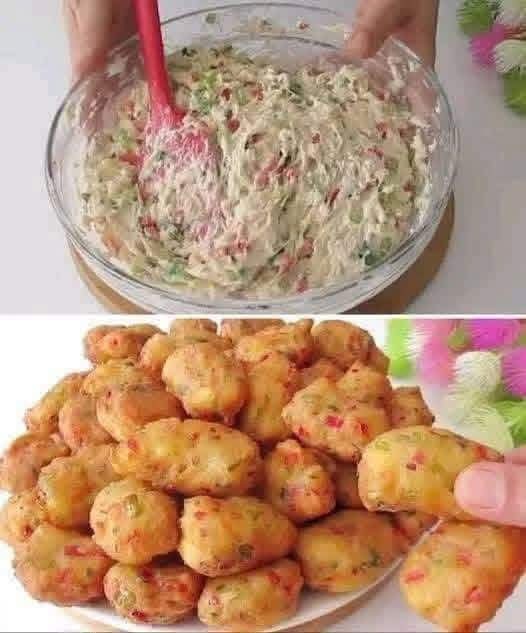
These vegetable cheese fritters are crispy on the outside, tender on the inside, and packed with veggies and melty cheese. A perfect snack, side dish, or light meal – ready in 20 minutes. Let’s be honest: getting kids (and adults) to eat vegetables can feel like a battle. But what if you could hide a…